July 1, 2026•17 min read
Ghost Mannequin Photography: A Complete Guide for 2026
Learn ghost mannequin photography from start to finish. This guide covers the studio workflow, editing, costs, and modern AI alternatives for e-commerce brands.
Ghost Mannequin Photography: A Complete Guide for 2026
You've probably hit the same wall most apparel brands hit early. Flat lays are fast, but the product pages look lifeless. Model shoots look strong, but every new drop turns into scheduling, casting, styling, and post-production overhead. Then you're left wondering how to show fit and structure without turning every SKU into a mini campaign.
That's where ghost mannequin photography earns its place. It sits in the middle. You get the garment's shape, drape, and silhouette without the cost and complexity of shooting every item on a person. For startups, that usually matters more than photography theory. It affects speed, consistency, and whether your catalog can scale without your visual standards collapsing.
What Is Ghost Mannequin Photography
Ghost mannequin photography is a product photography technique that makes clothing look like it's being worn by an invisible person. You shoot the garment on a mannequin, then remove the mannequin in editing so the final image keeps the body shape without showing the body form.
If you sell apparel online, the appeal is obvious. A customer can see the shoulder line, the fall of the fabric, the structure through the torso, and the way a collar sits. Flat lay usually can't do that for jackets, dresses, blouses, or structured items.
People in the trade also call it the invisible mannequin or hollow man effect. That name is accurate. The finished image looks like the garment has volume and form, but the support underneath has vanished.
Why brands rely on it
This isn't a niche trick. 57.2% of online retailers use ghost mannequin photography alongside flat lay imagery as of 2025, while 95.6% still use model photography, according to Electro IQ's product photography statistics. That tells you where it fits in a real catalog strategy. It doesn't replace everything. It solves a specific problem well.
Ghost mannequin works because it removes distractions without flattening the product. A live model adds personality, but also body shape, pose, styling choices, and sometimes too much editorial energy for a simple PDP. A flat lay removes those distractions, but often removes the garment's structure too.
A good ghost mannequin image answers the basic shopping question fast: what will this piece look like when it has a body inside it?
Where it usually works best
Structured products benefit most:
- Blazers and jackets because shoulder shape matters
- Dresses and tops where drape changes the perceived fit
- Shirts with collars because neckline construction needs depth
- Premium basics when the fabric and cut are part of the value
For a startup brand, ghost mannequin photography is often the first visual system that feels professional and scalable at the same time.
The Traditional Ghost Mannequin Studio Workflow
Traditional ghost mannequin photography is straightforward in theory and unforgiving in practice. The technique depends on consistency. If the garment is styled badly, if the mannequin fit is wrong, or if the camera position shifts between shots, the editing stage gets slower and the final result looks cheap.
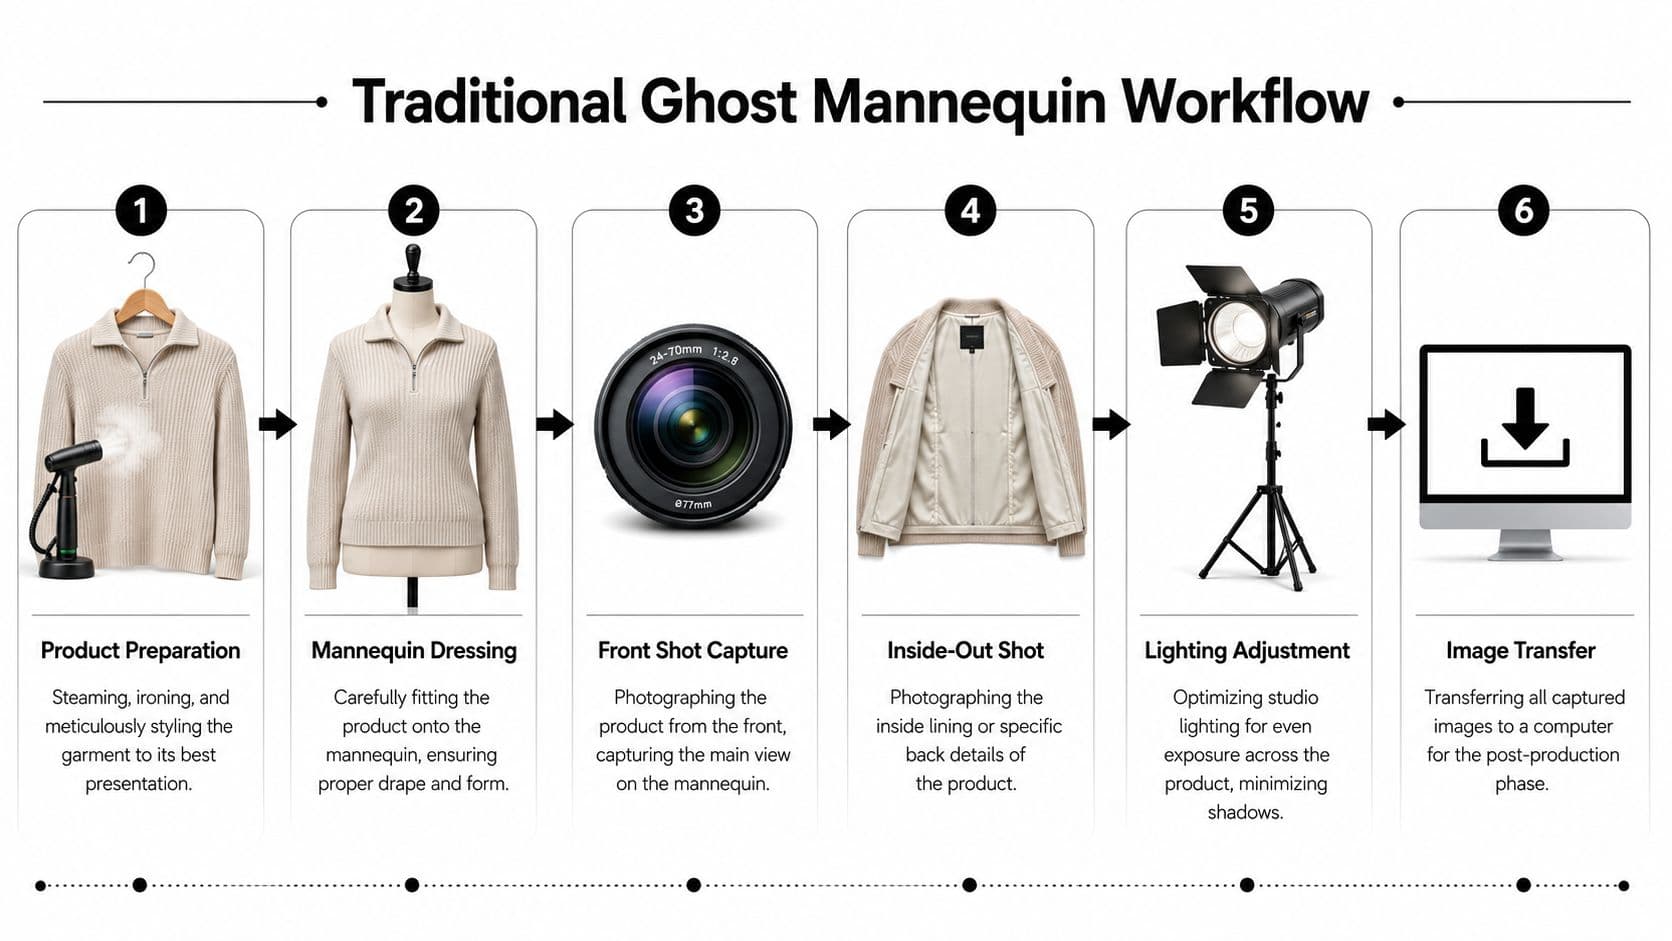
A six-step infographic illustrating the traditional ghost mannequin photography workflow for apparel product photography.
Start with the garment, not the camera
Most weak ghost mannequin images fail before the shutter clicks. The garment needs to be steamed, lint-rolled, buttoned correctly, and shaped to sit naturally on the form. An adjustable mannequin helps because one torso won't fit every cut the same way.
Padded shoulders matter more than most beginners think. Cardboard, paper, or foam inserts can help fill collapsed areas and straighten a hem. That's especially useful on lightweight tops and pieces that sag when they aren't worn by a real body.
The dual-shot method is the core of the process
The basic capture workflow uses two sets of images. First, photograph the garment on an adjustable mannequin. Then capture separate interior shots of the hidden areas such as the neckline or collar by turning the garment inside out or staging it with foam board, as described in this ghost mannequin photography guide from Clipping Path Zone.
That second shot is what many new teams skip. If you only remove the mannequin from the main image, you end up with a hole where the neck or inner back should be. That's not a ghost mannequin effect. That's just incomplete retouching.
What the physical setup needs to do
A solid studio setup doesn't need to be glamorous. It needs to be repeatable.
Stable camera position
Keep the framing locked. If the camera shifts between the outer shot and the interior shot, the retoucher has to force alignment later.Even lighting
Diffused lighting reduces harsh shadows and helps preserve fabric detail. If the left side of the garment is brighter in one frame and darker in the next, compositing becomes harder.Consistent mannequin placement
Many teams mark the floor so each product sits in the same position. That keeps product scale consistent across a catalog.Symmetrical styling
Check hems, plackets, sleeves, and collar points. Small asymmetries become very obvious once the mannequin disappears.
Practical rule: If the garment doesn't already look sellable on the mannequin, editing won't rescue it cleanly.
What works and what doesn't
What works is methodical repetition. Dress the mannequin carefully, shoot the front cleanly, capture the hidden interior details, and keep every variable fixed.
What doesn't work is improvising by garment. Teams often think they can “figure out the neck join later.” That usually means slower retouching, mismatched shadows, and awkward interior seams.
The studio workflow is still the benchmark when you want maximum control. But it's also why ghost mannequin photography has a reputation for being more labor-heavy than flat lay. You aren't just taking a picture. You're collecting the pieces of a composite.
Post-Production The Digital Compositing Process
The ghost mannequin effect is finished in editing, not in-camera. The studio gives you the raw material. The computer work creates the illusion that the garment is floating naturally with depth and internal structure.
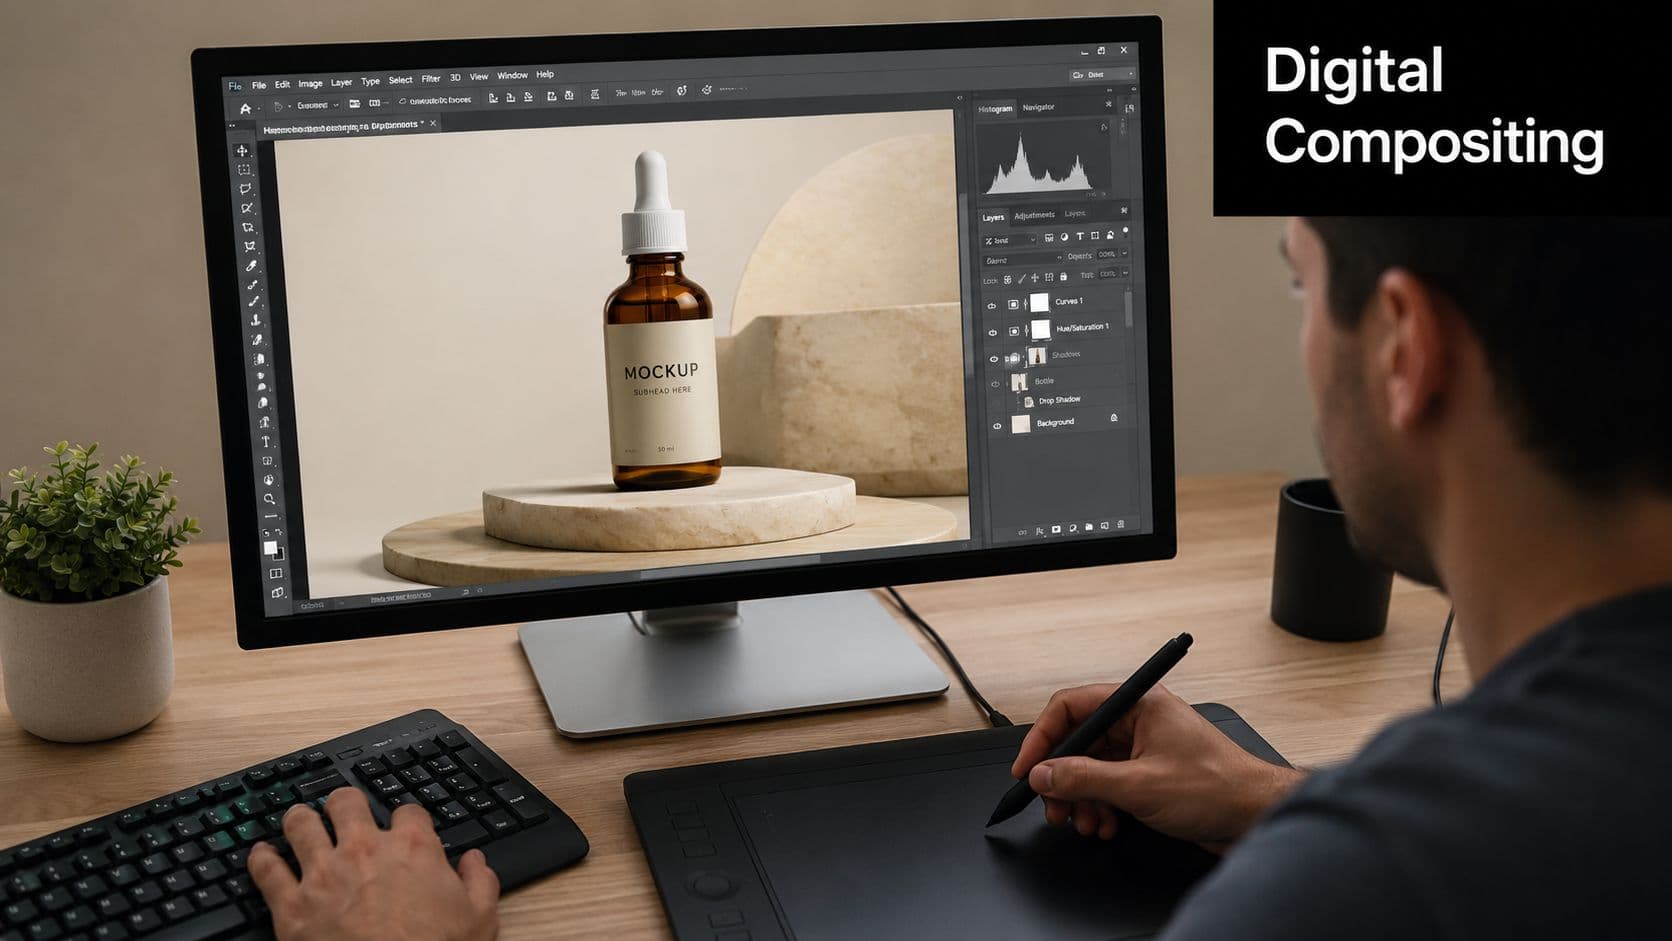
A digital artist uses a pen tablet to edit product photography of a serum bottle on computer.
How the composite is built
The standard Photoshop workflow is precise. The front garment shot becomes the main layer. The interior image, such as the inside collar or back neck, is placed behind that front layer. The retoucher masks out the mannequin from the main shot, then warps and scales the interior piece so it fits naturally into the open area.
After that comes cleanup. Color correction, wrinkle control, and shadow or reflection adjustments bring the image together so the final piece looks like one photograph rather than a cut-and-paste job.
Three editing tasks usually decide whether the result looks professional:
- Edge masking around collars, armholes, cuffs, and hems
- Interior alignment so the inside detail sits at the right depth
- Blending and cleanup to remove visible joins, odd shadows, and mannequin artifacts
Why manual editing gets expensive
The retouching isn't conceptually difficult, but it is repetitive and detail-sensitive. One bad mask edge can make a premium shirt look like a marketplace knockoff. A neckline that's slightly off-center makes the whole product feel wrong, even if the customer can't explain why.
That's also why many brands eventually look for ways to convert flat photo to mannequin visuals when they need faster turnaround across a larger SKU count. The traditional workflow gives control, but each image demands labor.
If you want to see the compositing logic in action, this walkthrough gives a useful visual reference before your team builds its own SOP:
Where retouchers lose time
The biggest time drains are rarely dramatic. They're usually small preventable issues:
- Mismatched captures because the garment shifted between shots
- Collapsed interior areas that don't provide enough usable neck detail
- Inconsistent white balance between images
- Over-retouching that removes natural fabric character
If the editing takes forever, the shoot usually caused it.
That's the part founders often underestimate. Ghost mannequin photography isn't only a photography technique. It's a production system where capture discipline and retouching discipline have to match.
Common Pitfalls and Pro Tips for Better Results
A lot of teams assume they can fix most problems in post. That's the wrong mindset for ghost mannequin photography. The more you leave for editing, the more expensive and inconsistent the output becomes.
The mistake that causes the most rework
Garment prep gets ignored because it feels low-skill. It isn't. Steaming, linting, and correct buttoning are what make the silhouette usable.
According to Photta's guide to smartphone and AI ghost mannequin workflows, deep wrinkles alter garment shape and are nearly impossible to fix digitally without distorting the silhouette, increasing production costs by up to 40%. That matches what happens in real workflows. Retouchers can remove blemishes. They can't cleanly rebuild a warped placket or a collapsed chest panel without changing how the product looks.
Problems that make images look amateur
Here are the issues I'd flag first in any startup catalog review:
Wrong mannequin size
If the torso is too large, the garment strains and misrepresents fit. If it's too small, the product hangs dead and loses shape.Bad stuffing choices
Overfilling shoulders or chest creates an inflated, artificial silhouette. Underfilling creates collapse. Both are visible.Uneven lighting
Harsh directional light exaggerates texture where you don't want it and creates patchy shadows that complicate compositing.Sloppy alignment
If the front shot and interior shot don't match, the neck join looks fake immediately.Ignoring the hemline
Crooked hems and twisted side seams make even expensive apparel look poorly made.
Practical habits that improve quality fast
Studio habit: Treat prep time as image-making time. It isn't separate from photography. It is photography.
A few habits pay back quickly:
- Use a lint roller on dark fabrics right before capture, not earlier in the day.
- Button, zip, and fold garments the same way across the whole category.
- Check symmetry through the camera screen, not just by eye on set.
- Keep a category-specific styling reference so every sweatshirt, blouse, or blazer follows the same visual rules.
After the shoot, don't waste good images with poor ecommerce formatting. If your team is cleaning up PDP presentation, this guide on optimizing Shopify image sizes is useful for keeping product pages sharp without making them slow.
What usually works best by team size
Small teams should simplify. Shoot fewer angles, standardize the mannequin setup, and create a prep checklist.
Larger teams should formalize everything. Styling references, camera marks, product prep SOPs, and retouching rules matter more than individual talent when volume increases.
Comparing Photography Styles Cost Time and Quality
A startup usually feels this choice fast. You have 200 SKUs to launch, a limited budget, and three image jobs competing at once. The PDP needs clarity, paid social needs something with energy, and wholesale or marketplace listings need speed and consistency. One photography style rarely handles all three well.
Ghost mannequin sits in the middle of the workflow. It gives apparel shape and polish without the full cost and coordination of an on-model shoot. Flat lay is faster. On-model sells mood better. The right choice depends on what the image needs to do, how much volume you have, and how often the assortment changes.
Where each style earns its keep
On-model photography is strongest when the brand needs emotion, styling context, and a human point of view. It helps customers picture fit and attitude, which is why it works well for campaigns, landing pages, and paid creative. The trade-off is production control. Casting, hair and makeup, styling, shoot time, and retouching all add cost. Consistency also gets harder if products are shot across different days or with different talent.
Flat lay wins on efficiency. It is easy to repeat, quick to train, and often good enough for tees, knit basics, accessories, and products where drape is not the main selling point. It starts to underperform when structure matters. Structured jackets, dresses with shaped waists, and engineered outerwear lose too much form on a tabletop.
Ghost mannequin is usually the best catalog tool for apparel that needs body shape but does not need a lifestyle story in every frame. It keeps attention on cut, proportion, and construction. For many brands, that balance is what makes it commercially useful.
Photography Style Comparison
| Metric | Ghost Mannequin | On-Model Photography | Flat-Lay Photography |
|---|---|---|---|
| Garment shape | Strong 3D structure and silhouette | Strongest sense of wear and styling | Limited for structured pieces |
| Catalog consistency | High when the setup is standardized | Harder to maintain across shoots | High |
| Production complexity | Moderate to high because of shoot and compositing | High because of casting, styling, and shoot logistics | Low |
| Best use case | PDPs for apparel where shape matters | Hero products, campaigns, lookbooks | Basics, accessories, simple inventory |
| Brand feel | Clean, product-first, professional | Editorial, human, lifestyle-driven | Efficient, minimal, straightforward |
Cost and time decide more than aesthetics
The visual difference between these methods matters. The operational difference usually matters more.
Traditional ghost mannequin gives a cleaner apparel presentation than flat lay for many categories, but it still requires prep, multiple captures, and retouching. On-model adds even more moving parts. Flat lay removes a lot of that friction, but you give up shape. This forms the core decision framework. Brands are not choosing a style in theory. They are choosing how much time and money to spend for a specific level of clarity and brand impact. When budget is the constraint that settles it, it helps to see the five ghost mannequin alternatives compared on cost, effort, and turnaround before committing to a workflow.
I usually frame it this way. If the customer needs to understand construction, silhouette, and fit cues from the product page, ghost mannequin often gives the best return. If the image needs to sell aspiration, use on-model. If the product is simple and margin is tight, flat lay can be the smart call.
There is also a fourth option now. Some teams use an ai fashion model workflow to cover part of the gap between studio output and speed, especially for testing assortments or scaling image production without booking another shoot.
What I would choose by scenario
Premium drop or brand-led launch
Use on-model for hero assets. Use ghost mannequin for the core PDP set so the collection still feels consistent and product-first.High-volume basics
Use flat lay where shape is not doing much selling. Save ghost mannequin budget for the items with more structure.Structured apparel at catalog scale
Use ghost mannequin for blazers, dresses, coats, denim, and any category where silhouette affects conversion.Early-stage brand with limited resources
Split the job by channel. Put budget into the images that influence purchase most, then use faster methods for the rest.
The strongest brands rarely commit to one method across the board. They assign each method to the job it does best. That is how you control cost without making the catalog look cheap.
The Modern Alternative AI-Powered Visuals
A startup brand usually hits this point fast. The product line is growing, the launch calendar is tight, and the team cannot keep booking studio days every time new colorways arrive. That is where AI starts to matter, not as a creative trend, but as a production option.
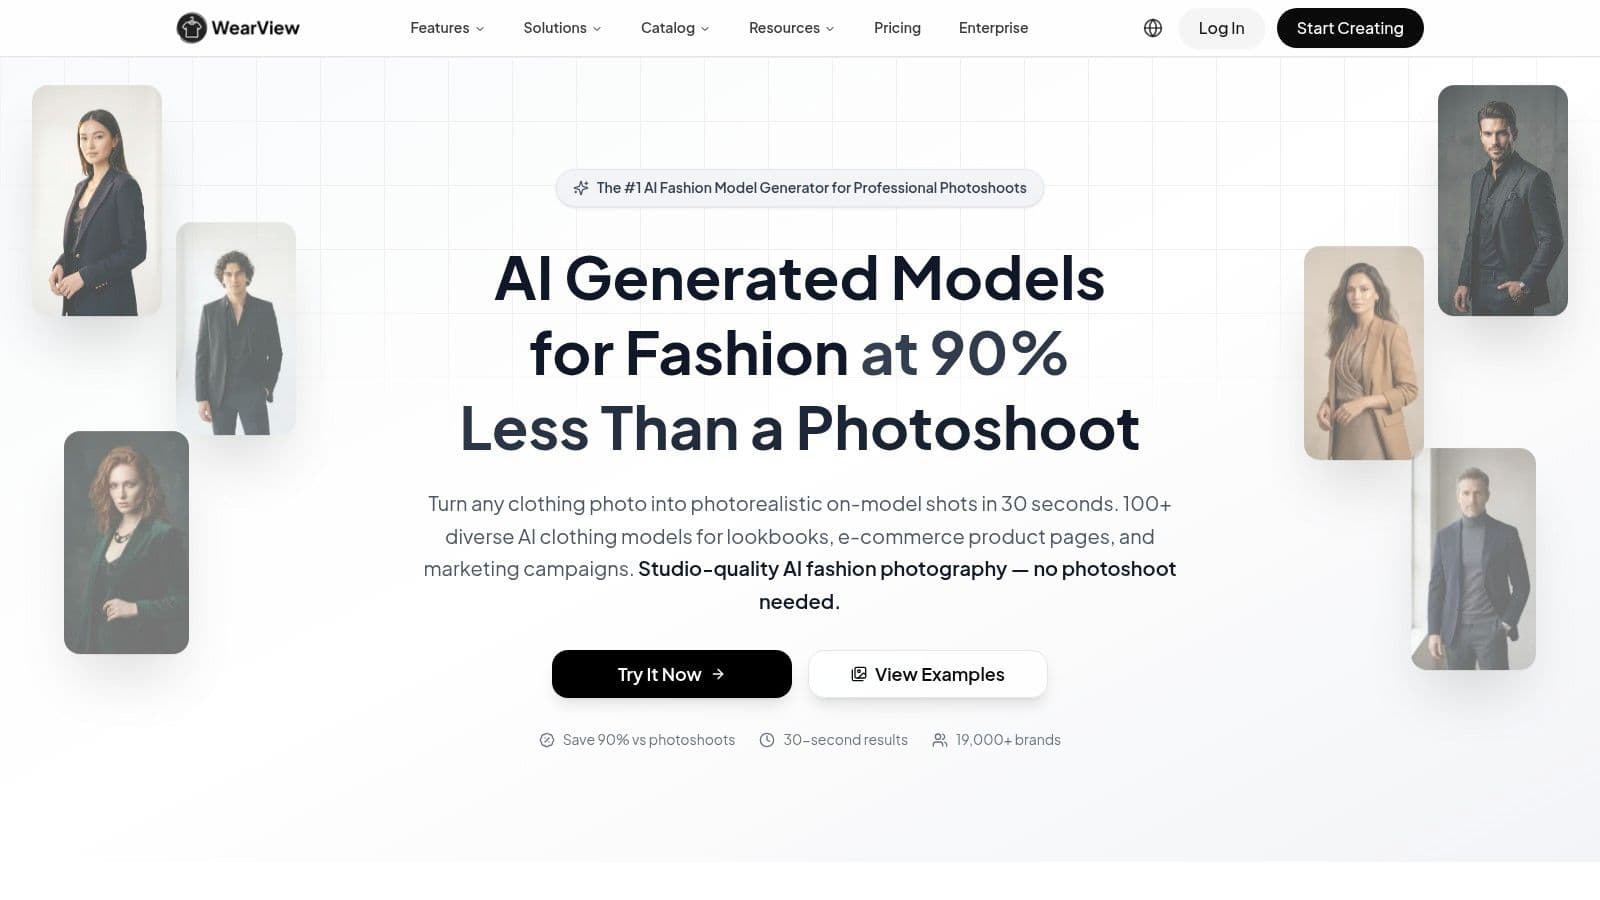
Screenshot from https://wearview.co
Why AI is getting traction
The appeal is simple. Traditional ghost mannequin production has real labor behind it. You need prep, pinning, multiple captures, retouching, and quality checks. AI cuts much of that manual work, so the per-image cost drops and turnaround gets much faster, as noted earlier.
That changes the math for smaller brands. Instead of asking, "Can we afford to shoot this category properly?" the better question becomes, "Which images need full studio control, and which ones only need to look clean, consistent, and sellable?"
AI is also useful when the starting assets are not ideal. Flat lays, hanger shots, and supplier images can often be turned into more uniform catalog visuals without rebuilding the whole workflow from zero.
Where AI earns its keep
AI works best when volume is the problem.
It is a practical fit for large SKU batches, early assortment testing, marketplace listings, and channel-specific variations where one product needs several outputs. A team can move faster, standardize presentation, and avoid spending studio budget on every single item before demand is proven.
A good example is an ai fashion model workflow. It lets a brand turn basic product shots into mannequin-style or model-based images without setting up a physical shoot for each variation. The gain is speed. The trade-off is that the team still needs a sharp eye for fabric behavior, proportions, and detail accuracy.
Where AI still falls short
AI is not the right answer for every garment.
It tends to struggle on pieces where the selling point is technical construction, exact drape, specialty fabric texture, or interior detail that has to match the actual product precisely. Structured jackets, complex dresses, and premium materials often expose those weaknesses fast. If the customer will zoom in and judge quality from the image, errors get expensive.
That is why I rarely treat AI as a full replacement. It is better as a selective tool inside the image workflow.
Use it to cover speed, scale, and testing. Keep traditional production for hero products, high-risk categories, and any item where visual accuracy affects trust. That mix usually gives startup brands the best return: controlled spend, faster output, and a catalog that still looks deliberate.
Making the Right Choice for Your Brand
The best decision usually comes from your product mix, not from photography preferences.
If you sell structured or textured garments, ghost mannequin deserves serious weight in your workflow. Emerging 2025 to 2026 data indicates that 3D ghost mannequin images increase add-to-cart rates by 22% for textured or structured garments compared to flat-lay, while flat-lay still works better for lightweight basics like t-shirts, according to this discussion summarizing category-specific performance for ghost mannequin images. That lines up with what most merchandisers see in practice. Product type should drive format choice.
A simple decision framework
Use flat lay when the item is simple, lightweight, and unlikely to gain much from body-shaped presentation.
Use traditional ghost mannequin photography when the garment's construction needs to be shown clearly and you want direct control over every visual detail.
Use AI-powered ghost mannequin or model generation when your bottleneck is volume, speed, or budget, especially if you're trying to standardize a growing catalog. If your team wants a fast, self-serve route, an AI Ghost Mannequin Service for fashion professionals lets you upload a photo and have the mannequin removed automatically in seconds.
What I'd recommend to most startup brands
Don't build your whole visual strategy around one method.
Use model imagery for the products that define the brand. Use ghost mannequin for the products that need shape and fit clarity. Use flat lay where speed matters more than dimensionality. Then bring AI into the process where manual production is slowing down launches or eating margin.
That approach is usually more profitable than trying to force every SKU through the same visual template.
If your team needs to produce apparel visuals faster without running a full studio workflow for every item, WearView (Money) is one practical option. It lets brands upload garment photos and generate mannequin-style or model-based ecommerce imagery in seconds, which can be useful for scaling catalog production while keeping visuals consistent.
WearView Team
WearView Content & Research Team
WearView Team is a group of fashion technology specialists focused on AI fashion models, virtual try-on, and AI product photography for e-commerce brands. We publish in-depth guides, case studies, and practical insights to help fashion businesses improve conversion rates and scale faster using AI.