June 11, 2026•23 min read
Mastering Clothing Product Photography to Boost Your Sales
Discover how professional clothing product photography drives sales. Learn key techniques for lighting, styling, and using AI to create images that convert.
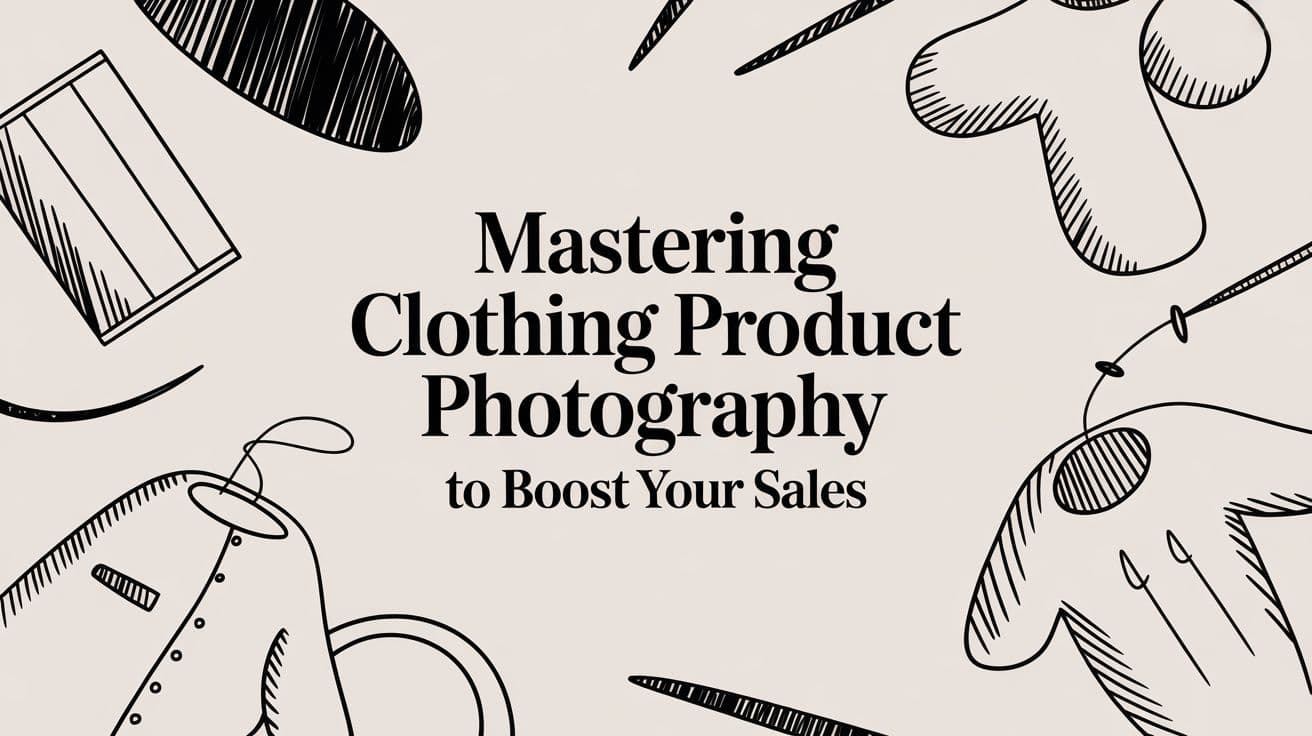
Mastering Clothing Product Photography to Boost Your Sales
In the world of fashion e-commerce, your images are your digital storefront. Effective clothing product photography isn't just about snapping pretty pictures; it's the handshake between your brand and your customer. It’s often the single biggest reason a casual browser becomes a loyal buyer.
Get it wrong, and you’re not just fumbling a sale—you're breaking trust.
Why Your Clothing Product Photography Is Costing You Sales

A person compares clothing product images on a smartphone and laptop, with 'STOP LOSING SALES' on screen.
Picture a customer scrolling through your online store. They spot a sweater that looks perfect. The color pops, the texture seems incredibly soft, and the fit looks like it was made for them. They add it to their cart, click "buy," and wait excitedly for it to arrive.
A few days later, the package lands on their doorstep. But what’s inside is a huge letdown. The vibrant red they saw online is actually a dull maroon. The knit that looked so soft is scratchy, and the fit is boxy and completely unflattering. This painful gap between what they expected and what they got is a direct failure of photography.
The High Cost of Inaccurate Images
That moment of disappointment isn't just a bummer for the customer; it's a massive, hidden cost for your business. The immediate fallout is a product return, which piles on shipping fees, restocking labor, and a direct hit to your bottom line. But the real damage goes much deeper.
When your products don't match your photos, you create frustrated customers. In fact, misleading visuals are a key reason the fashion industry sees return rates as high as 50%. With so much of the market living online, this is a financial leak that brands simply can't afford to ignore. You can find more detailed statistics on the fashion industry to see the full scale of the problem.
In e-commerce, a picture isn't worth a thousand words—it's worth the entire sale. It's the only tool a customer has to judge quality, feel, and fit before they commit to buying.
This is exactly why smart clothing product photography stops being an artistic choice and becomes a core business strategy. It’s all about building trust by showing your garments exactly as they are.
Bridging the Digital Divide with Photography Styles
The solution is to give your customers the full story, showing your products from multiple angles that each serve a unique purpose. Getting comfortable with a few different photography styles is how you give shoppers a complete, honest picture of what they’re buying.
- Flat Lay Photography: This is your go-to for showing off patterns, basic shapes, and key details in a clean, straightforward way. You just lay the garment flat on a surface. It's fantastic for social media feeds or high-level collection overviews.
- Ghost Mannequin Photography: By cleverly stitching multiple images together, this technique creates a hollow, 3D effect. It’s the perfect way to show a garment's structure and fit without the distraction of a model, giving your product pages a slick, uniform feel.
- On-Model Photography: This is where you tell a story. Seeing clothes on a real person helps customers instantly understand the fit, the drape, and how the fabric moves. It lets them picture themselves wearing it.
By mixing and matching these styles, you shrink the gap between what a customer sees on their screen and what they'll hold in their hands. This visual honesty doesn't just cut down on returns and abandoned carts; it builds the brand trust you need to thrive long-term.
Choosing the Right Photography Style for Your Brand
When it comes to clothing photography, the style you pick is way more than just a pretty picture. It’s a strategic move that tells your customer exactly who you are. Each method highlights a different aspect of your product, and the right choice hinges entirely on your goals, your audience, and where the final image will live.
Let's break down the three core styles every apparel brand needs to get right. Think of them as different angles for telling your product's story: the creative flat lay, the technical ghost mannequin, and the relatable on-model shot. The most successful brands almost always use a mix of all three to paint a complete, must-buy picture for the shopper.
Flat Lay Photography: The Creative Canvas
Flat lay is exactly what it sounds like: arranging your garments and accessories on a flat surface and shooting from directly above. It’s clean, graphic, and super versatile, which is why you see it dominating social media feeds, email blasts, and brand lookbooks.
This style is a total rockstar for showing off bold prints, unique patterns, and the overall shape of a piece without any distractions. The magic of a great flat lay is all in the composition and texture. By carefully arranging items, you can guide the eye and create an image that just feels right. Pro tip: use contrasting backgrounds to make your colors pop, or add small, relevant props—like a pair of sunglasses next to a summer dress—to build a little story and add a dose of personality.
When you nail it, a flat lay feels both intentionally curated and effortlessly authentic. It’s a powerful way to tell a visual story on platforms where looks are everything.
Ghost Mannequin Photography: The 3D Product Showcase
So, you need to show off a garment's true fit and shape, but without a human model stealing the show? This is where ghost mannequin photography comes in. It's the undisputed industry standard for a reason. The process involves taking multiple shots of an item on a special mannequin and then stitching them together in post-production to make the mannequin disappear, leaving a hollow, 3D version of your product.
What you get is a crisp, professional image that perfectly highlights the garment’s structure, seams, and even the interior details. This method is an absolute game-changer for product detail pages (PDPs) because it gives shoppers a crystal-clear idea of how the item is built and how it will likely hang on their own body.
The ghost mannequin technique is the perfect bridge between a flat, 2D image and a real-world product. It gives the garment form and depth—two things that are absolutely critical for online shoppers who can’t physically touch what they’re buying.
Yes, it takes more editing work on the backend compared to other styles. But the polished, consistent look it delivers across your entire catalog is unmatched for building a trustworthy, high-end e-commerce experience.
On-Model Photography: Telling a Human Story
Let’s be honest: nothing sells a lifestyle quite like seeing clothes on an actual person. On-model photography is the most powerful style for creating an instant connection because it helps customers see themselves wearing your product. It immediately answers those nagging questions about fit, drape, and movement that other methods just can’t touch.
This is where your brand's personality gets to really come alive. A model’s pose, their expression, the location—it all works together to create a mood, whether that's adventurous, sophisticated, or laid-back cool. Seeing how fabric flows when someone walks or how a dress fits on different body types builds an emotional connection and seriously cuts down on that "add to cart" anxiety.
Of course, on-model shoots bring their own set of challenges, from finding the right models and stylists to scouting locations. But for brands that get it right, the payoff is huge. You’re not just showing off a product; you’re selling a feeling, a story, and an entire lifestyle.
Comparing Clothing Photography Styles
Feeling a bit overwhelmed? Don't be. This table breaks down the three primary clothing photography methods, helping you select the best approach for your specific needs.
| Method | Best For | Pros | Cons |
|---|---|---|---|
| Flat Lay | Social media, email campaigns, and lookbooks. Excellent for showcasing outfits and detailed patterns. | Fast to set up, highly creative, and cost-effective. | Can misrepresent fit and drape; may look less premium if not styled well. |
| Ghost Mannequin | Product detail pages and catalogs. Ideal for showing a garment's true shape and structure. | Provides a clean, consistent, and professional look. Clearly shows form and fit. | Requires significant post-production skill and time; can feel sterile. |
| On-Model | Lifestyle campaigns, ads, and homepages. Perfect for conveying emotion and relatability. | Highest potential for customer connection; shows real-world fit and movement. | Most expensive and logistically complex; requires models, stylists, and locations. |
Ultimately, the best strategy is a balanced one. Use ghost mannequins for your technical product shots, on-model photos to sell the dream on your homepage and in ads, and creative flat lays to engage your audience on social media. This multi-pronged approach ensures you're connecting with customers at every single touchpoint.
Your Essential Toolkit for Studio-Quality Photos
Look, great clothing photography isn't about having the most expensive gear. It’s about knowing what actually matters. You can get stunning, professional-looking shots with a high-end DSLR or just the smartphone in your pocket. The secret is focusing on the right tools and how you use them.
Your camera is just the starting point. Sure, a DSLR or mirrorless camera gives you that granular, manual control over settings like aperture and ISO, which is fantastic for creative freedom. But don't sleep on modern smartphones. Their sensors and processing power are so good now that with the right lighting and a steady hand, a phone can be all you need to get fantastic results.
No matter what you're shooting with, a sturdy tripod is non-negotiable. It’s the one thing that will instantly level up your photos by eliminating camera shake. This guarantees every shot is crisp and sharp—a must-have when customers are zooming in to inspect the weave of your fabric. It also locks in your framing, keeping everything consistent from one product to the next for a clean, professional catalog.
Getting a Handle on Your Camera Settings
Jumping into manual camera settings can feel like learning a new language, but you only need to understand a few key concepts. Think of them as your basic controls for light and focus.
- Aperture (f-stop): This is just the opening in your lens that controls how much light gets in. A low f-stop number (like f/1.8) gives you that blurry, artistic background (a "shallow depth of field") that makes your product pop. A higher f-stop (like f/11) keeps the entire image sharp, which is perfect for detailed flat lays where every inch matters.
- ISO: This is simply your camera's sensitivity to light. You'll want to keep this as low as possible (think 100 or 200) for clean, noise-free images in a well-lit space. You only really need to crank it up when you're shooting in darker conditions.
- Shutter Speed: This is how long your camera's sensor is exposed to light. A fast shutter speed freezes motion, while a slower one can create blur. Since you're using a tripod (you are using a tripod, right?), you don't have to worry about camera shake, so you can use slower speeds to let more light in without any issues.
Getting comfortable with these three settings—the classic "exposure triangle"—is what separates a quick snapshot from a professional photograph. It's how you take full control over the final look and feel of your images.
Why Lighting Is Everything
If the camera is the heart of your setup, lighting is the soul. It is the single most important element in clothing photography, period. Bad lighting can make a luxury garment look cheap, mess with the colors, and hide the very details you're trying to show off. Great lighting, on the other hand, makes everything look better.
You can start with natural light—it's free and gives a beautiful, soft look. Just set up near a large window on an overcast day. That diffused, even light is perfect for minimizing harsh shadows. If you want more control, a basic studio lighting kit is a game-changing investment.
Lighting does more than just illuminate your product; it carves out its shape, defines its texture, and sets the mood. It’s the tool you use to tell the viewer whether a fabric is silky smooth or ruggedly textured before they can even touch it.
This decision tree helps visualize how your approach should change depending on what you're trying to achieve, from a casual social media post to a detailed e-commerce product page.
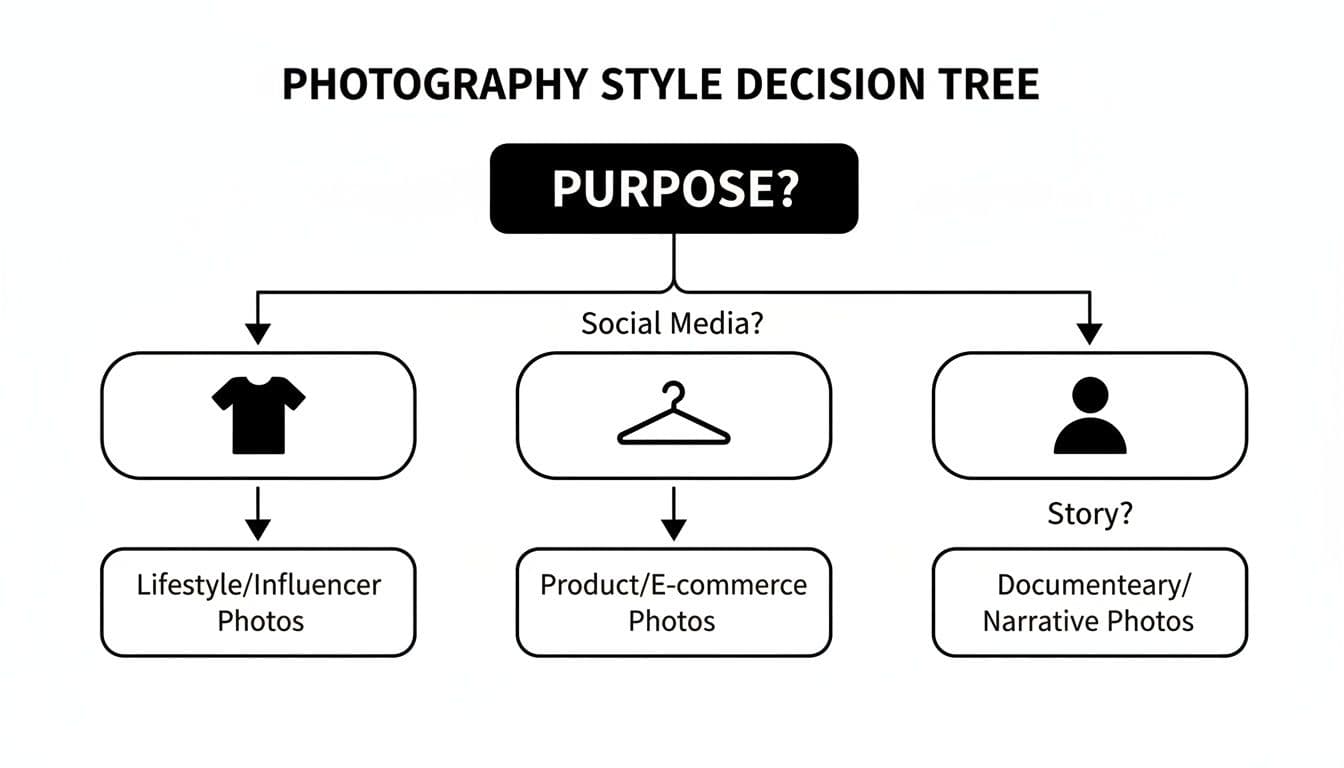
Decision tree showing photography styles based on purpose: lifestyle, product/e-commerce, and narrative photos.
As you can see, your goal—whether it's driving engagement, showing off product details, or telling a bigger brand story—should dictate your entire photographic strategy.
A simple one-light setup can create dramatic, moody shots, while a two- or three-light configuration gives you that clean, even lighting that's the gold standard for e-commerce. You don't need to break the bank, either. There are some fantastic guides on how to build an affordable and effective DIY e-commerce photo studio to get started. By putting a little time and money into understanding your lighting, you gain the power to present your clothing in its absolute best light.
How Small Styling Details Create a Premium Look
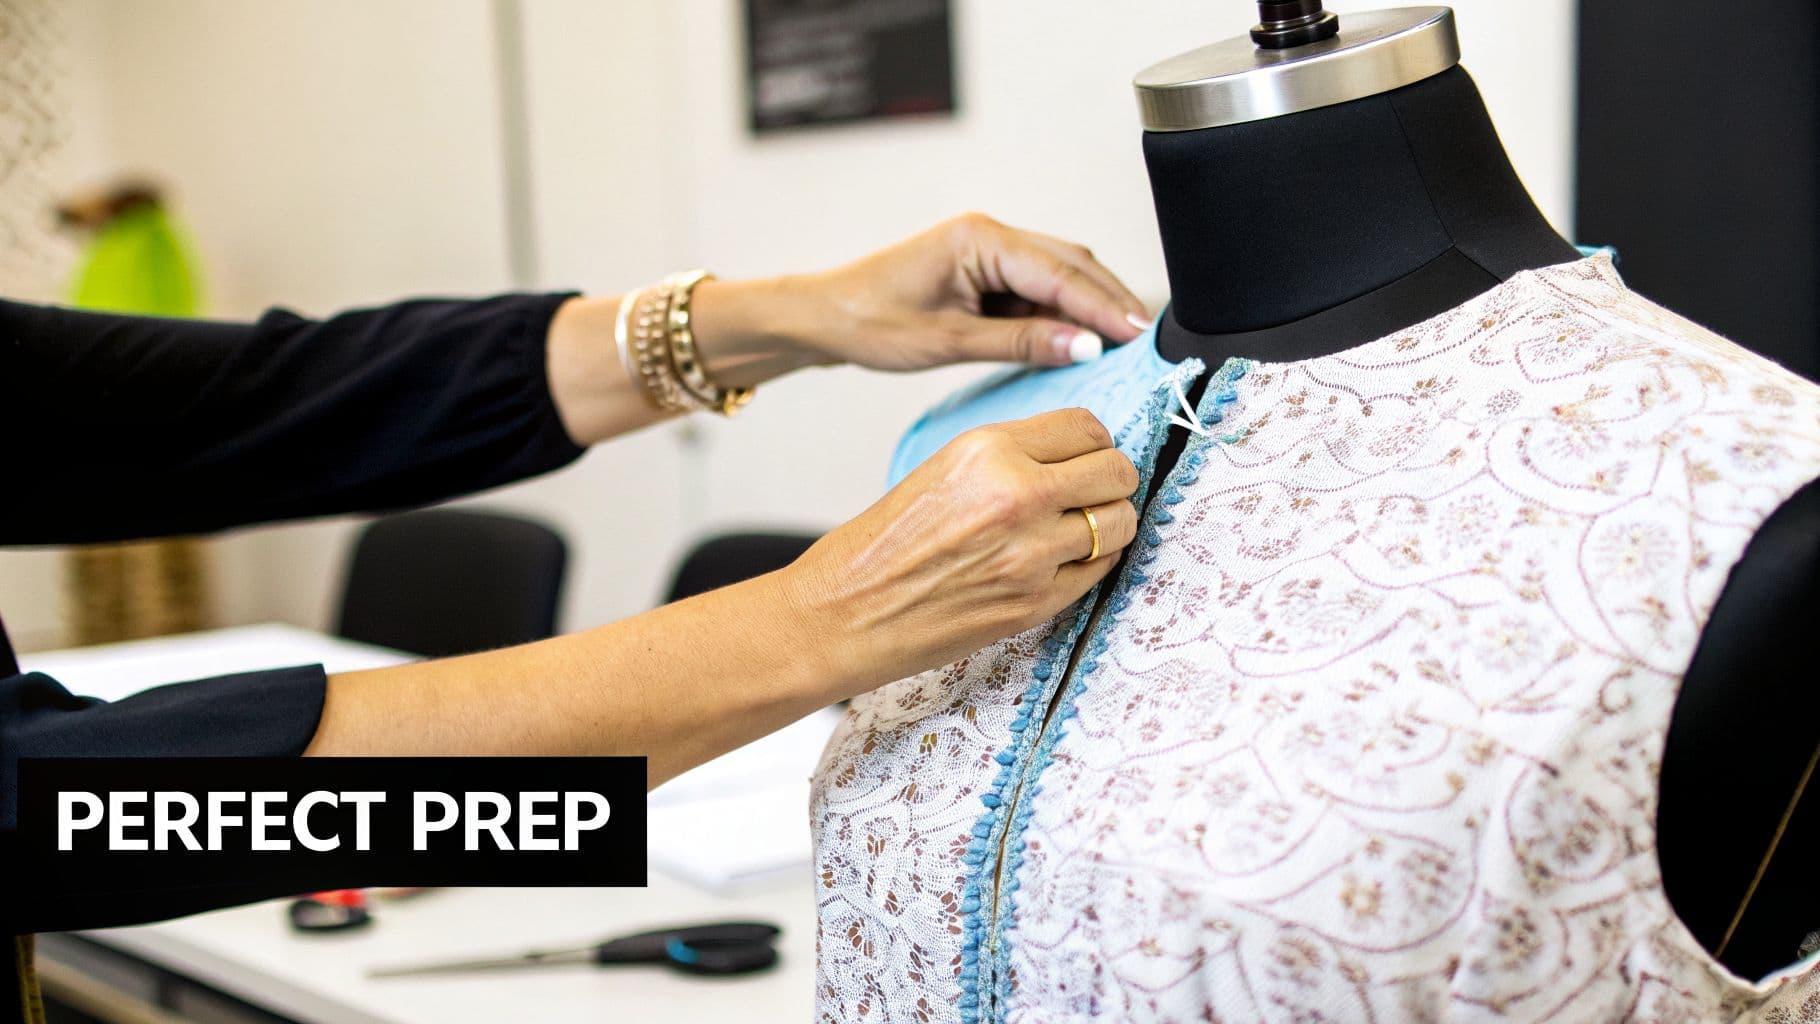
Hands carefully adjust a light blue garment on a mannequin wearing a patterned white top.
The gap between an okay photo and a fantastic one rarely comes down to the camera. The real magic happens long before you even think about pressing the shutter button. It’s all in the tiny, meticulous styling details that signal quality and care from the moment a customer lays eyes on your product.
This prep work is the unsung hero of great clothing product photography. When a potential buyer spots a wrinkle, a stray thread, or an awkward fold, it subtly chips away at their perception of your product's value. Getting the preparation right isn’t just a task; it's how you visually tell shoppers your brand is worth it.
Mastering Garment Preparation
Before any piece of clothing gets in front of the lens, it needs to look absolutely perfect. This first step is non-negotiable if you want images that look polished and professional, which directly shapes how customers see your brand's commitment to quality.
Your pre-shoot checklist should always include:
- Thorough Steaming and Ironing: Every single crease and wrinkle has to go. A handheld steamer is a lifesaver for delicate fabrics, while a quality iron will take care of tougher materials like denim or heavy cotton.
- Lint Rolling: Go over every square inch of the garment with a lint roller. Nothing screams amateur like dust, hair, or stray fibers showing up in a high-res photo.
- Checking for Flaws: Do a quick inspection of the seams, buttons, and zippers. It’s far better to catch a small manufacturing defect now than to have it immortalized in your product shots.
This isn't just about making things look tidy; it's about respecting the customer's eye for detail. You want the product to look as flawless on their screen as it will when it arrives at their door.
The Art of Strategic Fit and Form
Once the garment is pristine, the next job is making sure it hangs and fits perfectly, whether it's on a model, a mannequin, or laid flat. This is where a stylist's toolkit becomes your best friend, helping you shape the garment to look its absolute best.
Styling is the silent language of product photography. The right pin or clip can transform a garment from looking 'fine' to looking 'flawless,' which is a difference customers can feel, even through a screen.
It’s the small tools that make the biggest impact. Use pins and clips strategically on the back of the garment to create a tailored, flattering silhouette. This simple trick cinches the fabric to get rid of any bagginess and clearly shows the intended fit.
For flat lays, try stuffing tissue paper or small foam inserts inside the garment. This adds just enough dimension to keep it from looking flat and lifeless. For more creative setups, check out our guide on how to take pictures of clothes without a mannequin.
Adding Context with Minimalist Accessories
Styling can also mean creating a complete look, but the key here is restraint. The goal is to make the main product shine, not to get lost in a sea of accessories. A single, well-chosen accessory can provide valuable context and help customers imagine themselves wearing the item.
For instance, pairing a blouse with a simple necklace or showing a jacket with a neutral scarf can instantly elevate the photo. These additions should always feel intentional and perfectly aligned with your brand's vibe. By mastering these small styling details, you turn a simple product shot into a compelling story about quality and style.
Using AI to Shake Up Your Product Photography
While getting the styling details right is always going to be important, the next big shift in clothing product photography isn't happening in a physical studio. It's happening with artificial intelligence. AI isn't some fuzzy, futuristic concept anymore; it's a practical tool that solves the biggest headaches in apparel photography: cost, time, and scale.
Think of it like having a virtual photo studio on your laptop. Instead of wrangling models, stylists, and locations for a shoot, you just upload a photo of your garment. In a matter of seconds, you can see that same item on a huge range of professional-looking models, in any backdrop you can dream up. This isn't science fiction—it's the new reality for e-commerce.
Platforms like WearView are built on this exact idea. They let you take a simple, cheap flat lay or hanger shot and spin it into an endless variety of realistic, on-model images. This completely flips the old production workflow on its head and puts the creative control right back in your hands.
Slashing Costs and Speeding Up Timelines
Let's be honest: a traditional on-model photoshoot is a massive pain, both financially and logistically. The costs for photographers, models, stylists, studio rentals, and retouching can easily balloon into thousands of dollars for just a few products. It’s also incredibly slow. You're often looking at weeks between the actual shoot and getting the final, web-ready images.
AI-powered photography completely changes the math. It basically gets rid of all that overhead.
By swapping a physical photoshoot for a digital one, brands can cut their photography expenses by up to 90%. A process that used to take weeks of back-and-forth can now be done in minutes, which means you get your products to market way faster.
That kind of speed and efficiency is a game-changer. You can launch new collections quicker, test different visual styles to see what works, and jump on market trends without being bogged down by production delays. It gives every brand access to the kind of high-converting lifestyle imagery that used to be reserved for companies with huge budgets.
Hitting Unlimited Scale and Diversity
One of the best parts about using AI is the ability to scale your creative output without any real limits. A single flat lay photo can be turned into hundreds of unique on-model images. This lets you showcase your apparel on a wide spectrum of models representing different ethnicities, body types, and ages—all with a few clicks.
This solves a major challenge for brands that want to create more inclusive and representative marketing. You can instantly generate visuals that speak directly to specific target audiences, making sure every customer feels seen.
- Product-to-Model Generation: Turn a basic hanger shot into a dynamic on-body image.
- Pose Control: Adjust the model’s pose to highlight specific features of the garment.
- Consistent Models: Use the same AI-generated model across your entire collection for perfect brand consistency.
Being able to produce this much variety on demand is huge. The global photography services market is on track to hit nearly $60 billion by 2026, with e-commerce being a massive driver. It’s no surprise, then, that 73% of fashion brands are already planning to bring generative AI into their creative process.
As you look ahead, using tools like AI is becoming less of an option and more of a necessity for creating optimized visuals. To see how this is playing out in advertising, check out this guide on using AI for Facebook ads. AI is no longer just an efficiency tool; it’s a creative partner that unlocks a whole new level of possibility for your brand's visual identity.
Turning Compelling Images Into Higher Conversions
Stunning product photography is the hook, but it’s not the whole story. A beautiful shot that doesn't lead to a sale is just a pretty picture. The real magic happens when you turn those eye-catching images into a measurable lift in your conversion rate. This is where the art of photography meets the science of e-commerce.
Think about it from the customer’s perspective. Great images do more than just show what a t-shirt looks like; they answer all the little unspoken questions and calm any anxieties floating around in a shopper's mind. You're trying to create a visual experience so complete and convincing that clicking "Add to Cart" feels like the most natural thing in the world.
Building Trust Through Visual Storytelling
Every single photo on your product page has a job to do, and that job is building trust. Your image gallery isn't just a random collection of pictures; it's a carefully guided tour designed to win over your audience.
The primary images, usually on a crisp white background, are your handshake—a clear, honest introduction to the product. But to actually close the deal, you need to add layers of context that help a customer see that item in their life, not just on a screen.
An image gallery isn't just a collection of photos; it's a guided tour. Each shot should reveal something new, from the overall fit and feel to the tiny details that communicate quality and craftsmanship.
This is exactly why a well-thought-out shot list is non-negotiable. It’s your blueprint for building a compelling visual argument that convinces shoppers your product is the one they've been looking for.
Key Image Types That Drive Sales
To turn browsers into buyers, your photography has to get ahead of their biggest worries: fit, quality, and what the item actually looks like in the real world.
Here are the heavy hitters—the essential shots that have a direct line to your conversion rates:
- Lifestyle Shots: When you place your product in a real-world setting, you’re not just selling a garment; you’re selling a feeling. This creates an emotional spark that a sterile studio shot just can't replicate.
- Detailed Close-Ups: High-resolution shots of the fabric's weave, the neatness of the stitching, or the quality of a zipper are vital. They're the digital equivalent of a "touch and feel" experience, backing up every claim you make in your product description.
- 360-Degree Views: Giving shoppers total control to spin the product around is a game-changer. It shows you have nothing to hide and is incredibly powerful for wiping out doubt and hesitation.
Shoppers are hungry for this kind of authentic context. Lifestyle shots set in natural environments aren't just a nice-to-have anymore; they're a top recommendation. And with a staggering 65.7% of fashion sales now happening on mobile devices, you need visuals that stop the scroll. To combat cart abandonment, trends like cinematic lighting and interactive 360-degree views are becoming table stakes.
Maintaining Consistency and Optimizing for Performance
As you build out this diverse library of images, keeping a consistent visual identity across your store is critical. A uniform editing style, similar lighting, and a cohesive brand mood tie everything together, creating a storefront that feels professional and trustworthy. For a deeper look at this, check out these expert strategies for improving ecommerce conversion rates.
Finally, the most persuasive image in the world is useless if it tanks your site's speed. Huge, uncompressed files can kill your page load times, sending frustrated users bouncing and hurting your search rankings. Once your images are ready, it’s crucial you learn how to optimize images for web performance and conversions so they load in a flash.
By combining the right mix of shots with solid technical performance, your product photography becomes more than just decoration—it becomes a powerful engine for driving sales.
Common Clothing Photography Questions Answered
Even with a solid plan, you're going to have questions pop up as you start shooting. That's just part of the process. Getting straight answers to these common sticking points can save you a ton of time and help you get better shots right from the start.
Here are the questions we hear most often from brands dialing in their product photography.
How Many Photos Should I Use for Each Clothing Product?
The sweet spot is 5 to 8 photos per product. This gives your customer a full 360-degree understanding of the item without hitting them with decision fatigue.
A winning image gallery usually includes:
- A clean front view
- A clear back view
- At least one side profile
- A detailed close-up (think fabric texture, a unique button, or a zipper)
- An on-model or lifestyle shot to show how it fits and moves in the real world
This mix tackles the main questions a customer has about fit, feel, and quality, which builds the trust they need to click "add to cart."
Think of your image gallery as a virtual fitting room. Each new photo should answer another question, moving the customer closer to a confident "yes."
What Is the Best Background for Clothing Photos?
For your main product pages on Shopify or Amazon, a pure white or light grey background is the industry standard for a reason. It’s clean, professional, and puts all the focus on the garment. This consistency makes your entire catalog look polished and makes it easier for customers to compare items.
But when it comes to social media, ads, or your lookbook, that's where you can get creative. A textured studio wall, a compelling outdoor setting, or a colored backdrop that matches your brand's vibe can stop the scroll and tell a much richer story. Context is king outside of the product page.
Can I Get Professional Results with a Smartphone?
Absolutely. The camera in your pocket is ridiculously powerful. The secret to pro-level shots isn't the camera body—it's controlling the environment around it.
To get there with your phone, you need three things. First, always use a tripod to keep your images tack-sharp. Second, find big, soft natural light, like the kind that comes through a large window on an overcast day. And third, use a good editing app to make those final tweaks to color, brightness, and contrast.
Ready to create stunning, on-model photography without the cost and complexity of a traditional shoot? WearView uses AI to turn your simple garment photos into an infinite variety of high-converting, on-model images in just seconds. Start creating with WearView today and see the difference for yourself.
WearView Team
WearView Content & Research Team
WearView Team is a group of fashion technology specialists focused on AI fashion models, virtual try-on, and AI product photography for e-commerce brands. We publish in-depth guides, case studies, and practical insights to help fashion businesses improve conversion rates and scale faster using AI.