February 21, 2026•18 min read
How To Take Clothing Photography for Your Online Store in 2026
Master clothing photography with our guide. Learn essential setups, styling techniques, and AI workflows to create high-converting images for your online store.
How To Take Clothing Photography for Your Online Store in 2026
In the hyper-competitive world of e-commerce, your clothing photography is your single most powerful sales tool. It has to do more than just show a product; it needs to create desire, build trust, and give a customer the confidence to click “add to cart.” If you’re still using basic snapshots, it's time for an upgrade. This is the first step toward turning casual browsers into loyal customers.
Why Better Clothing Photography Drives More Sales
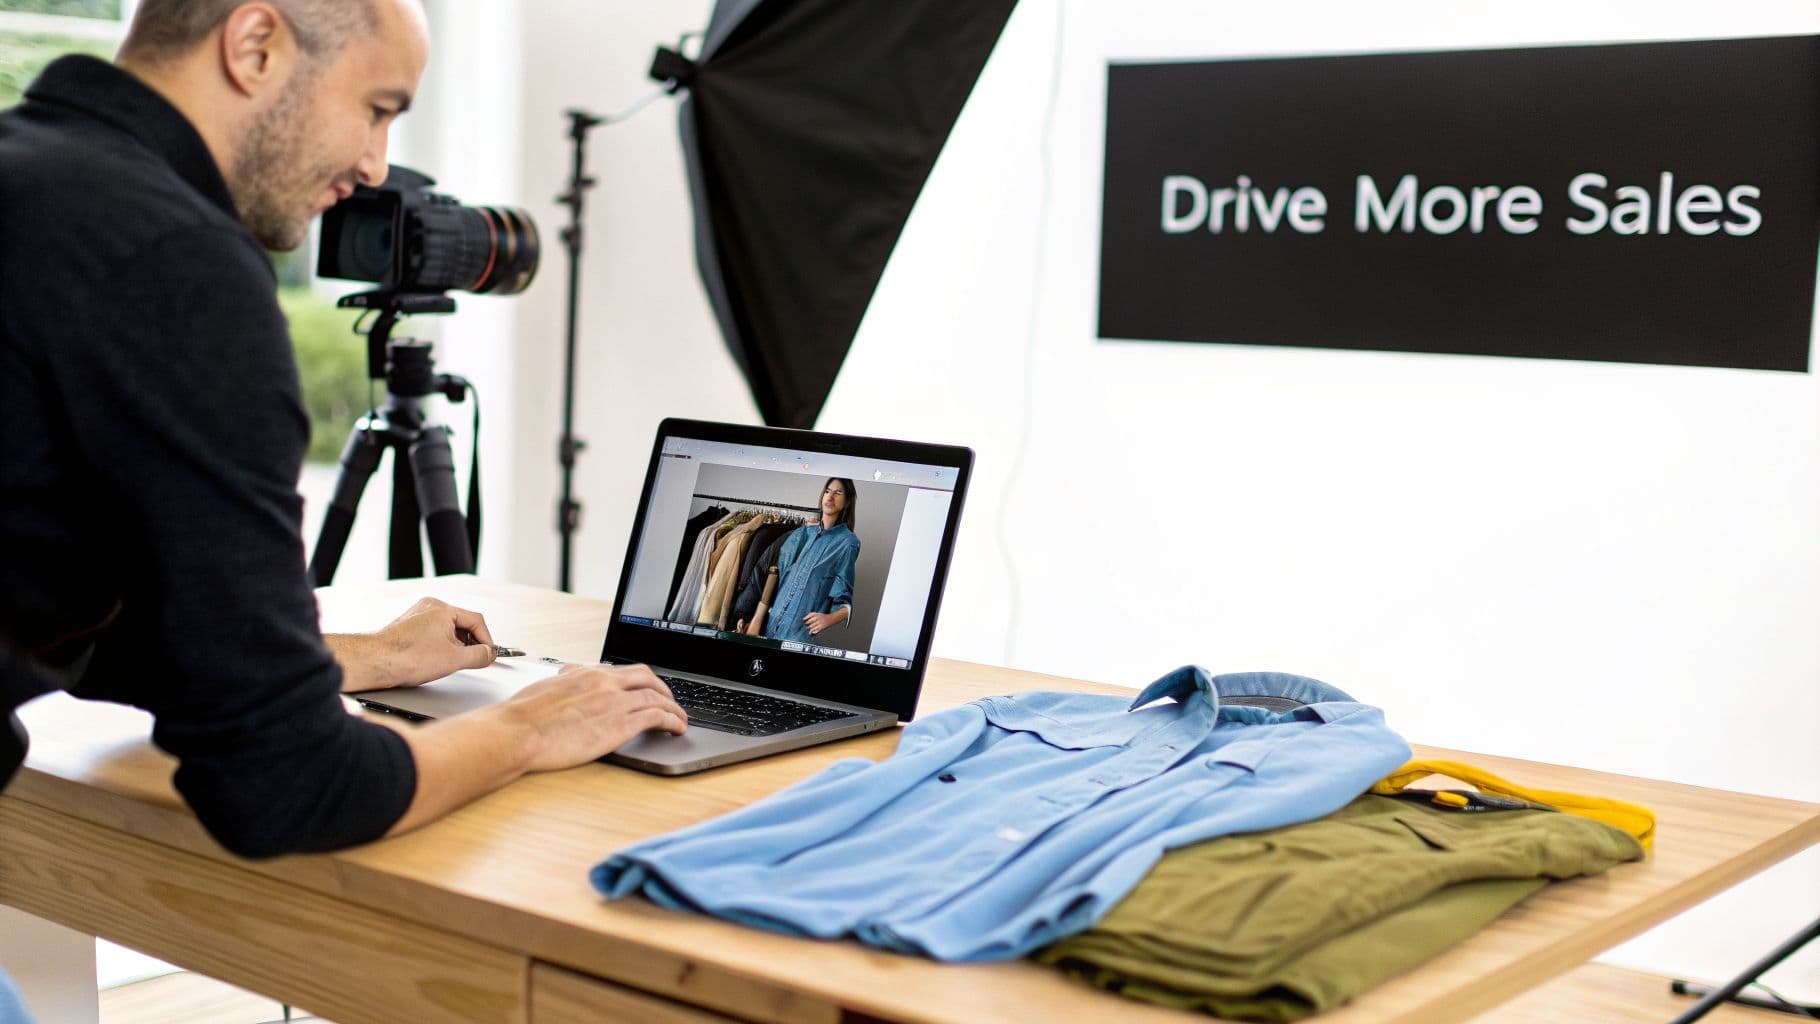
A man editing clothing photos on a laptop in a studio with folded shirts and camera equipment.
Think about it. In a physical store, shoppers can touch the fabric, inspect the seams, and see how a garment drapes on their body. Online, your photos have to do all that heavy lifting. They're the primary, and often only, point of interaction a customer has with your product, making them absolutely essential for conveying quality and fit.
This guide is your modern playbook for creating stunning clothing photography that actually converts. We'll walk through a practical, hybrid approach that combines foundational photography skills with some game-changing AI technology.
The Financial Impact of Great Visuals
Investing in better imagery isn't just a creative expense—it’s a direct lever for revenue. It helps to view your Amazon product photography as a performance lever, where settling for 'good enough' can seriously hold back your sales potential. Your images have one job: stop the scroll and grab attention instantly.
With online shopping now making up 42% of all fashion sales, the digital shelf is more crowded than ever. This shift is precisely why powerful visuals are non-negotiable. It's a well-documented fact that content with strong images consistently gets 94% more views than text-heavy alternatives. The data is clear: shoppers are visual, and they engage with picture-driven content.
Today's shoppers don't just buy a product; they buy into a story and a lifestyle. Your photography is the first and most important chapter of that story.
Moving Beyond Traditional Photoshoots
Forget the old notion that you need expensive studios, professional models, and week-long photoshoots to compete. The modern approach is all about efficiency and scalability without sacrificing quality. We’re going to show you how to:
- Set up a practical in-house system that delivers consistent, professional results.
- Master core styling techniques for both flat lay and on-hanger shots.
- Use AI to generate photorealistic model imagery at a fraction of the traditional cost.
Consider this your roadmap to building a high-quality visual strategy that not only sets your brand apart but also drives measurable growth.
Building Your In-House Photography Setup
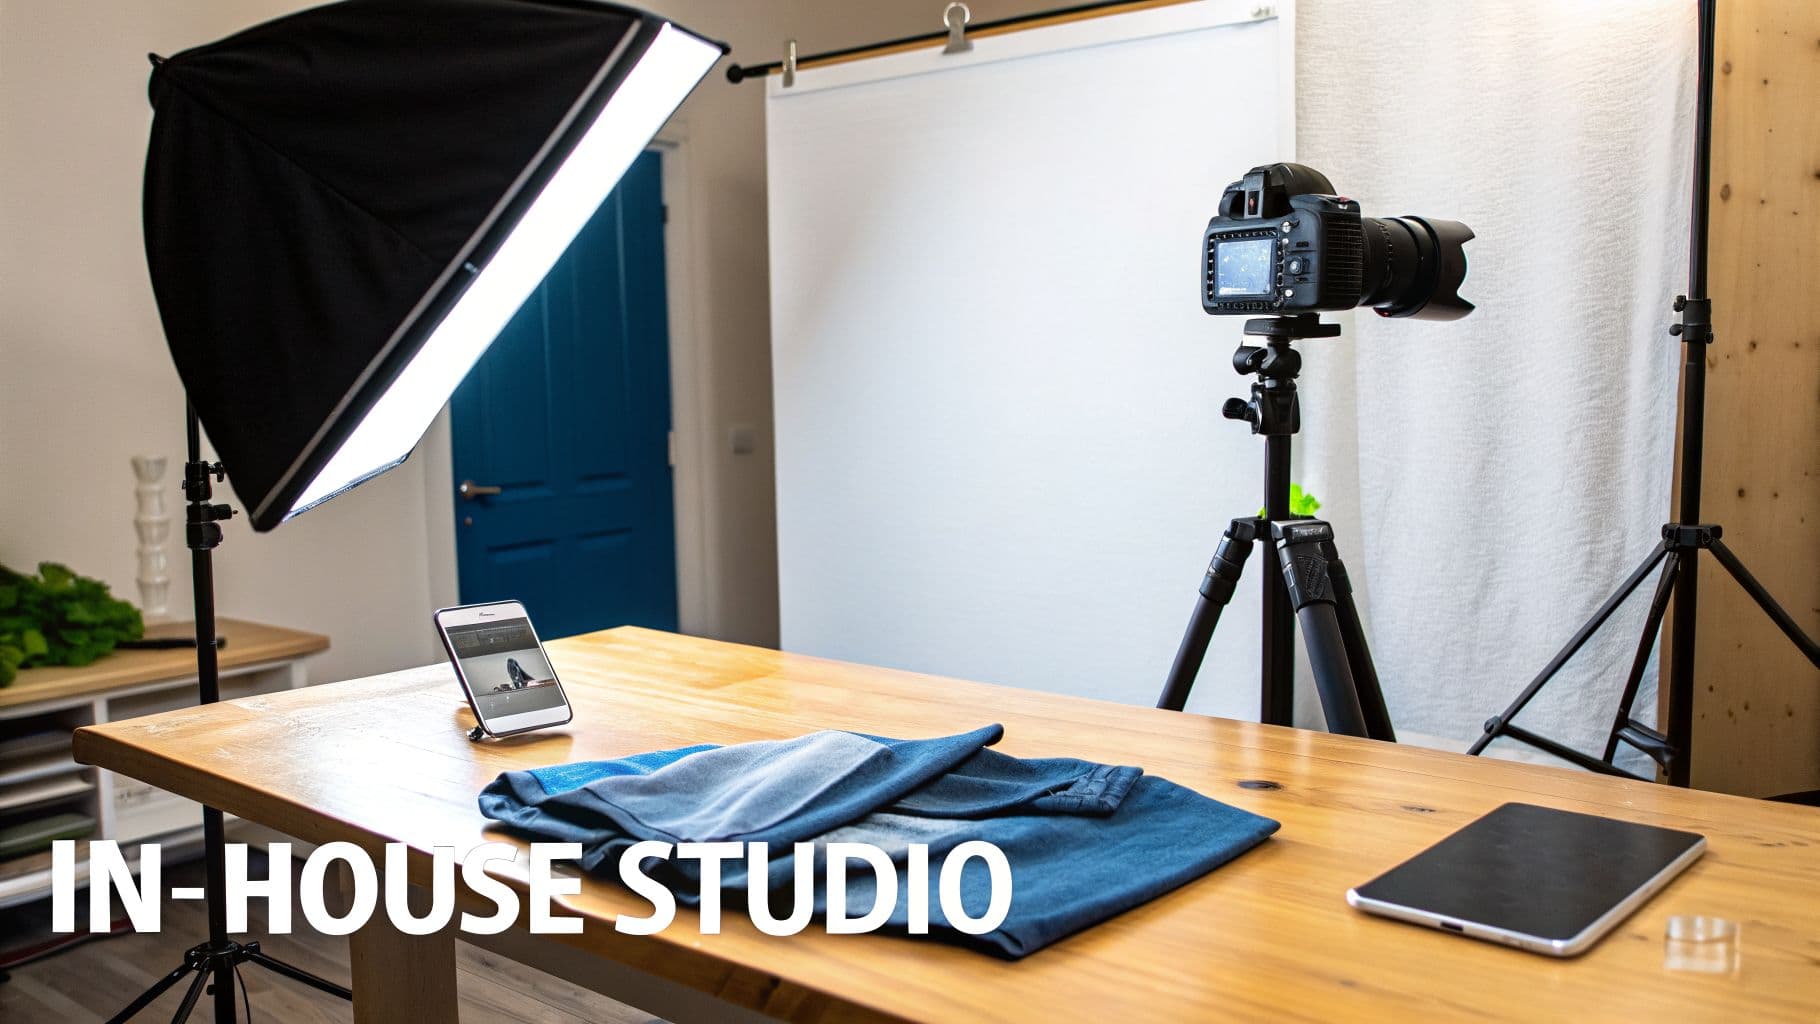
An in-house photography studio setup with a DSLR camera, softbox light, white backdrop, and folded blue clothing on a wooden table.
You don't need a Hollywood budget to get professional-grade clothing photos. The real key is building a practical, in-house setup that gives you consistent, high-quality results every single time. It’s not about buying the most expensive gear; it's about smart, targeted investments that pay for themselves in quality and efficiency.
The goal here is a controlled environment. You want predictable lighting and clean backgrounds. This consistency is non-negotiable—not just for a professional-looking website, but also for making post-production a breeze and prepping images for advanced AI tools.
Choosing Your Camera
The camera debate usually boils down to two choices: a DSLR/mirrorless camera or a high-end smartphone. While modern phones like the latest iPhone or Google Pixel pack incredible cameras, a dedicated DSLR or mirrorless camera gives you far more manual control. That control is everything for consistent product shots.
- DSLR/Mirrorless Camera: These give you superior image quality and lens versatility. A simple 50mm "nifty fifty" lens is perfect for crisp, distortion-free shots. Most importantly, you get full control over settings like aperture, ISO, and shutter speed, which is how you achieve uniform brightness and focus across an entire collection.
- High-End Smartphone: If your budget is tight, a good smartphone is a great starting point. Use portrait mode to get a soft background blur and always shoot in the highest resolution possible. Just be mindful of the automatic processing—it can sometimes alter colors in unpredictable ways.
No matter which you choose, a sturdy tripod is an absolute must-have. It kills camera shake, ensures every shot is framed identically, and frees up your hands for styling the garments.
Mastering Your Lighting
Lighting is, without a doubt, the most critical element in product photography. Bad lighting makes expensive fabrics look cheap and throws colors way off. Good lighting makes everything pop.
Natural light from a large window is a fantastic, free option. Just position your setup so the light falls softly across the garment from the side. The enemy is direct, harsh sunlight, which creates ugly shadows. An overcast day is your best friend here.
For total control and consistency, though, artificial lighting is the way to go. A basic, affordable kit can make a world of difference.
- Softbox: This is the workhorse of e-commerce photography. A single large softbox diffuses light, creating a soft, even glow that minimizes harsh shadows and brings out fabric texture beautifully.
- Reflector: A simple white foam board or a 5-in-1 reflector is a cheap but powerful tool. Place it opposite your main light to bounce light back into the shadows. This one simple trick creates a balanced, professional look.
For those just starting out, we put together a detailed guide on building your own e-commerce photography studio on a budget that breaks down all the essentials.
Setting the Scene with a Clean Background
Your background needs to be simple and non-distracting. The clothing is the hero of the shot, and everything else should just fade away.
A solid, neutral background is the standard for e-commerce. It provides a clean canvas and makes removing the background in post-production about a thousand times easier. A roll of white seamless paper is the industry go-to, but a clean, light-colored wall can also work perfectly.
Get this foundational setup right, and your raw images will be crisp, well-lit, and ready for the next step.
Mastering Core Garment Photography Techniques
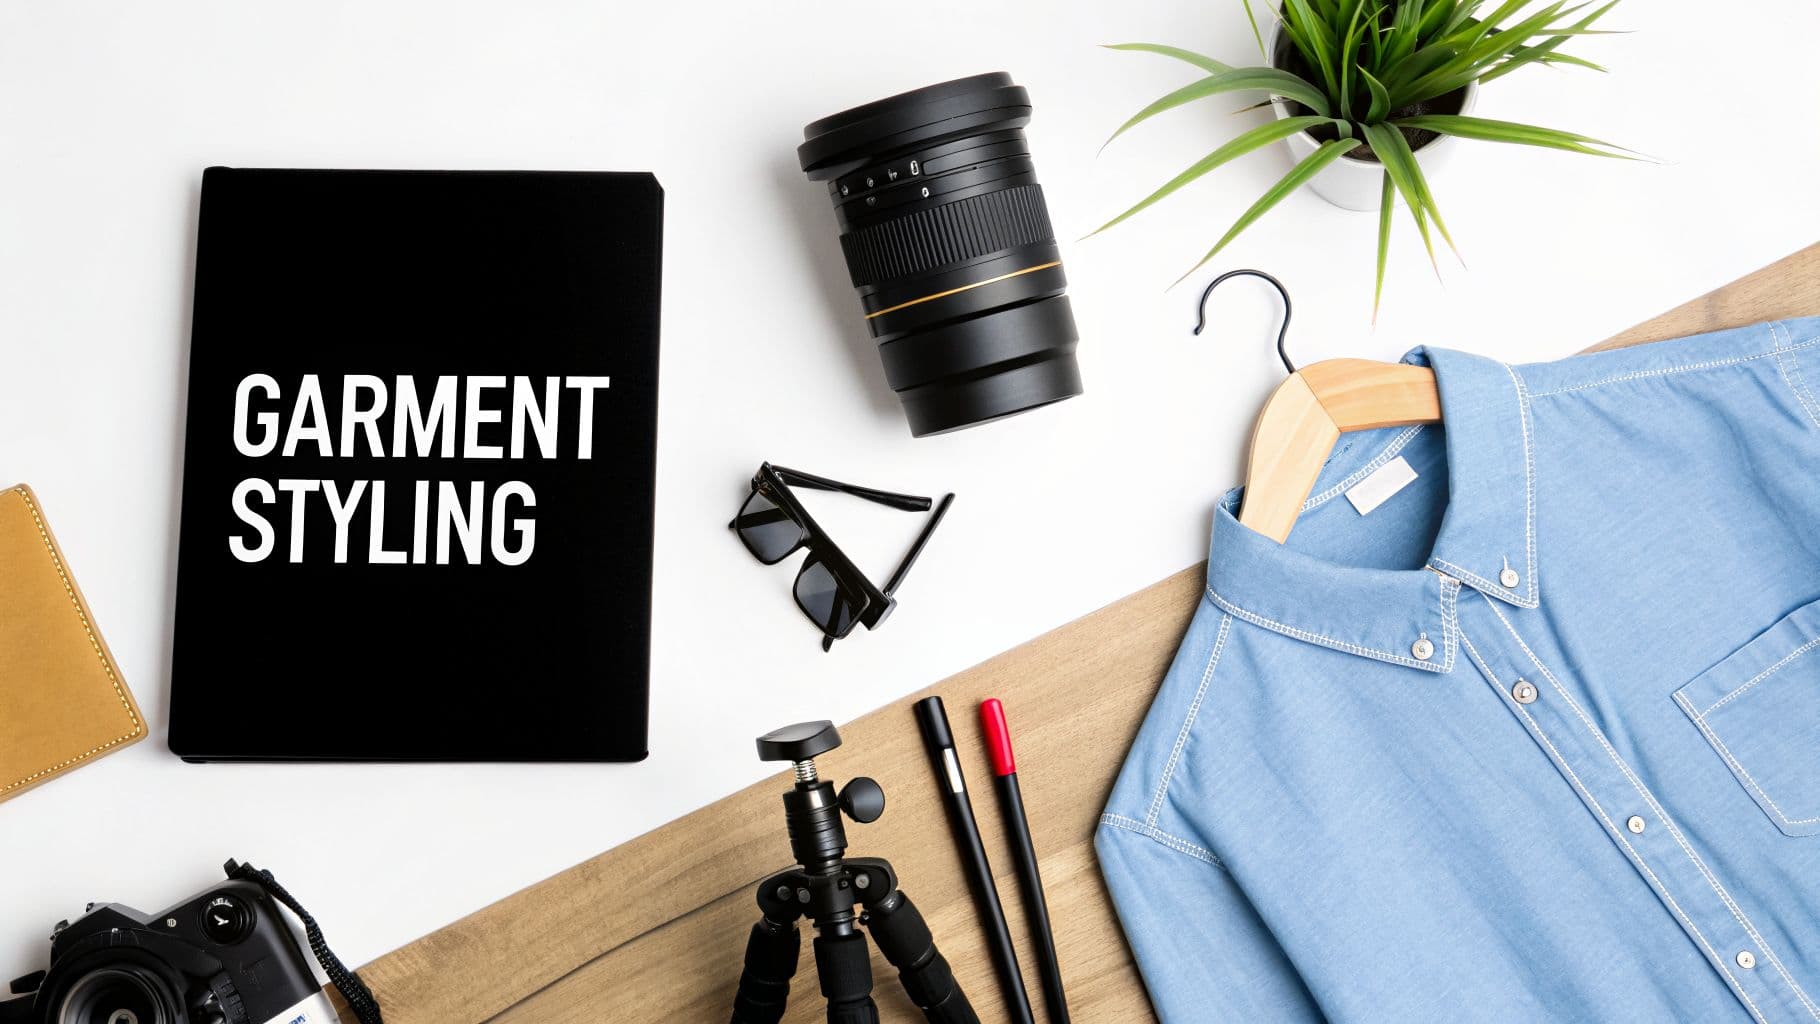
Flat lay of garment styling essentials, including a denim shirt, camera gear, sunglasses, and a notebook.
Alright, your in-house studio is ready to go. Now for the fun part: getting hands-on with the core methods of shooting garments. The goal here is simple—capture clean, detailed, and beautifully styled images that either work perfectly on their own or become the perfect asset for AI model generation.
We're going to focus on the three foundational approaches that every e-commerce brand needs to know: flat lay, on-hanger, and mannequin photography.
Each technique has its own strengths, and knowing how to execute all three gives you a versatile toolkit for any item in your collection. Think of these as the fundamental building blocks of all modern clothing photography.
Choosing Your Garment Photography Style
Deciding which method to use can feel overwhelming, but it really comes down to your product, brand vibe, and workflow. Each style tells a different story about your garment's fit and feel. This table breaks down the pros and cons to help you make the right call for your brand.
| Style | Best For | Pros | Cons |
|---|---|---|---|
| Flat Lay | Casual wear like t-shirts, jeans, sweaters, and accessories. Great for social media. | Low cost, easy to set up, allows for creative styling with props. | Can look flat or lifeless if not styled well; doesn't show the garment's true drape or fit. |
| On-Hanger | Garments where drape is important, like blazers, coats, dresses, and delicate blouses. | Simple setup, shows how fabric hangs naturally, feels more elevated than a basic flat lay. | The hanger can be distracting; doesn't convey the garment's shape on a body. |
| Mannequin | Showing a garment’s true fit and structure. Essential for structured items like suits, formalwear, and fitted tops. | Provides a realistic 3D shape, highlights fit and form, creates a clean "ghost" effect. | Requires more complex shooting and significant post-production work; mannequins can be costly. |
Ultimately, many brands use a mix of these techniques. A t-shirt might get a creative flat lay for Instagram, while a tailored blazer gets the full ghost mannequin treatment for the product page. Experiment and see what resonates with your customers.
The Art of the Flat Lay
Flat lay photography is so much more than just placing a shirt on the floor and pointing a camera down. It's about breathing life into the fabric, creating shape, and suggesting movement. A sad, flat t-shirt doesn't inspire anyone to click "add to cart," but a thoughtfully styled one shows off its personality.
First things first: steam or iron the garment meticulously. Every single wrinkle will be magnified under studio lighting. Lay it on your clean background and start playing with its shape. Instead of just flattening it, gently curve the sleeves or pinch the waist to give it a more natural, almost-worn feel.
Here are a few pro styling secrets I've picked up over the years:
- Add Volume: Stuff crumpled tissue paper or even cotton balls inside the garment to give it a subtle lift. This works wonders for blouses, dresses, and jackets, preventing them from looking limp.
- Create Symmetry: For a clean, organized look, fold one side of the garment neatly over the other, making sure the seams align perfectly. This is especially effective for button-down shirts and jeans.
- Mind Your Angles: Always shoot directly from above—a true bird's-eye view—to avoid any weird distortion. A tripod with a horizontal arm is your best friend for achieving this consistently.
Perfecting the On-Hanger Shot
Hanger shots are a fantastic way to display pieces like blazers, coats, and delicate dresses where the natural drape is a key selling point. But here’s the catch: the hanger itself matters. A lot. A cheap-looking plastic hanger can instantly devalue an otherwise premium garment.
Choose hangers that feel like they belong with your brand. Simple wooden or sleek metal hangers usually look clean and professional. Whatever you do, avoid hangers with other brand names or distracting colors. The hanger is a supporting actor, not the star of the show.
For the shot, hang the garment against your neutral background using a simple nail or a C-stand with a crossbar. Style the item just as you would for a flat lay, ensuring it hangs straight and is wrinkle-free. A great trick is to use small clips or double-sided tape on the back of the garment to pull the fabric taut, giving it a more fitted appearance from the front.
The right hanger is an extension of your brand identity. A premium silk blouse on a flimsy plastic hanger sends a conflicting message about quality. Invest in a small set of 'hero' hangers just for photography.
Capturing the Ghost Mannequin Effect
Mannequin photography is the gold standard for showing a garment's true fit without the distraction of a human model. The endgame here is to create the "ghost mannequin" (or "invisible mannequin") effect in post-production, which requires shooting the garment in a very specific way.
You’ll want a matte white mannequin to avoid any pesky reflections. Start by photographing the garment on the mannequin from all the important angles—front, back, and sides. But the real key to the magic is capturing the interior of the garment.
To do this, you'll need a separate shot:
- Keep the garment on the mannequin.
- Turn it around so the back is facing the camera.
- Carefully peel back the collar or neckline to expose the inner tag and lining.
- Snap a clear, well-lit photo of this inside-out view.
Later, in post-production, you’ll combine these images. The shot of the interior gets layered behind the main front shot, which creates the illusion that an invisible person is wearing the item. This technique provides that clean, professional look that gives customers a crystal-clear understanding of the product’s fit. It’s a non-negotiable skill in high-end clothing photography.
Nail Your Post-Production Workflow
A great photoshoot is just the starting point. The real magic—and the part that saves you countless hours—happens in a disciplined, efficient editing workflow. This is where you transform raw camera files into polished, on-brand assets that are ready for your storefront.
The single biggest time-saver here is batch editing. Seriously, this changes everything. Instead of tweaking every photo one by one, you apply the same set of adjustments to a whole group at once. You can use tools like Adobe Lightroom for this. Just pick one photo from the shoot, get the color, exposure, and white balance perfect, and then sync those exact settings across the entire collection.
This one move is the fastest way to get that consistent, professional look across all your product listings, which is a huge factor in building customer trust.
Why Clean Edits Are Non-Negotiable
Once your colors are locked in, the next step is getting the technical details right. That means optimizing for optimal Shopify image sizes to guarantee your pages load fast. Nobody waits for slow images to load; it's a proven conversion killer.
You also need a clean background. A pure white or transparent background makes your product the hero, gets rid of distractions, and is a must-have for most ad platforms and AI tools. You could spend hours manually cutting things out in Photoshop, but honestly, automated tools can now do this in seconds. For a deeper dive into this, our guide on e-commerce image editing best practices covers more advanced techniques.
Your post-production workflow shouldn't be an afterthought. It should be a repeatable, systemized process that you can execute flawlessly every time you shoot a new collection.
Build a Repeatable System
To pull this all together, create a simple checklist you can run through every single time. A standard process means no guesswork and no missed steps, which becomes absolutely critical as your brand grows.
A solid workflow usually looks something like this:
- Cull the Duds: Your first pass is just about selection. Rip through all the raw photos and pick only the sharpest, best shots. Be ruthless here—quality over quantity, always.
- Batch Correct: Apply your universal edits for color, brightness, and contrast across all the keepers in one go.
- Spot-Check and Tweak: Now, quickly scan the batch and make small, individual adjustments. Maybe you need to remove a tiny piece of lint or fix a stubborn wrinkle on one specific shirt.
- Isolate the Product: This is where you remove the backgrounds. Use your favorite tool to get those clean, isolated product shots.
- Crop and Export: Finally, resize and export everything to the exact specs required by your e-commerce platform and any marketing channels you use.
Following a structured process like this turns your raw clothing photography into polished, sales-driving assets with way more speed and a lot less frustration.
Using AI to Generate On-Model Imagery
Alright, you’ve put in the work and now have perfectly edited, background-free images of your garments. This is where the magic really happens. We're moving beyond simple product shots and into a world where you can create a nearly endless supply of on-model imagery—all without booking a single model or studio.
This is the core of a modern clothing photography workflow. It’s all about taking that one great flat lay or hanger photo and instantly seeing it on a model who fits your brand's look perfectly. And it happens in seconds.
The Simple Workflow From Product to Model
Getting started is refreshingly simple. The technology is designed to do the heavy lifting, turning your clean product photos into dynamic, ready-to-use marketing assets. It’s about working smarter, not harder, to get those high-end results.
The process boils down to just a few clicks:
- Upload Your Garment Photo: Grab one of the clean, edited images you just prepared. A well-lit photo on a transparent background is your golden ticket here.
- Choose Your Model: Pick a model from a diverse library or, even better, create your own unique model to keep your brand look consistent across the board. You get full creative control.
- Generate and Download: The AI gets to work, rendering your garment onto the model in a variety of poses. From there, you just download the high-resolution images and they're ready for your product pages, social media feeds, and ad campaigns.
This quick infographic lays out the post-production steps that tee up your images for this AI transformation.
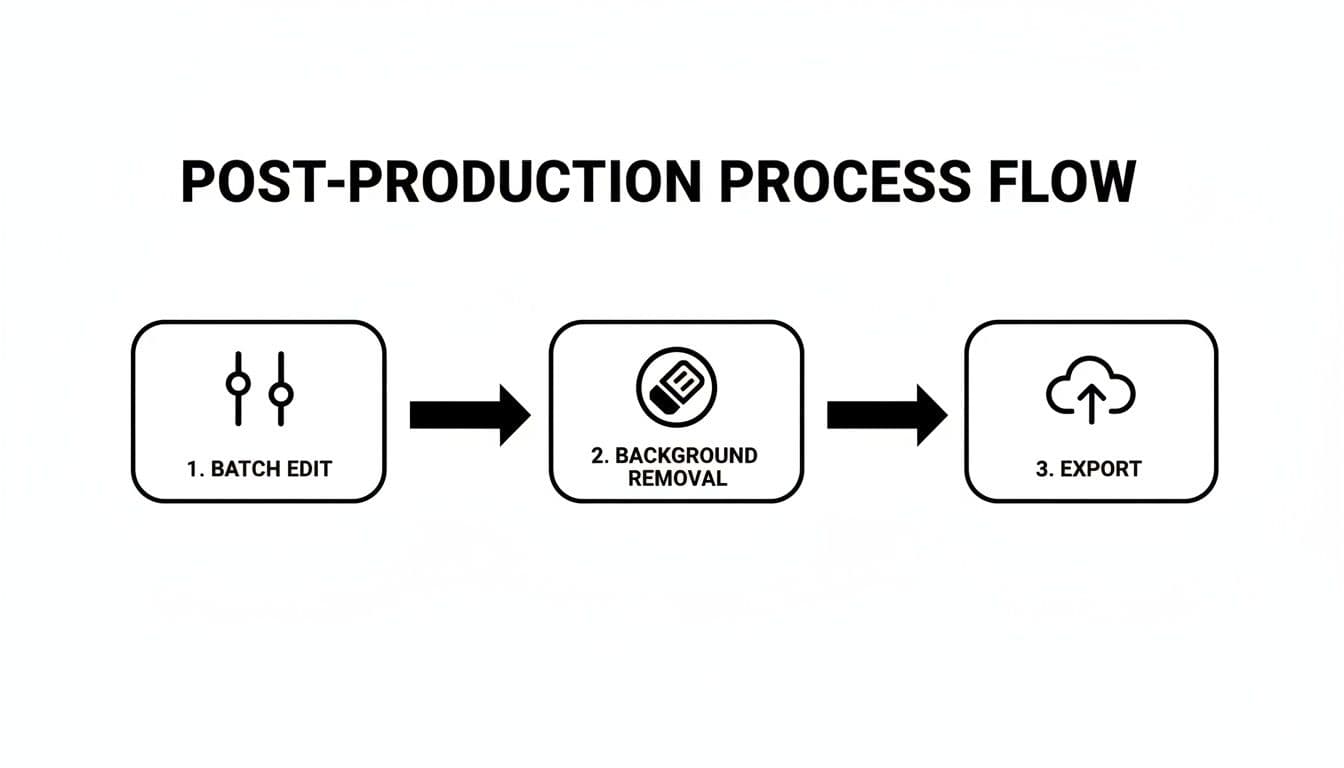
A flowchart detailing the post-production process with steps: 1. Batch Edit, 2. Background Removal, and 3. Export.
Nailing this process ensures your source images are perfectly optimized, which ultimately leads to more realistic and accurate on-model results.
Slashing Costs and Boosting Variety
The financial and creative upsides here are huge. We all know traditional photoshoots are a budget-killer—models, photographers, studios, stylists... it adds up fast. AI-powered generation pretty much wipes out those expenses. In fact, some brands are seeing cost reductions of up to 90%.
But it’s not just about the savings. You also gain incredible visual variety. Instead of being stuck with the five or ten shots you could afford from a photoshoot, you can now generate dozens of images for every single product.
Want to test different models? New poses? Different backgrounds to see what your audience clicks on? Now you can. This is a game-changer for A/B testing ad creative and keeping your website looking fresh without any new production headaches.
This shift isn't just a trend; it's a fundamental change in how fashion e-commerce works. The ability to create brand-consistent visuals at scale is quickly becoming a major competitive advantage.
The industry is moving toward systemized workflows that can keep up with the breakneck pace of e-commerce. As some analysts have noted, platforms that blend human skill with AI speed are becoming essential for brands that want to scale efficiently. You can read more predictions about the future of professional photography to get a better sense of this industry shift.
This approach also gives you the power to create a genuinely diverse and inclusive representation of your customer base. You can use ai generated models to reflect different ethnicities, sizes, and styles, making sure your brand connects with a much wider audience. It’s a powerful way to make your brand feel more personal and relatable—a massive driver for loyalty and sales.
Got Questions? We’ve Got Answers.
Jumping into a new workflow always brings up a few questions, especially when you’re mixing classic photography with AI. We get it. Here are some of the most common things brands ask when they start turning their product shots into on-model imagery.
The first thing everyone wants to know is what kind of photo they need to start with. For the best AI results, your source image is everything. You need a clean, well-lit shot of your garment on a simple, neutral background. A high-resolution JPEG or PNG with the background already removed is the gold standard.
Another big one is about commercial use. Can you actually use these AI-generated model photos for your business? With a reputable platform, the answer is a firm yes. You’re typically granted full commercial rights, meaning you can use the images on your website, in social media, and across your ad campaigns without a second thought about royalties or weird licensing fees.
Do I Need to Hire a Pro Photographer?
Honestly? Not anymore. While a great photographer is always an asset, the whole point of this hybrid workflow is to empower you to create amazing visuals yourself. If you’ve nailed the basic lighting and styling we covered earlier, you can absolutely produce source images that are perfect for AI transformation.
This isn’t just a random shift; it's where the entire industry is heading. Generative AI is changing how fashion brands think about production. As e-commerce keeps growing, tools that can flip a simple product photo into a studio-quality model shot are becoming non-negotiable. You can get a deeper look at how this is shaking up the old-school production model by reviewing some expert analysis on fashion photography trends.
Key Takeaway: The quality of your AI on-model shot is a direct reflection of the quality of your original garment photo. A sharp, well-lit source image will always give you a more realistic and compelling final picture.
Finally, people often ask about brand consistency. Can you keep using the same model over and over? You bet. Modern AI platforms let you generate images with consistent models, giving your brand a cohesive, recognizable look across every product page and marketing email. It’s a simple way to build a more unified and professional customer experience.
Ready to ditch expensive photoshoots and start creating incredible on-model imagery in seconds? With WearView, you can upload your garment photos and instantly generate studio-quality visuals that fit your brand perfectly. Discover how WearView can cut your production costs by up to 90% and get your products to market faster.
WearView Team
WearView Content & Research Team
WearView Team is a group of fashion technology specialists focused on AI fashion models, virtual try-on, and AI product photography for e-commerce brands. We publish in-depth guides, case studies, and practical insights to help fashion businesses improve conversion rates and scale faster using AI.