February 18, 2026•19 min read
How to take pictures of clothes without mannequin: Quick guide to pro photos
Discover how to take pictures of clothes without mannequin and master flat lay, hanger, and ghost techniques for stunning product photos.
How to take pictures of clothes without mannequin: Quick guide to pro photos
Photographing clothes without a mannequin is much easier than you might think. We'll be focusing on two core methods: flat lay photography, where you artfully arrange garments on a surface, and hanger shots, which are perfect for showing off a piece's natural drape.
These techniques are your ticket to creating authentic, relatable product images that help customers see your items in a more natural, real-world light.
Why Mannequin-Free Photography Is Winning Over E-Commerce
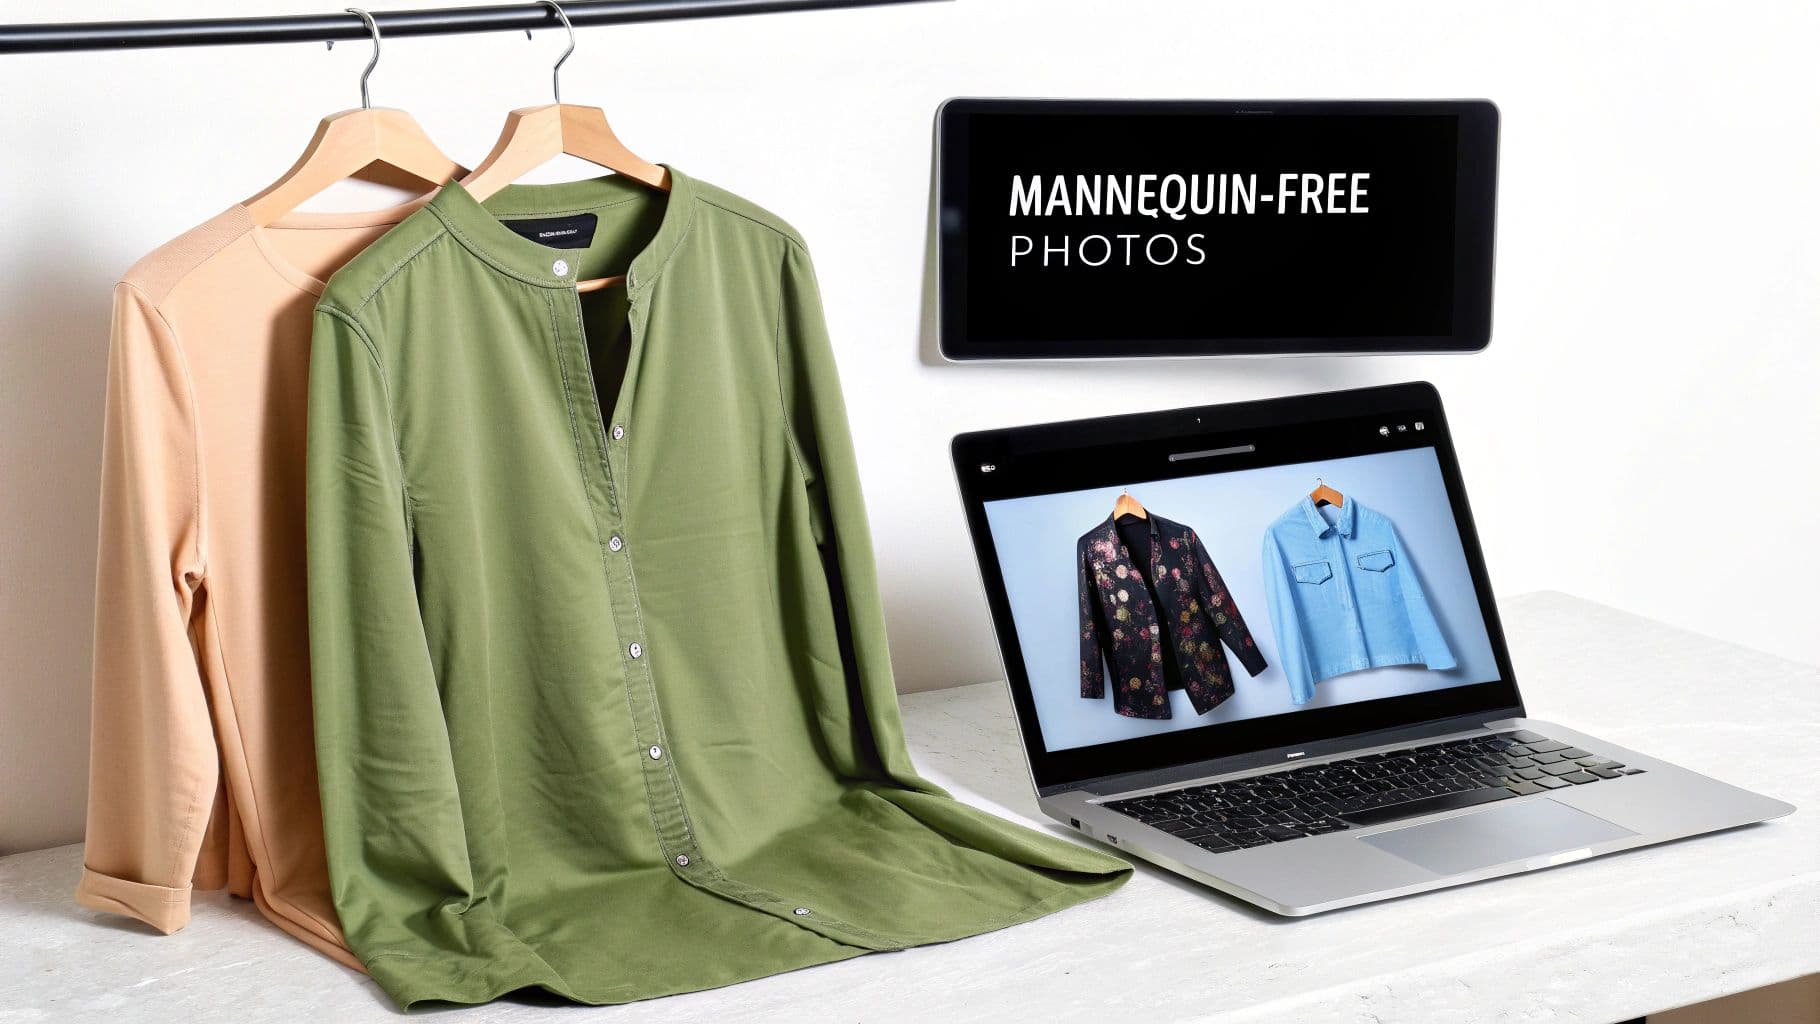
Two shirts on hangers, a tablet displaying 'MANNEQUIN-FREE PHOTOS', and a laptop with clothing images.
In the hyper-competitive world of online fashion, you might have noticed top brands are ditching their traditional mannequins. What's behind the shift? It boils down to two things: authenticity and efficiency. Going mannequin-free creates a cleaner, more minimalist aesthetic that puts 100% of the focus right where it belongs—on your product.
This approach doesn't just look more modern; it's also incredibly practical. For starters, you can forget about shelling out for expensive, bulky mannequins that need their own zip code for storage. Instead, you can pull off professional-looking shots with a simple setup right from your home or studio.
The Core Benefits for Your Brand
Moving away from mannequins helps you build a more approachable and relatable brand. Shoppers today are drawn to visuals that feel genuine, not stiff and staged. Making this small change can have a big impact on how customers connect with your brand.
Here are a few of the biggest wins:
- Reduced Costs and Complexity: Ditch the investment in different mannequin sizes and styles. This simplifies your entire photography workflow from day one.
- Faster Time-to-Market: With a stripped-down, repeatable setup, you can get new arrivals shot and listed on your site in record time.
- Creative Freedom: Mannequin-less methods open up a world of styling possibilities. It’s your chance to tell a unique story with every piece you sell.
By focusing on the garment itself, you give customers the space to imagine themselves wearing it. This builds a much stronger connection and helps them buy with confidence, free from the distraction of a lifeless plastic figure.
In the fast-moving e-commerce space, this pivot can slash production expenses by up to 90%. Think about it: professional studio shots used to cost hundreds per item. Now, brands are using AI tools to turn basic flat lays into stunning, on-model photos in seconds, which is why we're seeing massive growth in AI-generated fashion photography.
Introducing the Three Main Techniques
To really get the hang of taking pictures of clothes without a mannequin, you'll want to master three primary methods. Each one presents your apparel in a unique way, and we're about to dive deep into all of them.
- Flat Lay Photography: This involves arranging clothing on a flat surface. It’s perfect for showing off patterns, texture, and entire outfits at a glance.
- Hanger Photography: By hanging garments against a clean background, you can beautifully highlight their natural shape and how they fall.
- Ghost Mannequin Photography: This is a clever post-production trick. It creates a 3D, "hollow" look, showing the garment's true fit as if it's on an invisible person.
Mastering the Art of Flat Lay Photography
Flat lay photography is one of the most powerful and creative ways to show off your apparel without a mannequin. You simply lay your garments flat on a surface and shoot from directly above, creating a clean, modern look that puts the product front and center. It's an incredibly versatile technique, perfect for everything from t-shirts and jeans to styling complete outfits.
The real beauty of the flat lay is its simplicity and the creative freedom it gives you. It lets you present more than just a single piece of clothing; it allows you to tell a whole style story. This approach works especially well on platforms like Instagram and Pinterest, where those top-down shots are super engaging.
Choosing the Right Background
The foundation of any killer flat lay is its background. The surface you choose sets the mood and has to feel true to your brand's identity. A clean white or light gray poster board is a classic for a reason—it’s the go-to for e-commerce because it creates a professional, distraction-free stage that makes product colors pop.
But don't feel boxed in by the basics. Experimenting with different textures is a great way to inject some personality.
- Rustic Wood: This is perfect for brands with a natural, outdoorsy, or vintage vibe. Think flannel shirts or denim.
- Cool Marble: Looking for a touch of luxury? Marble instantly communicates sophistication and a modern edge.
- Colored Paper: This is a fantastic, budget-friendly way to splash your brand colors and some energy into your photos.
Whatever you land on, make sure the surface is large enough to frame the garment with plenty of negative space. Giving your product that breathing room is the secret to a balanced, uncluttered composition that pulls the viewer's eye right where you want it.
The single most important rule for backgrounds is consistency. A cohesive look across all your product listings and social media builds a strong, recognizable brand identity that customers will remember.
Styling and Composition Tricks
Styling is where you truly bring the garment to life. A perfectly pressed, wrinkle-free shirt can actually look a bit sterile and lifeless. The goal is a "lived-in" but still tidy appearance.
A great trick for adding dimension is to gently stuff some tissue paper or cotton balls under the shoulders and torso. This creates subtle, natural-looking volume and mimics how the clothing would actually sit on a body. It’s a simple move that makes a huge difference.
Next, it’s all about the details. Fold sleeves in a way that feels natural—a slight angle or a simple cuff adds a touch of realism. If you're shooting a whole outfit, think about how the pieces logically relate to each other. For a deeper dive into the nuances of styling, you can explore some detailed guides on flat lay photography that offer more advanced tips.
Finally, think about props. The best props complement the clothing without stealing the show. Maybe it’s a pair of sunglasses next to a summer dress or a watch placed beside a neatly folded shirt. Use them sparingly to enhance the story, not to clutter the image.
Perfecting Your Lighting Setup
Lighting can absolutely make or break your flat lay photos. Your goal is to get soft, even light that shows off all the details without casting harsh, distracting shadows.
By far the best—and most affordable—option is natural light. Try to set up your station near a large window, ideally on an overcast day. That cloud cover acts as a giant, natural diffuser, giving you beautifully soft light for free.
If you can't rely on the weather, a simple artificial light source works just as well. A softbox is a great investment, but even a regular lamp with a diffuser sheet over it can do wonders. Place your light source at a 45-degree angle to your setup. This angle creates just enough soft shadow to define the garment’s shape and texture without being overpowering. To level up your shot, place a white foam board on the opposite side to act as a reflector. It will bounce light back into any dark spots, giving you a bright, professional finish.
Creating Professional Hanger and Ghost Manquin Shots
When a simple flat lay just won't do, it's time to bring in some dimension. To really show off a garment’s natural drape and structure, nothing beats hanger shots or the more advanced ghost mannequin effect.
Both of these methods give customers a much better idea of how an item actually fits and falls—something that’s crucial for pieces like dresses, flowy blouses, or structured blazers where shape is everything.
Elevating the Simple Hanger Shot
Don't underestimate the power of a good hanger shot. Done right, it's a quick, clean, and surprisingly effective way to photograph clothes without a mannequin. But the magic is all in the details.
First, pick a hanger that actually matches your brand's vibe. A simple wooden, metal, or even a nice padded hanger can instantly make your product feel more premium. Whatever you do, avoid cheap plastic hangers at all costs—they can tank the perceived value of your clothing in a heartbeat.
Once you’ve got the right hanger, make sure the garment is steamed or ironed to perfection. Position it symmetrically on the hanger. If it looks a little limp, use a few pins or small clips on the back to create a more defined, flattering silhouette.
Hang the item against a solid, light-colored wall or use a seamless paper backdrop for a super clean, professional look. A common trick is to hang it from a hook and use a bit of clear fishing line to stop it from swaying. This simple step ensures your images are perfectly sharp every time.
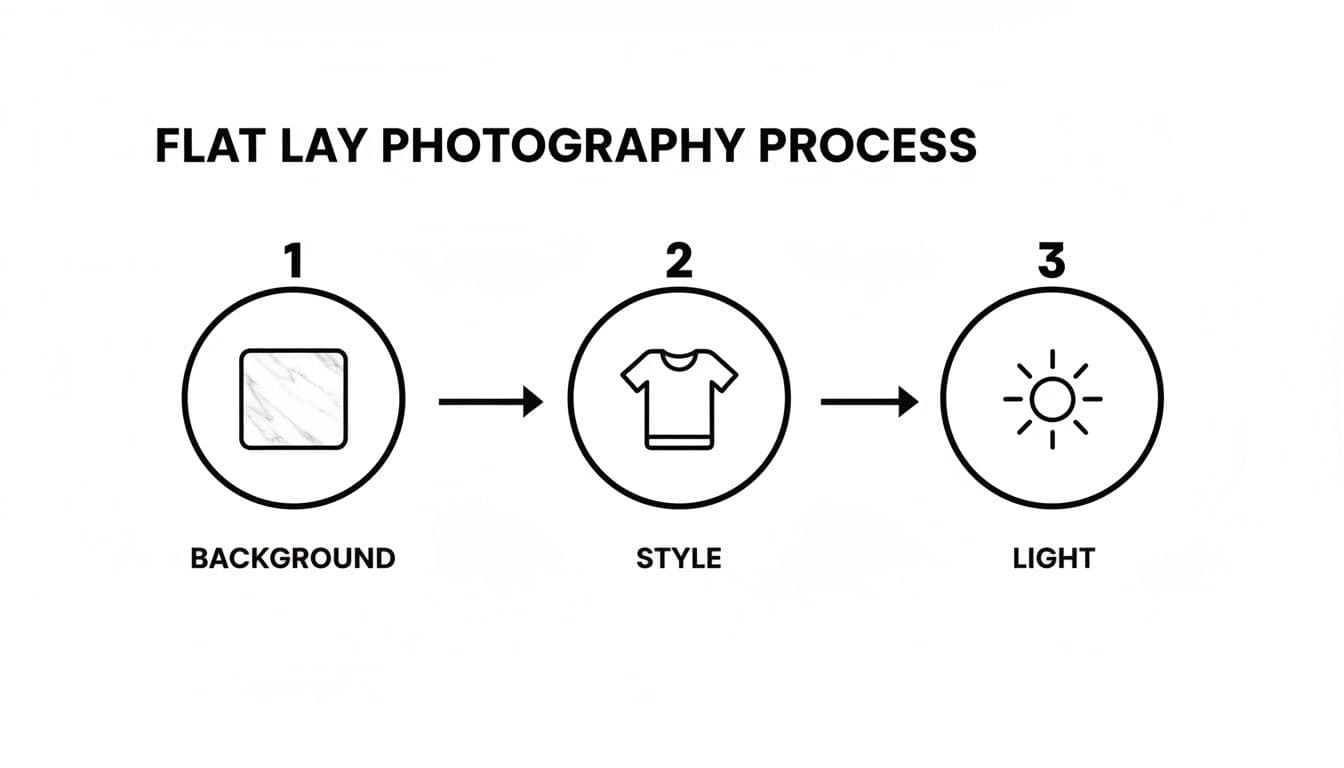
Diagram showing the flat lay photography process with three steps: background, style, and light.
No matter which method you choose, the core principles stay the same. A great shot always comes down to getting the background, styling, and lighting right.
Choosing the best method can feel tricky, so let's break down the main options to see which one fits your brand, budget, and effort level.
Choosing Your Photography Method: Flat Lay vs Hanger vs Ghost
Here’s a quick comparison to help you decide which mannequin-free technique is the right fit for your products and workflow.
| Method | Best For | Effort Level | Visual Appeal |
|---|---|---|---|
| Flat Lay | Casual wear, t-shirts, pants, children's clothes, accessories. | Low | Creative & stylistic, but can lack dimension. |
| Hanger Shot | Dresses, blazers, blouses, shirts, delicate fabrics. | Low-Medium | Professional & clean, shows drape well. |
| Ghost Mannequin | Structured jackets, blazers, dresses, detailed shirts. | High | Hyper-professional 3D look, shows fit perfectly. |
Ultimately, the best approach often involves a mix. You might use flat lays for your basic tees, hanger shots for your blouses, and invest in the ghost mannequin effect for your hero pieces like tailored jackets.
Crafting the Ghost Mannequin Effect
Ready to level up? The ghost mannequin technique is the industry gold standard for showing off a garment's fit—inside and out—without any distractions. It creates that cool, hollowed-out 3D look you see in high-end catalogs, giving customers an incredibly clear view of the product.
This method involves compositing multiple photos in post-production to create one seamless image. It’s definitely more work, but the payoff is a hyper-professional result that builds serious customer confidence and can give your conversion rates a major boost.
Here’s how it works. You’ll need a few key photos:
- The Main Shot: First, shoot the garment on a mannequin against your clean background. Nail the lighting and make sure the garment fits the mannequin perfectly.
- The Interior Shot: Now, take the garment off, turn it inside out, and put it back on the mannequin. This time, you're photographing the back interior—the parts that were hidden by the mannequin before, like the neckline and any labels.
In a program like Adobe Photoshop, you’ll layer these images, placing the interior shot behind the main one. The final step is to carefully mask out the mannequin, which merges the two photos and creates that complete, three-dimensional view.
While you can absolutely do this yourself, many brands find it's more efficient to use services or AI tools that can convert images from flat lay to ghost mannequin. This saves a ton of time and guarantees a perfect, professional finish every time.
Your Essential Gear and Camera Settings
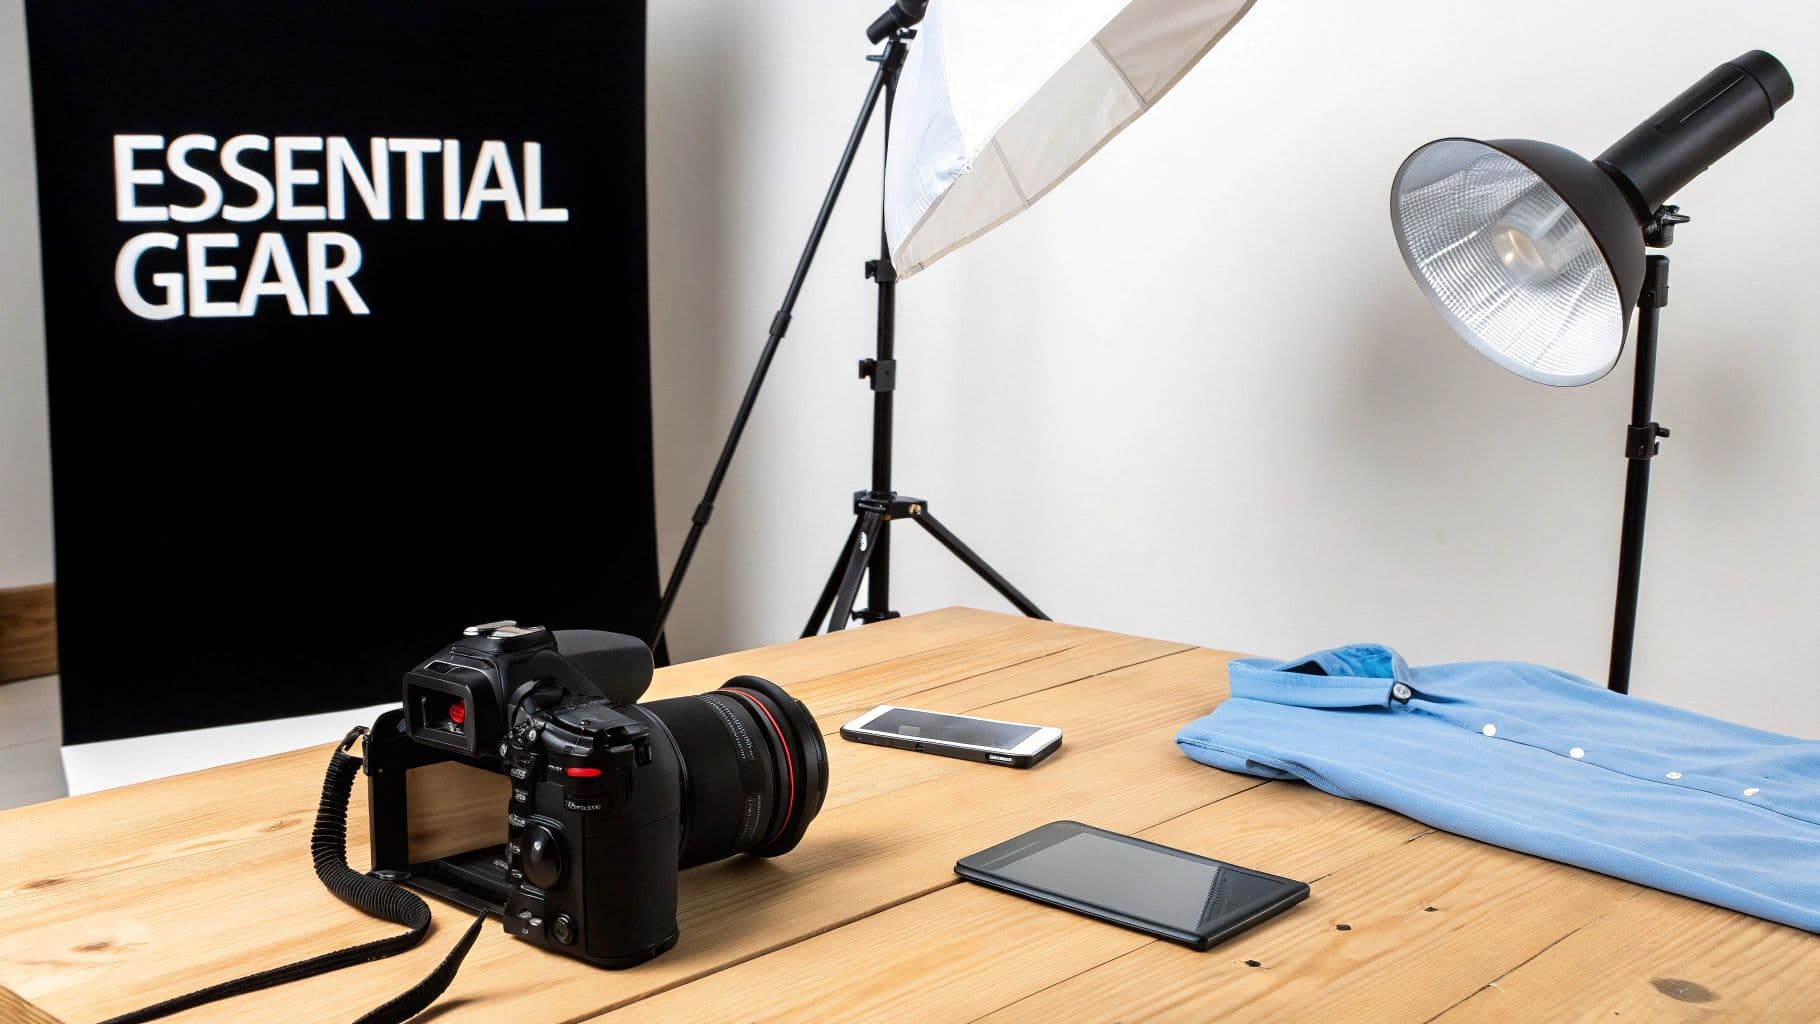
A product photography setup with a camera, blue shirt, smartphone, and tablet on a wooden table, ready for shooting.
Let's get one thing straight: you don't need a high-tech studio to take incredible photos of your clothing. I've seen amazing results come from simple, budget-friendly setups using everything from a DSLR to a modern smartphone.
The secret isn't the camera. It’s the lighting and, just as importantly, stability. A solid tripod is the one piece of gear I consider absolutely non-negotiable. It kills camera shake, guaranteeing your shots are consistently sharp and professional-looking. This is doubly true for flat lays, where you're often shooting straight down.
Building Your Budget-Friendly Home Studio
Having a dedicated space, even a small corner, makes the whole process smoother and more consistent. You can pull together a really effective setup with just a few affordable items that punch way above their weight in terms of quality.
Here’s your basic starter kit:
- A Sturdy Tripod: This is for getting those crisp, blur-free shots. If you plan on shooting flat lays, find one with an overhead arm. It's a game-changer.
- Simple Backdrop: A big roll of white or light gray seamless paper is the industry standard for a reason—it creates a clean, distraction-free canvas.
- Foam Core Boards: Grab two. A white board to bounce light and fill in ugly shadows, and a black one to deepen shadows where you want more contrast and shape.
- Clamps and Tape: You'll use these for everything, from holding your backdrop in place to making tiny, precise styling tweaks on the clothes.
The point isn’t to build a million-dollar studio. It's about creating a controlled, repeatable environment. That way, every product you shoot has that same professional, cohesive look that builds trust across your store.
Essential Camera Settings for Sharp Photos
Nailing your camera settings is how you capture true-to-life colors and all the little details in the fabric. Don't get spooked by the technical stuff; you only need to get a handle on a few key settings.
First, switch your camera to Manual Mode (M). This gives you total control and, more importantly, ensures every single photo has the exact same exposure. Consistency is king.
Dial in these three settings and you're golden:
- Aperture (f-stop): Shoot for a range between f/8 and f/11. This gives you a deep depth of field, which just means the entire garment will be in focus, from the nearest button to the back collar. Anything lower might blur parts of your product.
- ISO: Keep this as low as your camera will go, usually 100 or 200. A low ISO means less digital noise (that grainy look), which translates to cleaner, higher-quality images.
- White Balance: Skip "Auto White Balance," which can change from shot to shot. Instead, set a custom white balance or use a preset like "Daylight" or "Flash" to make sure your colors are spot-on and accurate.
Once you have those beautiful shots, remember that file size matters online. Learning how to optimize images for web is a crucial final step to ensure your site loads fast without turning your crisp photos into a blurry mess.
Achieving Perfect Lighting with a Simple Setup
Lighting is everything. Seriously. It's the single most important factor in product photography. What you're aiming for is soft, even light that shows off the garment without creating harsh, distracting shadows.
You don't need a bunch of expensive strobes. A single light source, whether it's a softbox or just a big, bright window, is often all it takes.
Position your main light at about a 45-degree angle to your product. Then, on the opposite side, place your white foam board. This board will act as a reflector, bouncing soft light back onto the garment to fill in the shadows. This simple one-two punch creates a balanced, professional look with minimal gear.
The Future of Product Shots Is AI-Powered
While flat lay and hanger shots are fantastic for creating clean, professional product images, the next evolution in fashion e-commerce is about bringing those garments to life.
Imagine taking your simple, mannequin-free photos and instantly turning them into dynamic, on-model images—all without booking a single photographer, model, or studio. This isn't some distant fantasy; it's happening right now with AI.
New platforms are completely changing the game for brands of all sizes. The process is surprisingly straightforward: you upload your existing product shots, and the technology generates hyper-realistic images on a diverse range of models in seconds.
How AI Transforms Your Existing Photos
This tech is pretty slick. It takes a standard flat lay or hanger photo and intelligently maps the garment onto a virtual model's body. The AI actually understands the fabric's drape, how it should fit, and its texture, creating an image that’s often indistinguishable from a traditional photoshoot.
One of the biggest wins here is consistency. You can use the same virtual model across your entire catalog, building a cohesive and recognizable brand look.
Plus, the creative freedom is a massive advantage. You can instantly test different poses, backgrounds, and model types in just a few clicks. This makes it incredibly easy to create targeted marketing campaigns or refresh your product listings without reshooting a single thing.
This approach moves beyond simply showing a product. It allows customers to visualize the fit and style on a human form, bridging a critical gap in the online shopping experience and giving conversion rates a serious boost.
The Benefits of Adopting AI Models
We've already established that shooting without a mannequin saves money, but AI takes those savings to a whole new level. Traditional photoshoots can easily run into the thousands, but brands are now turning simple uploads into professional model shots instantly. This slashes the time-to-market from weeks to mere seconds.
This efficiency helps brands tap into a rapidly growing market for AI-powered commercial photography, and it’s an impact felt across the industry.
Beyond the obvious cost savings, here’s where it gets really good:
- Unmatched Scalability: Need to generate hundreds of on-model images for your entire product catalog? You can do it overnight, effortlessly.
- Enhanced Inclusivity: Showcase your clothing on a wide variety of body types, ethnicities, and ages. This makes your brand far more relatable to a broader audience.
- Creative Control: Experiment with countless visual styles and backgrounds without the logistical nightmare of a physical shoot.
- Brand Consistency: Use the same ai generated models across all your listings to create a strong, cohesive brand identity that customers will recognize and trust.
This technology offers a powerful solution for scaling your catalog and creating a more inclusive, engaging shopping experience—all while saving a significant amount of time and money.
For anyone curious about the tools that make this happen, it's worth exploring the latest advancements in AI image generators. By embracing this technology, you're not just learning how to take pictures of clothes without a mannequin; you're future-proofing your brand's entire visual strategy.
Common Questions About Photographing Clothes Without a Mannequin
Even after you've nailed down the basics, you're bound to run into a few tricky situations when shooting without a mannequin. Here are some of the most common questions I get, along with quick, practical answers to get you past those hurdles.
How Do I Keep Clothes From Looking Flat in a Flat Lay Photo?
This is the number one challenge with flat lays. A garment lying completely flat just looks… dead. The goal isn't to make it look puffy or stuffed, but to give it just enough shape to suggest a human body underneath.
The easiest trick in the book is to use tissue paper or even some cotton balls to create subtle dimension. A little bit of stuffing under the shoulders, hips, or bust area will lift the fabric just enough to create gentle curves and natural-looking shadows. Don't smooth everything out perfectly, either—a few realistic folds and creases make the garment feel more real. You can use pins or double-sided tape on the underside of the clothing to hold these subtle shapes in place while you shoot.
What Is the Best Background for Clothing Photography?
For straight-up e-commerce, a pure white or light gray background is the undisputed champion. It’s clean, removes all distractions, and ensures the colors of your clothing look accurate on screen. This creates a professional, consistent vibe across your entire product catalog that builds customer trust.
But for social media, brand lookbooks, or your website's homepage, feel free to break the rules. A textured background like weathered wood, a clean marble slab, or even colored paper can inject a ton of personality and help tell your brand's story.
The most important rule isn't the background itself, but consistency. Pick a style and stick with it. Whether you go for minimalist white or rustic wood, a cohesive look across your images makes your brand feel polished and instantly recognizable.
Can I Get Professional Results With Just My Smartphone?
Absolutely. The camera in your pocket is more than powerful enough to capture stunning, professional-quality product photos. It's not about having the most expensive gear; it's about how you use the gear you have.
To get those pro-level results with your phone, just follow these simple rules:
- Use a Tripod: This is non-negotiable. A tripod kills camera shake, guaranteeing your images are sharp and crisp every time.
- Find Good Light: Set up near a large window where you can get plenty of soft, diffused natural light. Steer clear of harsh, direct sunlight, which creates ugly shadows.
- Nail Your Focus: Turn on your phone's gridlines to help with composition, and always tap the screen right on the garment to lock in your focus.
- Don't Use Digital Zoom: It destroys image quality. If you need a closer shot, physically move your phone closer to the clothing.
- Edit Mindfully: Use a photo editing app to make small tweaks. A little bump in brightness, contrast, or color balance can make your product photos truly pop.
Which Method Is Best for Selling Dresses or Jackets?
For garments where the structure and drape are major selling points—think dresses, blazers, and jackets—the hanger or ghost mannequin method is your best bet. A simple hanger shot is quick and does a great job of showing how the fabric hangs and falls.
If you're aiming for the top tier, though, the ghost mannequin effect is the gold standard. It perfectly showcases the item's three-dimensional shape, fit, and even interior details, giving customers the clearest possible idea of how it will look and feel.
Ready to skip the photoshoots altogether? WearView uses AI to turn your simple flat lay or hanger shots into stunning, on-model images in seconds. Stop spending time on complex setups and start creating studio-quality visuals that sell. See how WearView can transform your product photography.
WearView Team
WearView Content & Research Team
WearView Team is a group of fashion technology specialists focused on AI fashion models, virtual try-on, and AI product photography for e-commerce brands. We publish in-depth guides, case studies, and practical insights to help fashion businesses improve conversion rates and scale faster using AI.