January 19, 2026•23 min read
How to Shoot Product Photos That Convert and Impress
Learn how to shoot product photos with our definitive guide. Discover pro techniques for lighting, styling, and editing to create images that sell.
How to Shoot Product Photos That Convert and Impress
Fantastic product photos don’t just happen when you press the shutter. They’re made long before you even pick up the camera. The real magic lies in the prep work: meticulous garment care, a smart shot list, thoughtful styling, and a clean, organized setup. For a seller-focused walkthrough, see how to take photos of clothes to sell.
Nailing this pre-shoot phase is the single biggest time-saver I've learned in my career. It's the secret weapon that separates a smooth, efficient shoot from a chaotic one that ends in hours of frustrating post-production work.
Building Your Foundation for Standout Product Shots
You can have the best camera gear in the world, but if your prep is sloppy, your photos will be too. Professional-quality images are born from careful planning, not just fancy equipment. Skipping these foundational steps almost always leads to reshoots, inconsistent results, and a ton of time wasted fixing things in Photoshop that could have been prevented from the start.
Think of it this way: you wouldn't build a house on shifting sand. Don't build your product listings on lazy prep work.
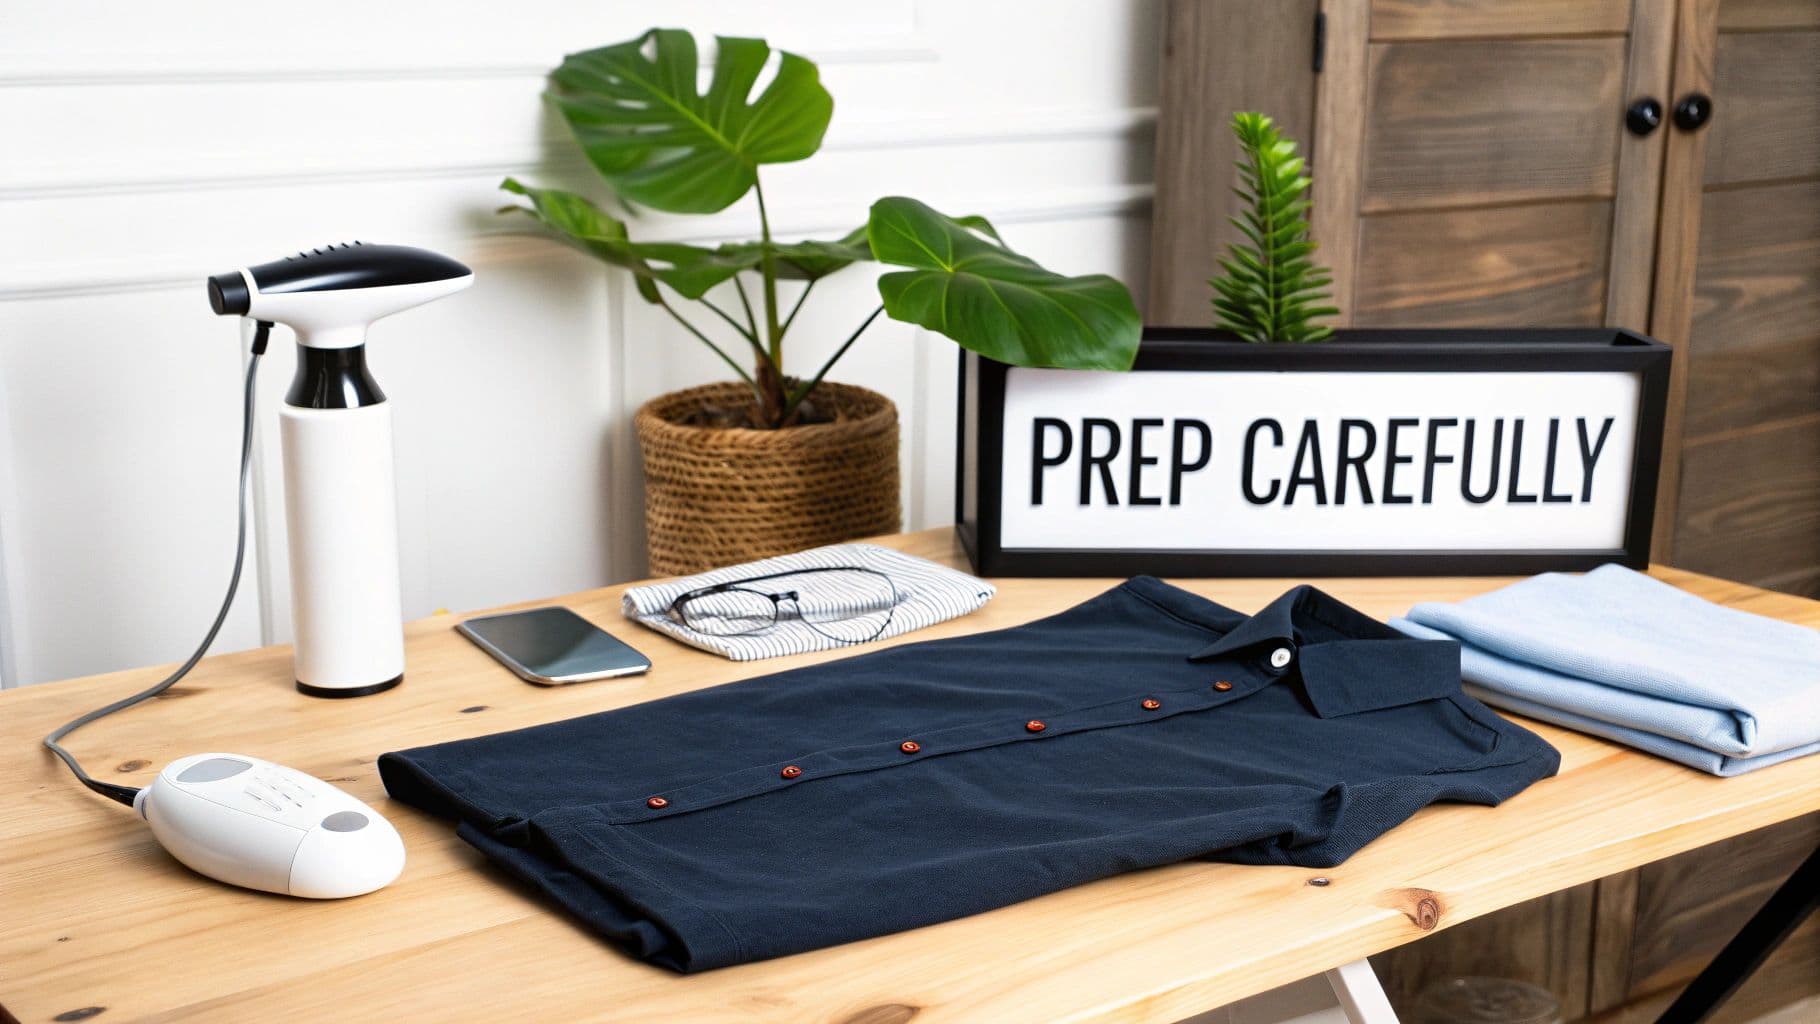
A steam iron and folded shirts on a wooden desk with a 'PREP CAREFULLY' sign.
Meticulous Garment Preparation
Every single wrinkle, piece of lint, or stray thread will be magnified by a high-resolution camera. What looks like a tiny flaw to the naked eye can become a glaring distraction in a final photo. Your first job is to make every single item look absolutely perfect.
This means thoroughly steaming or ironing each garment until it's completely free of creases. Have a lint roller and a microfiber cloth within arm's reach to zap any dust, hair, or fibers right before the item goes in front of the lens. For anything with delicate details like beading or embroidery, do a close inspection to make sure everything is sitting exactly where it should be. This level of detail pays off massively by cutting down your editing time.
Crafting a Strategic Shot List
A shot list is your photoshoot blueprint. It’s a detailed plan that outlines every photo you need for every product, saving you from that gut-wrenching "Oh no, I forgot the back view" moment after everything is packed up. A well-made list is your key to consistency and efficiency on set.
Here's what every good shot list should cover:
- The Essentials: Front, back, and side views. These are the absolute, non-negotiable basics for any e-commerce product.
- Detail Shots: Get in close. Highlight unique textures, cool button details, intricate stitching, or a specific pattern. Show off what makes the item special.
- In-Context Shots: Show the product in its natural habitat—on a model, styled with other pieces, or in a lifestyle setting that tells a story.
- Scale Shots: Help the customer understand the product’s true size. This can be as simple as showing it on a person or next to a universally understood object.
A detailed shot list doesn't just keep you organized on shoot day. It ensures every product is shown in its entirety, which helps answer customer questions before they're even asked and can seriously lower your return rates by setting accurate expectations.
Essential Styling and Prop Selection
Styling is what gives your product a personality and tells a story. Your goal here is to enhance the item, not to distract from it. My go-to rule for props is simple: if it doesn't add relevant context or support the product's story, leave it out.
For instance, a pair of sunglasses and a sun hat perfectly complement a beach cover-up. A random coffee mug? Not so much. Keep your props on-brand and your color palette cohesive. This applies whether you're building a full lifestyle set or just choosing a background for a flat lay. A consistent visual theme across all your photos is what builds a strong, recognizable brand identity.
If you're thinking about creating a dedicated shooting space, our guide on how to prepare an e-commerce shoot studio has some great tips for setting up the perfect environment.
Choosing Your Gear and Mastering Light
You don't need to rent out a massive studio or drop thousands on gear to create photos that stop scrollers in their tracks. While professional equipment certainly offers more control, the real secret to killer product photography isn't your camera's price tag—it's how you understand and shape light.
Honestly, your smartphone can be just as mighty as a DSLR when you nail the fundamentals.
And there's a reason everyone is upping their photo game. The global eCommerce product photography market was valued at USD 0.85 billion in 2025 and is on track to nearly triple by 2034. Why the explosion? Because businesses that invest in high-quality, professional-looking visuals report up to a 27% jump in conversion rates. This isn't just about pretty pictures; it's a critical business investment. You can dig into the numbers yourself in this recent market analysis on eCommerce photography trends.
Selecting the Right Camera for Your Needs
Let's bust a common myth right now: you do not need to spend a fortune on a camera to get started. The best camera is the one you already have and know how to use.
- Smartphones: Don't sleep on your phone. Modern phone cameras are incredibly powerful, easy to use, and let you instantly review and share your shots. The pro move is to use an app that gives you manual control over focus and exposure. This simple step elevates your photos from casual snaps to something much more polished.
- DSLR & Mirrorless Cameras: This is where you get maximum creative freedom. Being able to swap lenses and manually tweak every setting gives you the power to handle any lighting situation. You can achieve specific, intentional looks, like that beautifully blurred background that makes your product the star of the show.
No matter what you're shooting with, a sturdy tripod is non-negotiable. It’s the single best thing you can buy to instantly improve your photos. It eliminates camera shake, guarantees sharp images, and helps you keep your framing consistent across your entire product catalog.
Understanding the Exposure Triangle
This is what separates the pros from the amateurs. Mastering three core camera settings—the "exposure triangle"—is everything. Getting them to work in harmony gives you total control over the brightness and style of your images.
- Aperture (f-stop): This controls how much of your image is in focus. A low f-stop (like f/1.8) creates a shallow depth of field, giving you that dreamy, blurry background perfect for lifestyle or detail shots. A high f-stop (like f/11) keeps the entire scene sharp, which is exactly what you want for standard product-on-white photos where every detail needs to be crystal clear.
- ISO: Think of this as your camera's sensitivity to light. Your goal is to keep this as low as possible, usually ISO 100-200, to get the cleanest, most detailed images without any digital "grain." You should only ever raise the ISO as a last resort when you can't add more light and aren't using a tripod.
- Shutter Speed: This is simply how long your camera's sensor is exposed to light. A fast shutter speed freezes motion, while a slow one can create artistic blur. Since your camera will be locked down on a tripod, you can use slower shutter speeds without any fear of camera shake, allowing more light in without cranking up the ISO.
Think of these three settings like ingredients in a recipe. You can't just change one without it affecting the others. The goal is to find the perfect balance that makes your product look absolutely irresistible.
Mastering Light on Any Budget
Light is the single most important element in your photos. Full stop. It dictates the mood, defines the texture of a fabric, and makes your product pop right off the screen. The best part? You have fantastic options, whether you're working with free sunlight or an affordable lighting kit.
The Natural Light Approach
Natural light from a large window is a photographer's best friend. It’s soft, diffused, and creates an incredibly flattering look that's perfect for everything from flat lays to lifestyle shots.
- Best Time to Shoot: Set up near a window when you’re getting bright, indirect sunlight. An overcast day is a gift—the clouds act like a giant, free softbox, giving you beautiful, even light.
- Controlling Shadows: Even with great window light, you'll likely have some shadows on the side of the product opposite the window. The fix is simple and cheap: grab a white foam board to use as a reflector. Just place it opposite the window to bounce that beautiful light back, filling in the shadows and revealing more detail.
Affordable Artificial Lighting Setups
While natural light is gorgeous, it’s also unpredictable. For consistent, repeatable results day after day, an artificial light kit is a game-changer. And you don't need to break the bank.
- One-Light Setup: A single softbox or LED panel is a classic for a reason. Place it at a 45-degree angle to your product and use a reflector on the opposite side to soften any harsh shadows. It’s simple, effective, and gives you a clean, dimensional look.
- Two-Light Setup: For that perfectly even, shadowless lighting you see in major catalogs, use two lights. Place one on each side of your product, both at a 45-degree angle. This technique wraps your product in light, ensuring every detail is perfectly illuminated.
With a solid grasp of your gear and a little bit of light-wrangling, you're already well on your way to creating stunning product photos that not only look professional but actually drive sales.
Nailing the Shot: A Guide to the Three Core Photography Styles
Once the gear is set and you have a handle on the lighting, it's time for the fun part: bringing your products to life. Every garment has a personality, and a huge part of learning how to shoot great product photos is picking the right way to tell its story.
By mastering the big three—flat lay, hanger/mannequin, and on-model shots—you build a versatile toolkit that can showcase everything from a sharp, structured blazer to a soft, flowing dress. Each style does something different. Flat lays give you that editorial vibe, hanger shots keep things clean and consistent, and on-model photos forge a real human connection by showing fit and movement. Let's break down how to get each one just right.
Crafting Compelling Flat Lay Compositions
Flat lay photography is basically the art of arranging items on a flat surface and shooting from directly overhead. It’s perfect for highlighting product details, creating styled outfit grids, and building a strong brand aesthetic, especially on platforms like Instagram and Pinterest. The real secret is making the composition feel thoughtful and balanced, not like you just tossed some clothes on the floor.
Start by laying your main garment down first, smoothing it out until it's perfect. From there, you can start building the scene around it with props that make sense.
- Find Your Balance: Use the rule of thirds. Placing your hero item a little off-center almost always creates a more dynamic, interesting image.
- Give It Breathing Room: Don't cram everything into the frame. Negative space is your best friend—it helps guide the viewer's eye and keeps the shot from feeling cluttered and chaotic.
- Tell a Story: Pick props that add context and meaning. A pair of sunglasses and a paperback novel next to a swimsuit instantly screams "vacation."
It's about more than just picking a style; it's about presentation. Digging into powerful visual storytelling techniques can really elevate your shots. A well-composed flat lay doesn't just show a product; it sells a whole vibe.
Achieving a Clean Look on Hangers and Mannequins
When a customer really needs to understand a garment's true shape, how it drapes, or its structure, hanger or mannequin shots are your go-to. This approach, often called the "ghost mannequin" or invisible model effect, gives clothing a 3D form without the distraction of a person, letting shoppers focus entirely on the product itself. The goal is always a crisp, professional, and perfectly symmetrical image.
Consistency is absolutely everything here. Use the exact same hanger or mannequin for all your products to create a cohesive, uniform catalog. Make sure the garment is perfectly centered, steamed, and free of any weird pulls or wrinkles. For hanger shots, a thin, neutral-colored hanger is best so it doesn’t steal the show.
This simple flowchart illustrates the fundamental relationship between your camera, your light source, and the product you're shooting.
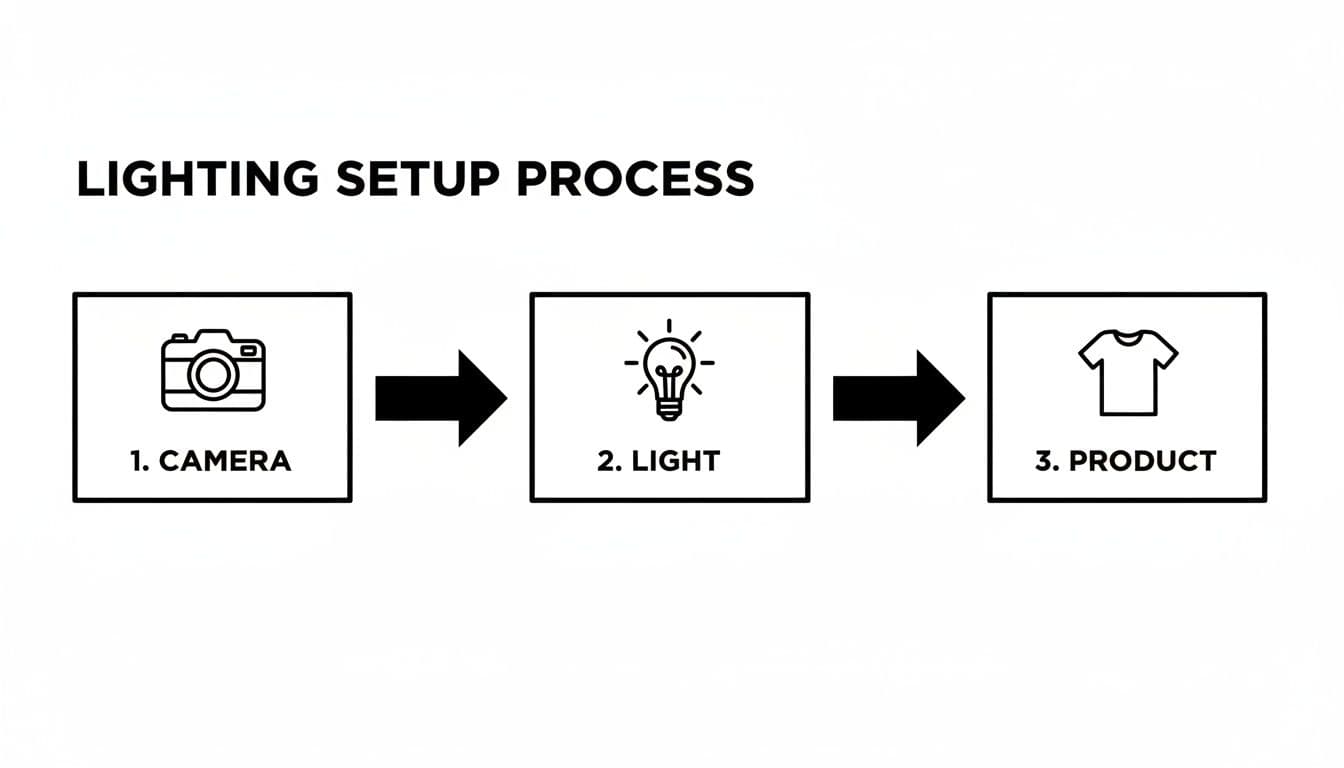
Flowchart illustrating the lighting setup process for product photography: camera, light, and product.
This visual helps reinforce that a direct, controlled lighting setup is key to highlighting the product’s shape and texture without creating distracting shadows.
Directing Authentic On-Model Poses
This is where the magic happens. On-model photography is your best tool for creating a connection. It shows customers how a garment actually fits, moves, and feels in a real-world context, helping them picture themselves wearing it. The challenge isn't just taking a good photo; it's directing your model to create poses that feel genuine and authentic, not stiff or staged.
Instead of just telling them to "pose," give them something to do. Ask the model to walk, laugh, or interact with a prop. Movement creates real moments and helps the clothing drape naturally.
The best model shots capture a feeling, not just a product. Your main job is to create an environment where the model feels comfortable and relaxed. Their ease will translate directly into more relatable and compelling photographs.
The data backs this up. E-commerce brands have increased their use of professional photography platforms by 33% recently. Why? Because high-quality images that accurately show fit and form slash return rates. And with visual posts on social media getting 94% more views, strong on-model imagery is a massive driver for both sales and engagement.
To make sure you don't miss anything, just run through this quick checklist on shoot day:
- Full-Length Poses: Capture the entire outfit to show proportions and how it all works together.
- Detail Shots: While it's being worn, zoom in on key features like a unique neckline, pocket details, or the fabric's texture.
- Action Shots: A simple step, a turn, or a hand slipping into a pocket adds life and shows how the fabric moves.
Refining Your Images with a Pro Workflow
Getting the shot is only half the battle. Seriously. The real magic that turns a good product photo into a great one often happens after the camera is put away. Your post-production workflow is where you polish the raw images, ensuring they look professional, accurate, and ready to convert browsers into buyers.
Think of it as the bridge between what you captured in-camera and the final, perfect image that goes live on your store. Nailing this process isn't just about making things look pretty; it's about building trust with your customers through visuals that are both stunning and true-to-life.
Speed Things Up with Tethered Shooting
If there’s one change that will level up your entire photoshoot, it's tethered shooting. It sounds technical, but it’s dead simple: you connect your camera to a computer with a cable, and your photos pop up on the big screen the instant you take them.
No more squinting at a tiny 3-inch camera display to check if the focus is tack-sharp or if a tiny wrinkle is ruining the shot. You see everything, full-size, in real time. This lets you catch and fix missed focus, weird shadows, or awkward styling right then and there, saving you from the absolute nightmare of discovering those problems hours later. It’s a massive time-saver and quality-control booster.
Tethered shooting is the difference between guesswork and precision. When you can see your images on a proper monitor, you can fine-tune your lighting, composition, and product details with total confidence, which nearly eliminates the need for expensive, time-wasting reshoots.
A Practical Post-Processing Checklist
Once the shoot is wrapped, a consistent editing routine is your best friend. The goal here isn’t to slap on a filter and call it a day. It's about enhancing the photo to make the product look its absolute best while staying 100% accurate. For this, most pros (myself included) lean on software like Adobe Lightroom—it’s powerful but still intuitive.
Here’s a quick-and-dirty checklist that covers the core edits every single one of your product photos should get:
- Crop and Straighten: First things first. Make sure your product is framed perfectly and aligned consistently from one image to the next.
- White Balance Correction: This is critical for color accuracy. Adjust the image so that whites are pure white, not tinged with yellow or blue. This ensures the customer sees the real color of the garment.
- Exposure and Contrast Adjustments: Bring up the brightness just a touch and add a little contrast to make the details pop. Be careful not to blow out the highlights or crush the shadows.
- Minor Retouching: Grab the spot removal tool and zap any dust, stray threads, or tiny imperfections you missed during prep. It's the little things that count.
- Sharpening: Apply a subtle amount of sharpening to make the textures and details look crisp and clear on a screen.
If you’re ready to go beyond the basics, our complete guide to e-commerce image editing dives into more advanced techniques.
Exporting Your Images for the Web
Alright, last step. You’ve got to get your beautifully edited images out of your software and ready for your website and social media. Using the wrong settings can result in painfully slow-loading pages or blurry, pixelated photos—both are conversion killers.
The name of the game is balancing image quality with file size. You need sharp images, but huge files will slow your site down to a crawl, and nobody sticks around for that.
- File Format: For almost all product photos, JPEG is your go-to. It gives you fantastic quality for a small file size.
- Image Size: A good rule of thumb is to size your images at around 2000 pixels on the longest side. This is big enough for zoom features without being overkill.
- Quality Setting: When you export, setting the JPEG quality somewhere between 70-80% is the sweet spot. It dramatically shrinks the file size with virtually no noticeable drop in visual quality.
The demand for high-quality visuals is only growing. The photography services market was valued at $55.6 billion in 2023 and is expected to hit $81.83 billion by 2032. Alongside that, the photo editing software market stood at $449.2 million in 2023, showing just how important both capturing and refining your images has become.
Of course, once you've perfected your product shots, you need to make sure people actually see them. A little strategic planning goes a long way, so check out these insights on the best times to post on Instagram to maximize your reach and engagement.
Shooting for AI: Getting Your Photos Ready for Virtual Try-On
E-commerce is moving fast, and AI is driving the change. We’re at a point where you can take a simple photo of a t-shirt or dress and have an AI instantly generate stunning, on-model photos. This tech is a game-changer for brands, saving a ton of time and money that used to go into traditional photoshoots.
But here’s the thing: AI isn’t magic. Just like a human photographer, it needs good, clean source material to work with. Think of it as "garbage in, garbage out." Learning how to shoot your products for an AI is a crucial new skill. It connects your existing photography know-how with technology that lets you scale content like never before. The goal is to give the AI the cleanest, most accurate visual data possible.
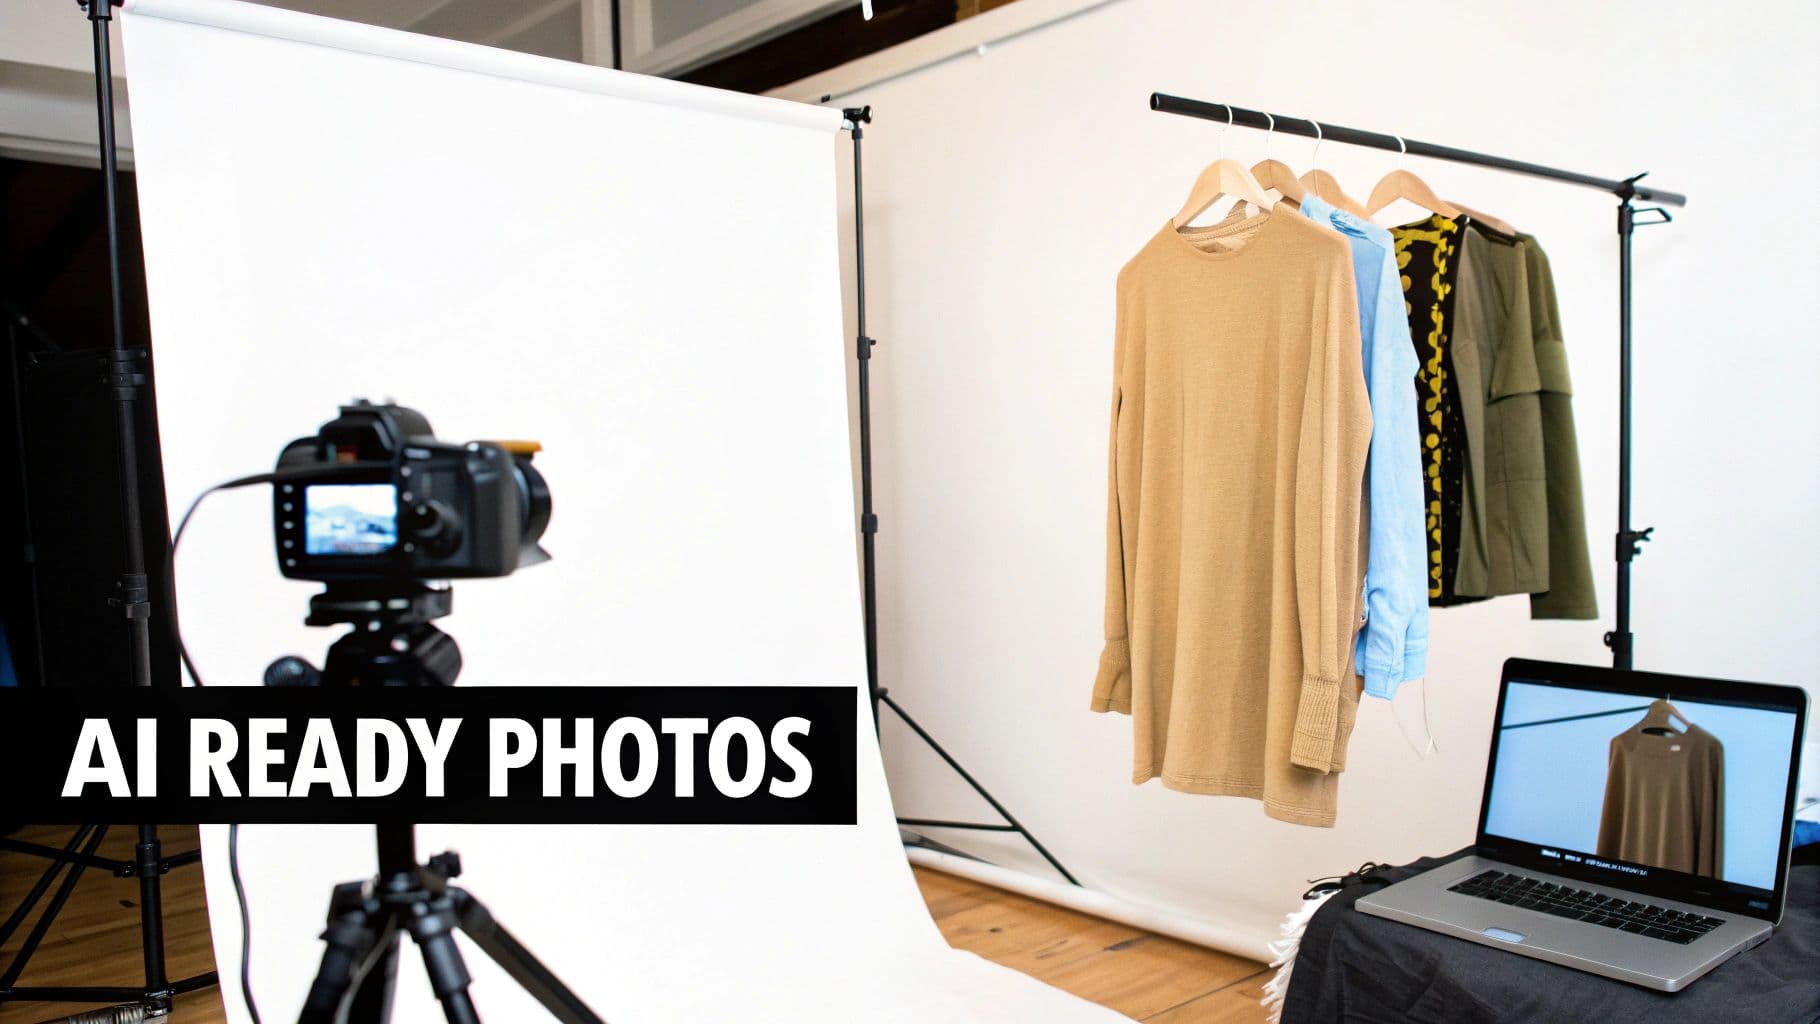
A professional product photography studio setup with a camera, white backdrop, clothing rack, and laptop.
Prepping Your Garments for an AI Makeover
The number one rule for shooting AI-ready photos is clarity. The AI has to "see" every little thing about the garment—its true shape, texture, how the fabric falls, and its exact color. That means no distractions.
This all starts with meticulous prep, just like you would for any high-end shoot. Get that steamer fired up. Every item needs to be perfectly steamed and completely free of wrinkles or lint.
When you lay the garment out or put it on a hanger, make sure it looks as flat and natural as possible. Any weird bunching, folding, or creasing can throw the AI for a loop, leading to distorted or just plain wrong results when it tries to place the item on a virtual model.
The Technical Checklist for Perfect AI Shots
Beyond a wrinkle-free product, there are a few technical rules you have to follow to get those professional-grade AI images. Consider this your cheat sheet for feeding the algorithm what it wants. Cutting corners here will only lead to frustrating, low-quality pictures.
Here’s what you need to nail every time:
- A Clean, Solid Background: Shoot your garment against a simple, non-reflective background. Pure white or a light, neutral grey is perfect. This helps the AI easily cut the product out from its surroundings without getting confused.
- Even, Diffused Lighting: Harsh shadows are the enemy. They can hide important details or trick the AI into seeing contours that aren't really there. Use a big, soft light source, like a large softbox or even an overcast window, to light the whole garment evenly from the front.
- High Resolution and Sharp Focus: Detail is everything. Use a camera that can capture high-resolution images and make sure the entire product is tack sharp. An aperture between f/8 and f/11 is usually your best bet for getting everything in focus from edge to edge.
- A Straight, Head-On Angle: Don't get creative with angles here. Photograph the garment straight-on from the front. Shooting from an angle will distort the product's true proportions, and the AI will struggle to map it onto a model’s body correctly. Do the same for the back shot—consistency is key.
The quality of your AI-generated on-model photo is directly tied to the quality of your source image. A clean, well-lit, and accurately shot flat-lay or hanger photo is the foundation for a final asset that looks real and sells.
How to Handle Different Types of Clothing
Not all clothes are made equal, and some need a little extra thought when you're shooting for AI. You wouldn't handle a stiff denim jacket the same way you’d handle a flowy silk dress, right?
For more structured pieces like blazers or pants, laying them flat usually works best. Take the time to arrange them so they reflect their natural shape as if they were being worn.
For items with a lot of drape, like dresses or long skirts, hanging them against a clean wall is often a better move. This lets the fabric hang naturally, which is exactly the kind of data the AI needs. This detail is what powers today's advanced virtual dressing room technology, where realism is everything.
Whatever you do, resist the urge to pin, tuck, or style the garment in an unnatural way. Your job is to show the product exactly as it is. Let the AI handle the fitting and styling on the virtual model. Stick to these guidelines, and you’ll be creating assets that are ready not just for your website today, but for the future of how people shop for fashion online.
Common Product Photography Questions, Answered
Even with the best game plan, you're going to run into questions on set. It happens to everyone. Let's tackle some of the most common hurdles I see photographers face, so you can solve problems on the fly and keep your shoot moving.
What’s the Best Camera for Product Photography?
Honestly, while a DSLR or mirrorless camera gives you ultimate control, you can get surprisingly great results with a modern smartphone, provided the lighting is on point. The real game-changer isn't the camera body—it's having manual control over settings like aperture and ISO. Many phone apps offer this now.
If you are using a dedicated camera, a solid 50mm lens is the workhorse of product photography. Think of it as the Goldilocks lens—it captures products with minimal distortion, closely mimicking how the human eye sees things. It’s a reliable choice for crisp, true-to-life images and a fantastic place to start.
How Do I Get That Pure White Background?
Getting that seamless, pure white e-commerce background is a two-part dance between lighting and editing. You can't just do one and expect professional results.
First, you need to light your backdrop separately from your product. The goal is to make the background as bright as you can without that light spilling onto your garment and blowing out the details. A well-placed reflector can then gently bounce some light back onto your product to fill in any harsh shadows.
Then, you finish the job in post-production. Using software like Photoshop or Lightroom, you can use the Levels or Curves tools to push the background to a perfect digital white (RGB 255, 255, 255). For truly professional work, the best method is to cut the product out, place it on its own layer, and drop it onto a brand-new, perfectly white canvas.
Don't ever expect the camera to deliver a perfect white background straight out of the box. That clean, professional catalog look comes from a combination of smart lighting on set and precise adjustments in the editing suite. It’s what makes the products pop.
Can I Really Use Natural Light for Professional Shots?
Absolutely. Natural light can be your best friend, especially when you're starting out. It’s free and creates a soft, appealing look that’s perfect for lifestyle shots and apparel.
The key is to set up near a large window, ideally on a slightly overcast day. This gives you a giant, beautifully diffused light source that wraps around your products without creating harsh, distracting shadows. Just be sure to use a white reflector or foam board to bounce light back into the darker areas and even things out.
The only real downside? It’s inconsistent. The light changes throughout the day, which is why most established brands eventually invest in a studio lighting setup for perfectly uniform results, shot after shot.
How Many Photos Should I Take of Each Product?
You want to give your customer a complete 360-degree understanding of the item. Aim for 5-8 photos per product at a minimum. This isn't just about showing off; it's about building buyer confidence.
Your shot list should always include:
- The main, hero shot (full front view)
- A shot of the back
- Views from both sides
- A close-up to show off texture, fabric, or details
- An "in-context" or lifestyle shot
For clothing, showing the item in different contexts is crucial. A complete set would include the garment as a flat lay, on a hanger, and—most importantly—on a model. This gives customers the best possible sense of its fit, drape, and real-world feel.
Stop wasting time and money on traditional photoshoots. With WearView, you can upload a single photo of your garment and instantly generate hundreds of on-model images, ready for your website, social media, and ads. Discover how AI can transform your fashion photography at WearView.
WearView Team
WearView Content & Research Team
WearView Team is a group of fashion technology specialists focused on AI fashion models, virtual try-on, and AI product photography for e-commerce brands. We publish in-depth guides, case studies, and practical insights to help fashion businesses improve conversion rates and scale faster using AI.