Setting up a proper ecommerce shoot studio is less about buying a fancy camera and more about building a powerful content engine. This guide is your blueprint for creating a scalable system for stunning product visuals—whether that’s a physical studio, an AI-powered workflow, or a smart hybrid of both.
Your Modern Ecommerce Studio Blueprint
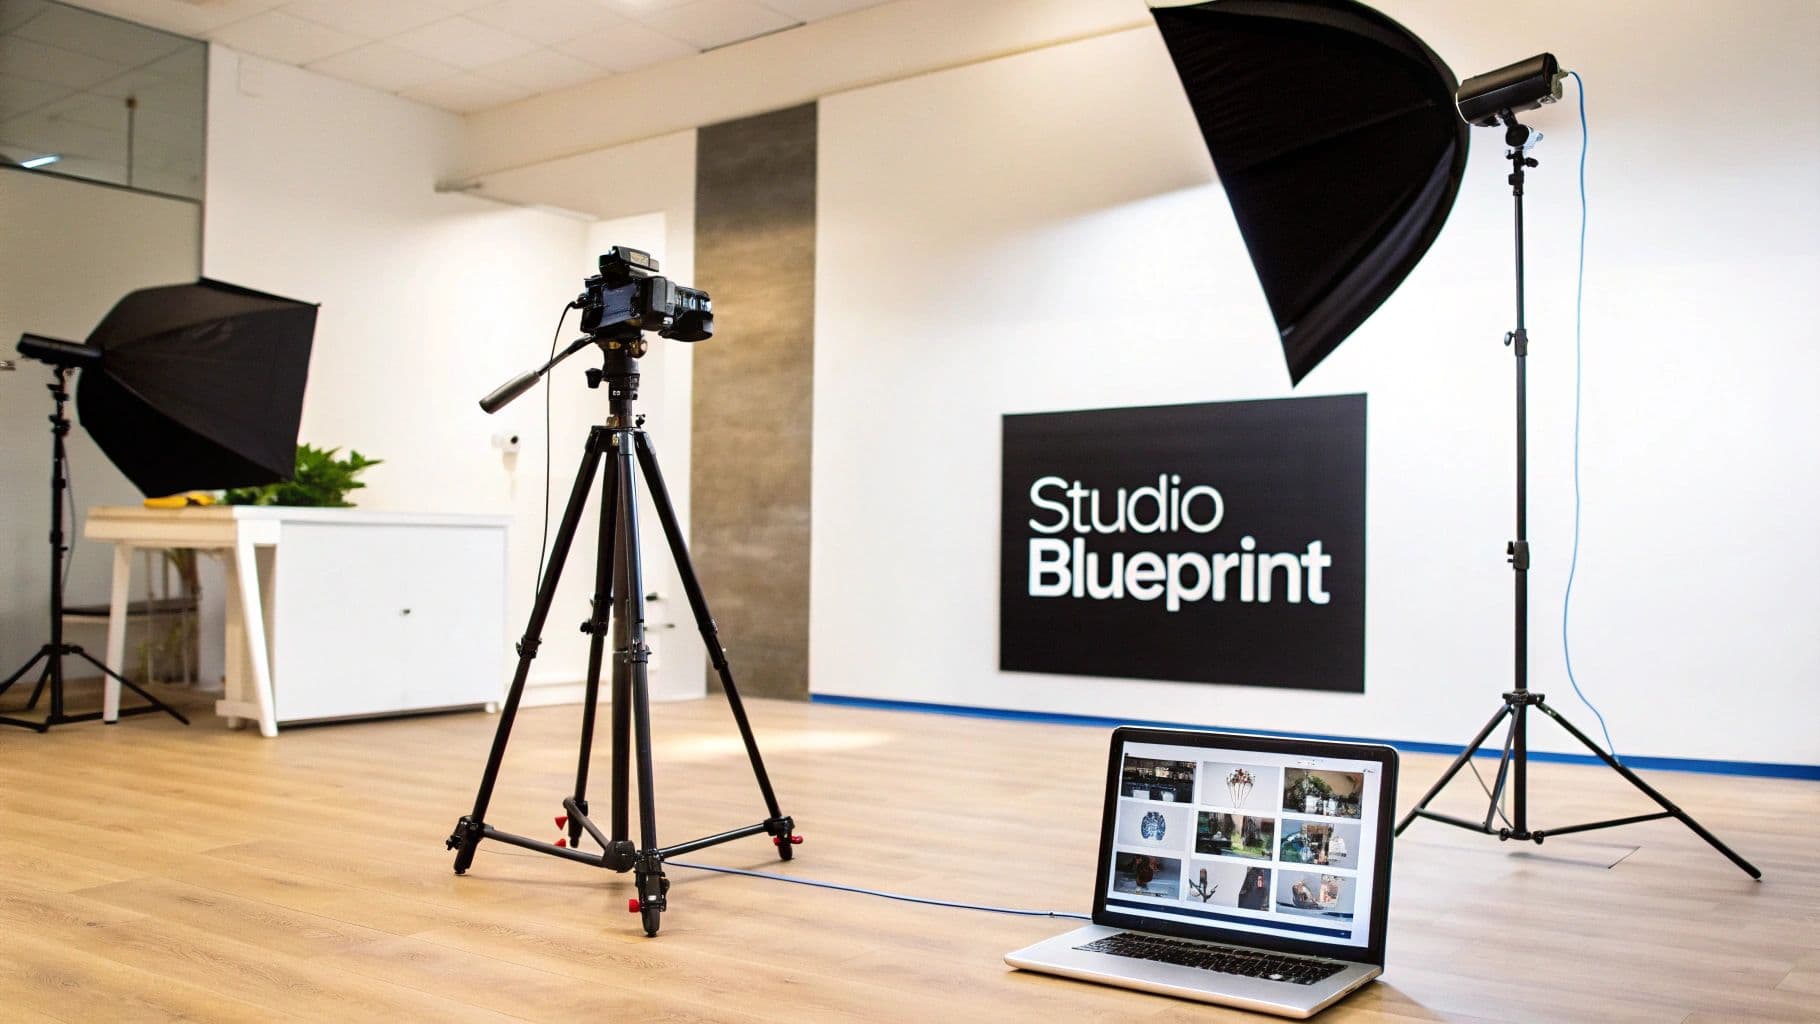
Modern photography studio setup with camera on tripod, softbox lights, and laptop displaying images.
In ecommerce, your product photos are your best salespeople. They have to do all the heavy lifting when customers can't physically touch or try on your items. The problem? Traditional photoshoots are painfully slow and expensive, creating a huge bottleneck for brands that need to launch new collections fast.
This blueprint gets straight to solving those real-world problems. We're skipping the theory and giving you an actionable roadmap for setting up a content creation system that actually drives revenue. It’s about building an efficient, repeatable process—not just pointing a camera at a white wall.
The Core Components of a Successful Studio
An effective studio really boils down to four key pillars. Nail these, and you'll produce visuals that not only look professional but also convert browsers into buyers. If you let any one of these slide, you'll end up with inconsistent quality or frustrating slowdowns.
Here's what you need to get right:
- Essential Gear: This is about choosing the right cameras, lenses, lighting, and backdrops that are perfectly suited to your specific products.
- Optimal Space: It’s all about the layout. You need a design that maximizes efficiency for shooting, prepping products, and storing everything.
- Streamlined Workflow: You need a seamless, documented process that takes a product from the moment it arrives to the final published image.
- The Right Talent: This means assembling a team—whether it’s in-house staff or trusted freelancers—who can execute your vision consistently.
A well-planned studio isn't a cost center; it's a revenue driver. The ability to produce high-quality visuals on demand gives you a massive competitive advantage. You can react to market trends and get products live faster than anyone else.
Moving Beyond Photography to Video
While killer product shots are the foundation, video content is becoming absolutely essential. When you’re setting up your space, you need to think about the bigger picture of ecommerce video production and how your setup can pull double duty. A versatile space lets you create everything from simple 360-degree product spins to engaging clips for social media.
We'll also dig into how modern AI solutions are completely changing the game for product photography. These tools offer a faster, more affordable way to get high-quality results, and in some cases, you might not even need a physical studio. Whether you build a physical space, go all-in on an AI workflow, or create a hybrid model, this is your complete plan for creating visuals that sell.
Choosing Your Studio Space and Essential Gear
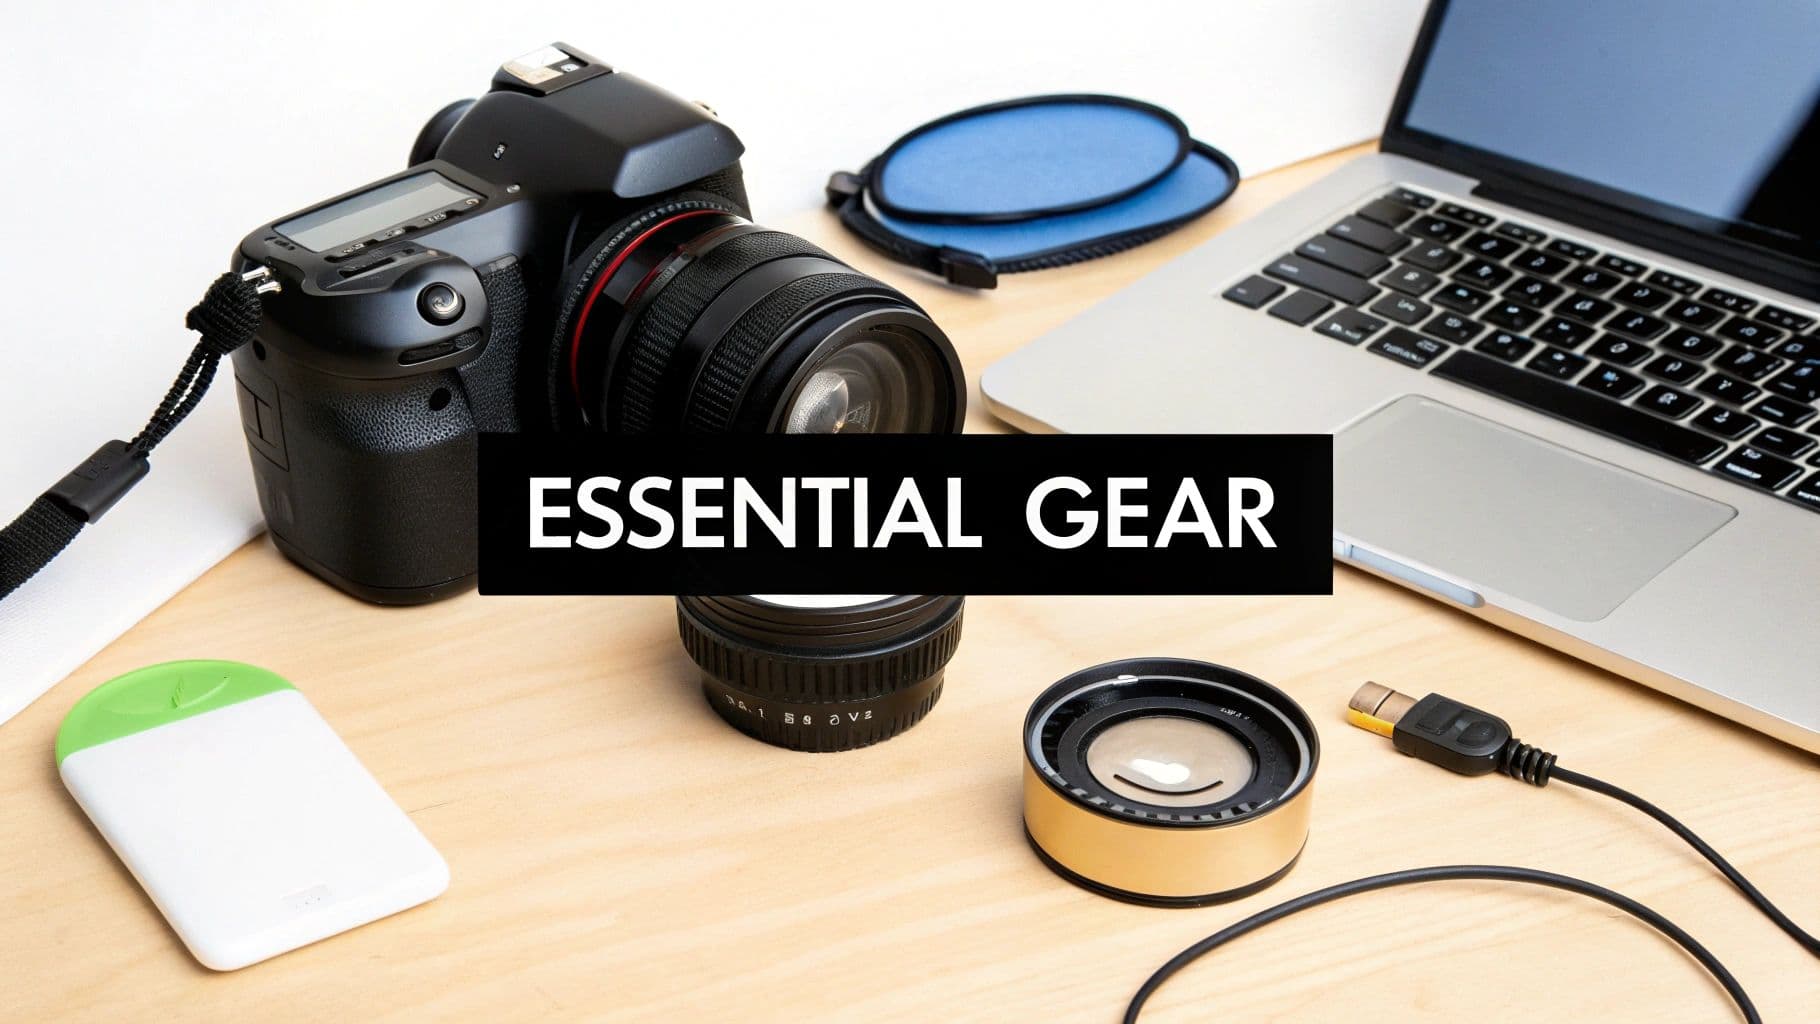
A flat lay of essential photography and tech gear including a camera, lenses, and a laptop on a wooden desk.
Building a physical ecommerce shoot studio comes down to two things: the right space and the right gear. Forget the idea that you need the most expensive equipment on the market. The real goal is to make smart, scalable investments that match your product, fit your brand’s look, and ultimately drive sales.
Your first studio doesn't need to be a sprawling warehouse. Many brands get their start in a spare room or a cleared-out corner of an office. What matters most is having enough room to work. A 100-150 square foot area is a solid starting point, giving you space for a backdrop, lights, and room to maneuver.
The single most important feature of any space is your ability to control the light. Find a room with windows you can completely black out. This creates a blank canvas, ensuring your lighting setup is the only thing illuminating your products—the absolute key to consistent results.
Selecting Your Core Camera and Lenses
Think of your camera as the heart of your operation, but the lens is what truly brings your vision to life. The old DSLR versus mirrorless debate is mostly settled for ecommerce. While both get the job done, mirrorless cameras are lighter, more compact, and packed with features like superior video and silent shutters, making them the go-to for modern studios.
But the real magic is in the glass.
- Prime Lenses: These have a fixed focal length (like 50mm or 85mm). They're incredibly sharp and usually have wider apertures, letting in more light and making it easy to create that soft, blurry background that makes products pop. A classic 50mm is a versatile workhorse for almost anything.
- Zoom Lenses: With a variable focal length (like a 24-70mm), these lenses offer pure flexibility. You can reframe your shot without moving the camera, which is a massive time-saver when you're shooting products of different sizes back-to-back.
For example, if you're shooting a delicate piece of jewelry, a 100mm macro prime lens is your best friend for capturing those tiny, intricate details. For clothing, a 35mm or 50mm prime gives a natural perspective that won’t distort the garment's shape. Getting these details right is a huge part of effective apparel product photography.
Mastering Your Lighting and Backdrops
Lighting isn't just important; it's everything. It dictates the mood, defines the shape, and reveals the texture of your products. Your main choice here boils down to strobes (flashes) or continuous lights.
Strobes deliver a powerful, instantaneous burst of light that freezes motion, giving you incredibly crisp, sharp images. On the other hand, continuous LED lights are always on. This makes them amazing for beginners because you can see exactly how the light is hitting your product in real-time. They’re also a must-have if you plan on shooting any video.
To shape that light, you'll need modifiers:
- Softboxes: These create a soft, diffused light that smooths out harsh shadows. They’re the standard for most ecommerce shoots. A big octagonal softbox is perfect for creating flattering light on a model.
- Umbrellas: Simple and effective, umbrellas spread a broad, soft light over a large area. They're great for evenly lighting up bigger products or backgrounds without much fuss.
Your backdrop is the stage. A simple roll of seamless white paper is the industry standard for those clean, classic product-on-white shots. If you're building a more permanent setup, a cyclorama wall (or "cyc wall") creates a seamless, corner-free background that’s a dream for high-volume studios shooting big items like furniture.
The table below breaks down how you might equip your studio, whether you're just starting out or scaling up for high-volume production.
Essential Ecommerce Studio Gear Breakdown
| Equipment Category | Entry-Level (Startup) | Mid-Range (Growing Brand) | Professional (High-Volume) |
|---|---|---|---|
| Space | Corner of an office or spare room (100+ sq ft) | Dedicated small room or garage (200-300 sq ft) | Dedicated studio space or small warehouse (500+ sq ft) |
| Camera | Entry-level mirrorless (e.g., Sony a6400) | Mid-range full-frame mirrorless (e.g., Sony a7 IV) | Professional full-frame camera (e.g., Canon EOS R5) |
| Lens | 50mm f/1.8 prime lens ("nifty fifty") | 24-70mm f/2.8 zoom lens for versatility | Collection of prime lenses (50mm, 85mm, 100mm macro) |
| Lighting | Two continuous LED panels with softboxes | Three-point strobe kit with various modifiers | High-power strobe system (e.g., Profoto) with large modifiers |
| Backdrop | Roll of seamless paper (white, grey) | Multiple rolls of paper, vinyl backdrops | Permanent cyclorama wall, multiple background options |
| Tripod | Basic aluminum tripod (e.g., Manfrotto Compact) | Sturdy carbon fiber tripod with a geared head | Heavy-duty C-stands and a robust studio tripod |
| Tethering | USB cable direct to laptop | Dedicated tethering cable with jerk-stopper | Tethering station with a calibrated monitor |
Remember, this is a roadmap, not a rigid set of rules. The best gear is the gear that fits your workflow and budget, enabling you to produce consistently great images efficiently.
Key Takeaway: Every piece of gear should solve a specific problem. Don't buy a macro lens if you sell refrigerators. Invest in a huge softbox if your main product is clothing. Purposeful investment is the name of the game.
Essential Studio Infrastructure
A few final pieces of infrastructure will tie everything together and make your life infinitely easier.
- A Sturdy Tripod: This is completely non-negotiable. A good tripod eliminates camera shake and lets you lock in your angle for shooting multiple products, ensuring every shot is perfectly consistent.
- Tethering Station: "Shooting tethered" just means your camera is connected directly to a computer. Images pop up on a big screen the instant you take them, so you can immediately spot issues with focus, lighting, or styling. It's a game-changer for efficiency.
- Light Stands and C-Stands: You need something to hold your lights and modifiers securely. Don't cheap out here—investing in quality stands prevents gravity from causing a very expensive accident.
Taming the Beast: Your Photoshoot to Post-Production Workflow
So you’ve got the professional gear. That’s a fantastic start, but the real secret to running a successful ecommerce shoot studio isn’t the camera—it’s the workflow. This is your battle-tested, repeatable process that takes a product from a cardboard box to a stunning, sales-driving image on your site. Without one, you’re just winging it, and that’s a recipe for inconsistent photos and wasted hours.
Think of your workflow as the assembly line for your visual content. It breaks down what feels like a messy, creative task into a series of simple, predictable stages. This is how you shoot hundreds of different products and make them all look like they belong to one cohesive, professional brand.
A truly great workflow is all about smashing bottlenecks before they happen. It anticipates the logjams—waiting on product approvals, getting buried in editing—and builds the solutions right into the process. The end goal is a smooth, logical flow from one step to the next, cutting out friction and cranking up your output.
The Make-or-Break Pre-Production Phase
Honestly, a shoot’s success is decided long before anyone picks up a camera. Pre-production is where you lay all the groundwork for a stress-free day. Cutting corners here is the number one mistake I see, and it almost always leads to confusion, frustration, and expensive reshoots.
Two documents are your absolute lifeline here: the shot list and the style guide.
- The Shot List: This is way more than a simple checklist; it's your playbook for the day. A proper shot list details the product name or SKU, the exact angles you need (front, back, 45-degree, detail shot, etc.), and any specific notes on features to highlight.
- The Style Guide: This is your brand's visual DNA on paper. It dictates everything—the precise background color, the lighting formula, model poses, what props are allowed—and ensures every single photo feels like your brand.
For example, a fashion brand’s style guide might lock in that all t-shirts get a flat lay shot on a specific light gray background, followed by three on-model shots showing the front, back, and a specific lifestyle pose. Defining this means any photographer or stylist can jump in and produce perfectly consistent work.
On-Set Efficiency: Moves That Matter
With your planning locked in, the on-set workflow is all about executing with precision and eliminating wasted effort. This starts before the first shot is even fired, with meticulous sample prep. Every single item has to be flawless—steam out every wrinkle, wipe off every fingerprint, and go to war with a lint roller.
One of the biggest game-changers for on-set efficiency is tethered shooting. This is where you connect your camera directly to a computer, so every photo pops up on a large screen the second you take it. This lets you and your team instantly check critical details like focus, lighting, and styling, catching mistakes the moment they happen.
Catching a styling mistake or a slightly soft focus immediately through tethering saves you the monumental headache of finding the problem hours later in post-production. At that point, it’s often too late to fix.
Another simple but powerful habit is a logical file naming system. Ditch generic names like IMG_1234.jpg. Create a standardized formula like Brand_SKU_Angle_01.CR2 (e.g., WearView_T001_Front_01.CR2). This one change makes organizing, finding, and delivering thousands of images exponentially easier. Trust me on this.
Breaking the Post-Production Bottleneck
Post-production is, without a doubt, the biggest time-suck in this entire process. But it’s also where you can reclaim a massive amount of time with smart automation and batching. Your best friends here will be tools like Adobe Lightroom and Capture One.
First, nail down a consistent base edit. This covers your core adjustments for exposure, contrast, and white balance to get your colors right. The key is to turn this into presets or styles. Once you’ve perfected the look for one product under your studio lighting, you can save those settings and apply them to hundreds of other photos from that shoot with a single click.
From there, you move into the more detailed work, which typically involves:
- Color Correction: Making absolutely sure the product color in the photo is a perfect match to the real thing.
- Background Removal: Creating that clean white or transparent background that’s standard for most ecommerce platforms.
- Retouching: Zapping away any dust, scratches, or tiny imperfections on the product itself.
Industry data consistently shows that high-quality product images can give e-commerce conversion rates a serious boost, particularly when the images are consistent and professional. This kind of consistency is only really possible with a defined studio workflow, which helps explain why e-commerce retailers are the fastest-growing client segment for photography services. If you want to dive deeper into the numbers, you can explore more photography industry statistics.
Finally, build a multi-stage quality control (QC) process. Have one person do the initial edits, but have a different person give the final sign-off. This two-step check helps catch the small errors that an editor might miss after staring at the same batch of images for hours. By systematizing every stage from prep to final export, you turn your ecommerce studio from a creative space into a reliable content machine.
The True Cost of a Traditional Studio
While the one-time hit of buying gear can feel like the biggest hurdle, the real financial drain of an ecommerce shoot studio is the constant drip of operational expenses. These are the recurring costs that sneak up on you, turning what felt like a smart one-time investment into a major monthly liability.
It’s a reality that goes far beyond the initial camera and lighting purchase.
The biggest line item, almost without exception, is talent. A photoshoot is a team sport, and every player on that team comes with a day rate. Whether you bring people on full-time or hire freelancers, those numbers add up incredibly fast.
This human element is the most variable—and often the most expensive—part of the whole equation. An experienced freelance photographer can easily command over $1,000 for a single day. Skilled models and stylists? They're often in the same ballpark. For a brand trying to scale, these costs can become a massive barrier to creating content consistently.
Breaking Down the Hidden Expenses
Beyond the creative team, your studio has a financial pulse that never stops. These are the non-negotiable, recurring costs that many brands completely underestimate when they first decide to bring production in-house.
Here’s a look at the expenses that often fly under the radar:
- Studio Rental & Utilities: Unless you own a dedicated space, this is a fixed monthly cost that can range from a few hundred to several thousand dollars, depending on your city and the square footage.
- Insurance: Protecting your gear with equipment insurance and your business with liability coverage isn't optional. It's an essential cost of doing business safely.
- Software Subscriptions: Your entire workflow runs on software. Tools like Adobe Creative Cloud and Capture One all carry monthly or annual fees.
- Equipment Upkeep: Gear doesn't last forever. Bulbs burn out, cameras need servicing, and technology moves on. You have to budget for the inevitable repairs and necessary upgrades just to stay current.
The true cost isn't just the money you spend; it's the time you lose. Every hour spent coordinating schedules, setting up lights, shooting, and editing is an hour not spent growing your business. This "time cost" is your most valuable and most overlooked asset.
A Real-World Budget Example
Let's ground this in reality. Imagine a fashion brand needs to shoot a new collection with 50 different products. The plan is a two-day shoot to capture three on-model shots and one flat lay for each item.
Here’s a conservative breakdown of what that might cost:
| Cost Item | Estimated Expense | Rationale |
|---|---|---|
| Photographer | $3,000 | A freelance rate covering two full shoot days and basic editing. |
| Model | $2,000 | Two models for two days at a standard agency rate. |
| Stylist | $1,500 | A professional stylist to prep and manage 50 garments on set. |
| Studio Rental | $1,000 | Renting a fully-equipped space for the two-day production. |
| Retoucher | $2,500 | Outsourced retouching for 200 final images at $12.50 per photo. |
| Total Estimated Cost | $10,000 | A baseline figure that doesn't even include catering, transport, or unexpected hiccups. |
This simple budget shows how quickly costs can rocket into the five-figure range for a single collection. For a much deeper dive, check out our full breakdown of the real cost of fashion photoshoots. It's a sobering look at the serious financial commitment behind even a modest shoot.
The workflow for this kind of production is a well-trodden path, moving from prep to the final, published image.
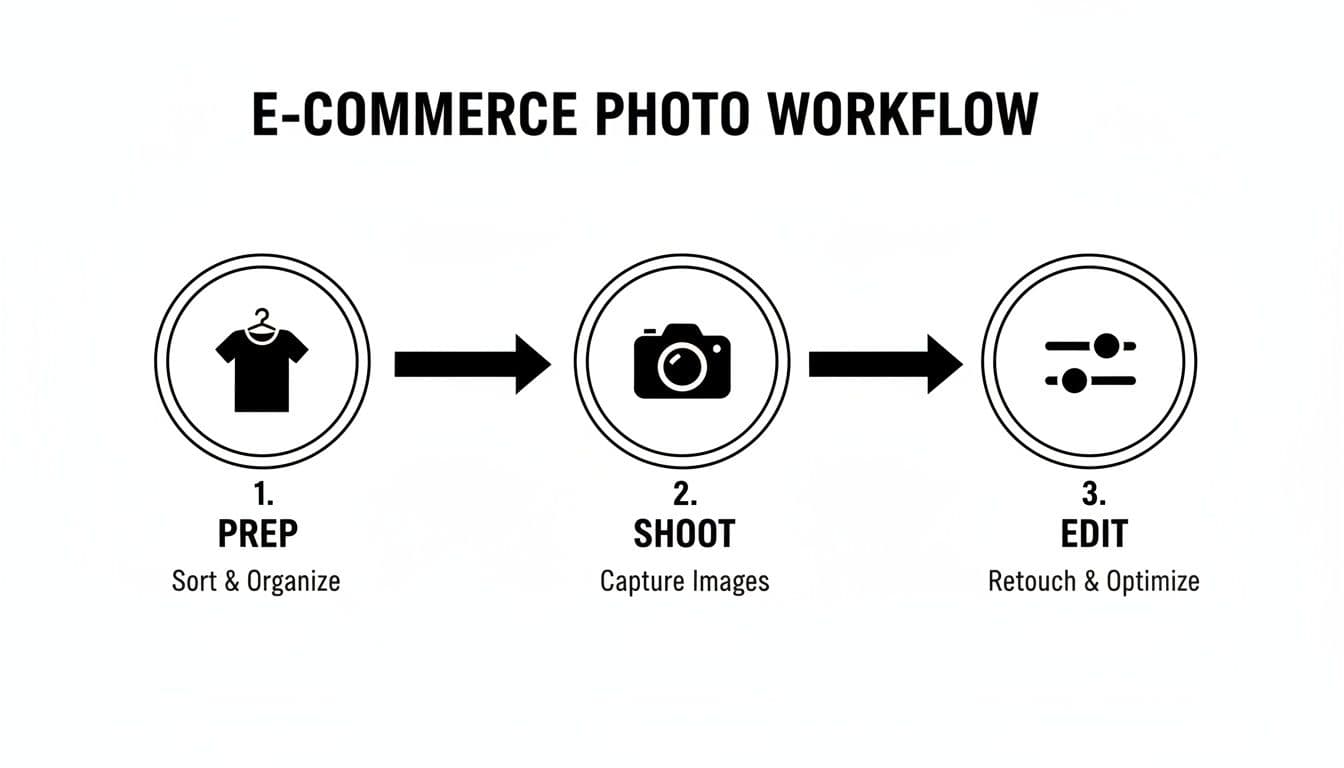
A three-step e-commerce photo workflow diagram showing prep, shoot, and edit stages with icons.
This diagram shows the core stages: prepping the product, the shoot itself, and the extensive post-production needed to get images ready for your store. The real challenge is that each stage is both time-consuming and expensive. They create bottlenecks that can delay your product launch and put a serious strain on your budget.
Now, multiply that by several collections per year, and you can see why this production model is becoming unsustainable for many brands.
The AI Alternative: A Virtual Ecommerce Shoot Studio
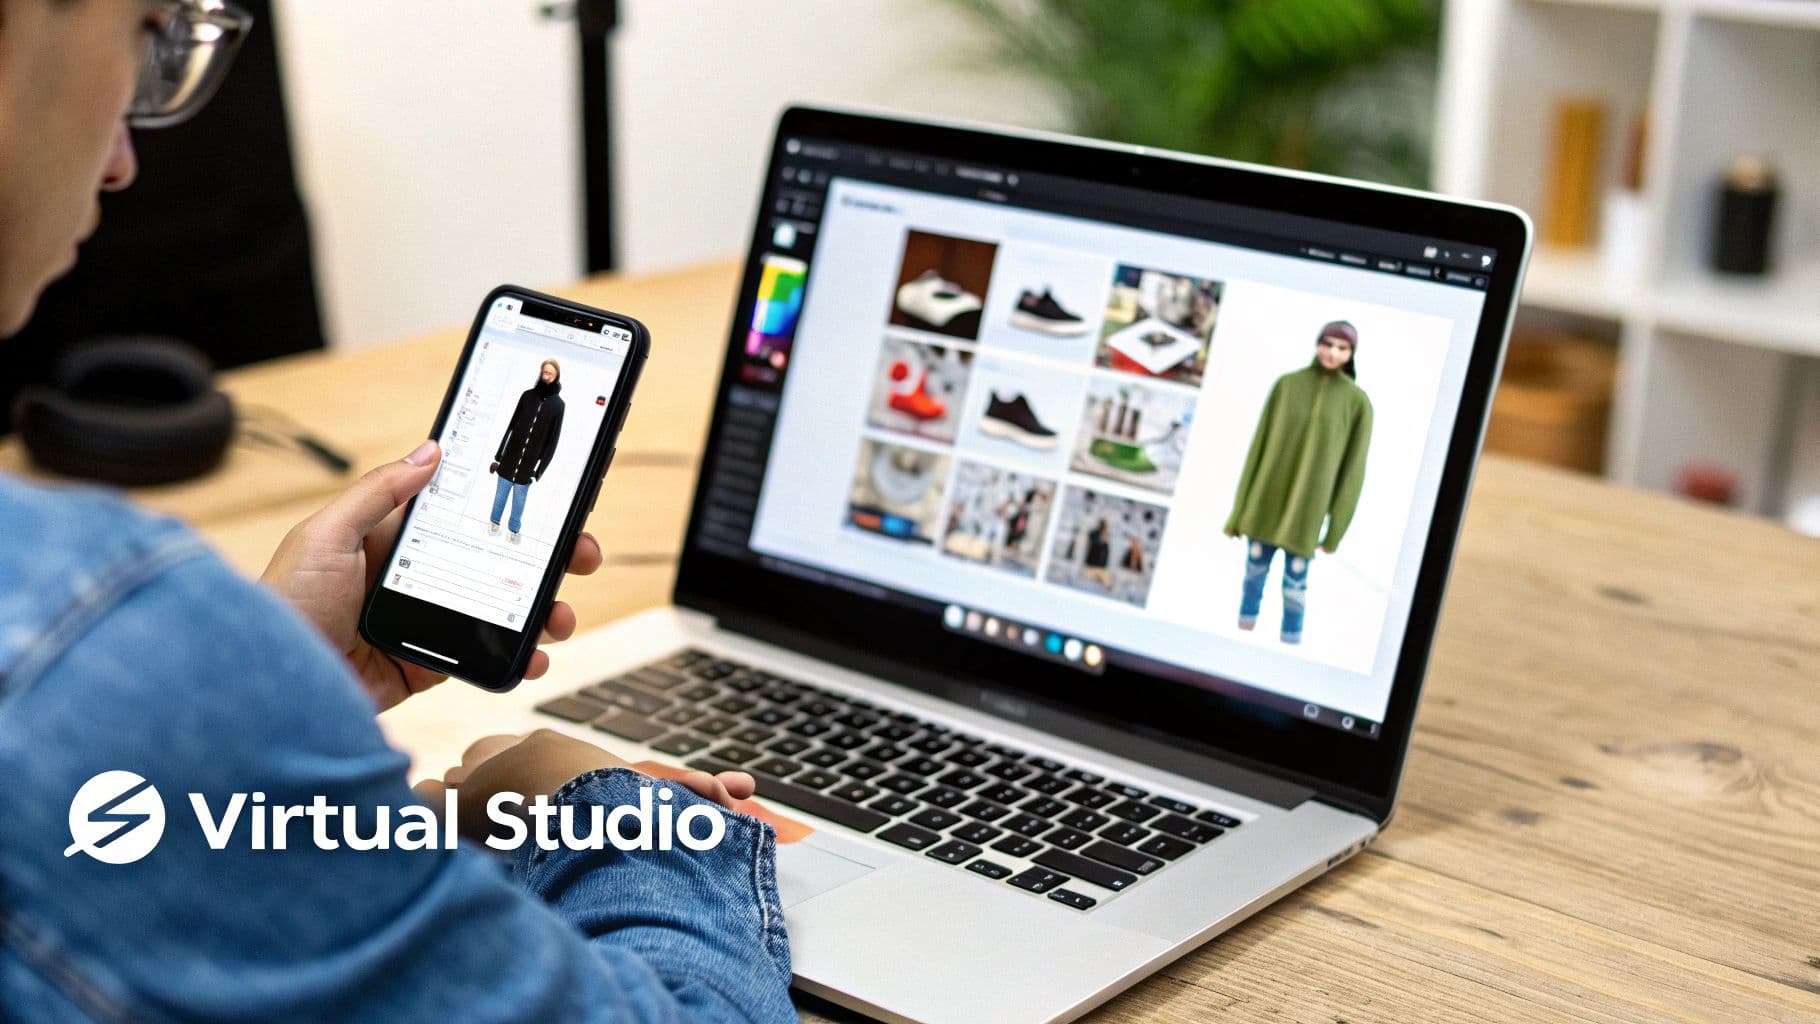
Person using smartphone and laptop for virtual product viewing and e-commerce image management.
After breaking down the costs and time sinks of a traditional setup, the limitations are pretty stark. A physical ecommerce shoot studio is a powerful asset, but it's also rigid, wildly expensive, and slow. What if you could get the same high-quality, on-model results without the studio, the models, or the week-long production schedules?
This is exactly where the virtual ecommerce shoot studio comes in. It’s a completely different way of thinking that sidesteps the physical world entirely. Instead of booking photographers and juggling logistics, you use AI to spin your existing product photos into a full catalog of on-model imagery.
The process itself is refreshingly simple. You start with basic, no-frills photos of your garments—a quick flat lay on the floor or a shot on a hanger will do. You upload these to a virtual photography platform, pick from a library of AI-generated models, and the tech handles the rest, generating photorealistic images of your products on those models.
The Core Benefits Driving Adoption
Brands are jumping on this technology for three main reasons, each one directly solving a major headache of traditional photography. First and foremost is the staggering cost reduction. By completely eliminating the need for photographers, models, stylists, and studio rentals, brands are reporting savings of up to 90% on their content creation budgets.
Second is the incredible speed. A process that once took weeks—from booking talent to getting final retouched images—is now crushed into a matter of minutes. This lets brands get new products live on their sites the same day they’re ready, jumping on trends while they're still hot and keeping inventory moving.
Finally, a virtual studio gives you limitless scale. Whether you need to shoot five new products or five hundred, the workflow and the cost per item stay the same. This unlocks a level of content creation that was previously only possible for the biggest names in the business.
Game-Changing Features of Virtual Studios
Beyond just saving time and money, this new breed of ecommerce shoot studio offers creative powers that traditional methods just can't touch. These features give you unprecedented control over your brand’s visual identity.
Key capabilities include:
- Diverse and Inclusive Casting: Instantly generate a cast of models that actually reflects your global customer base. You can ensure true representation and inclusivity without the logistical nightmare of traditional casting calls.
- Absolute Model Consistency: Use the exact same AI-generated model across your entire product line, season after season. This creates a perfectly cohesive brand aesthetic that builds recognition and trust with your audience.
- Custom On-Brand Scenes: Drop your products and models into any environment you can dream up—from a clean studio backdrop to a bustling city street—all without ever leaving your desk.
The real magic of a virtual studio is its ability to separate the product from the messy complexities of production. It lets you focus on the garment itself while the AI handles the entire visual creation process, from model selection to the final image.
Comparing Traditional vs. AI Workflows
To see the difference in action, let's look at what it takes to launch a single new product using both methods.
| Traditional Workflow Step | AI Workflow Step |
|---|---|
| 1. Schedule & Book (2-3 weeks lead time) | 1. Photograph Garment (10 minutes) |
| 2. Full-Day Photoshoot (8+ hours) | 2. Upload Image (1 minute) |
| 3. Culling & Selects (1-2 days) | 3. Select Model & Generate (5 minutes) |
| 4. Retouching & Delivery (3-5 days) | 4. Download Final Images (Instant) |
| Total Time to Market | ~2 Weeks |
The economics of classic ecommerce studios are being completely rewritten by AI. Even the market for studio management software is projected to balloon from $7.63 billion in 2024 to $20.2 billion by 2035, largely because of AI integration.
Instead of organizing a traditional photoshoot, a virtual studio uses technologies like those behind AI-driven ad creative generation. This isn't some futuristic concept; it's a practical tool solving the biggest ecommerce photography challenges today. For a deep dive into how this tech is used specifically for fashion, our complete guide to AI product photography breaks down the entire process.
Your Ecommerce Studio Questions, Answered
As you start mapping out your visual strategy, questions are bound to pop up. Whether you're thinking about building out a physical ecommerce shoot studio or jumping straight into a digital workflow, getting the right answers is key to making smart decisions for your budget and growth.
Let's dig into a couple of the most common questions we hear from brand owners.
Can I Really Start a Studio on a Shoestring Budget?
Absolutely. You don't need a sprawling loft space and a truckload of pro-grade gear right out of the gate. Your first studio can be as simple as a spare room with a clean white wall and a couple of affordable LED lights.
The real goal isn't just about taking pictures; it's about creating a repeatable, consistent process. You can nail that with a surprisingly minimal investment.
A killer starter kit is just an entry-level mirrorless camera, a versatile 50mm lens, and a solid tripod. That's it. This combo is more than enough to produce crisp, professional-looking product photos that sell.
Once the revenue starts rolling in, you can upgrade your setup piece by piece. The point is to start now with what you have.
How Do I Know When It’s Time to Switch to AI?
This is a big one. The tipping point usually comes down to two things: scale and speed.
Maybe you're finding that the constant cycle of booking photographers and models is eating your entire marketing budget. Or perhaps the weeks-long turnaround from shoot to final image is delaying your product launches and costing you sales. If that sounds familiar, it’s time to seriously look at an AI solution.
An AI-powered workflow really clicks when:
- You’ve got a high volume of products hitting your warehouse regularly.
- You need to get new arrivals live on your site in days, not weeks.
- Your creative production budget is feeling the squeeze.
- You want to show your products on a diverse range of models without the headache of casting calls.
Ultimately, if your physical studio has gone from being an asset to a bottleneck, that’s your sign. Exploring AI isn't just a trendy move; it’s the logical next step to keep your brand growing.
Ready to skip the costs and complexity of a traditional studio altogether? With WearView, you can turn basic garment photos into thousands of on-model images in minutes, not weeks. Get started with WearView today and see what AI can do for your product photography.
Tags:

WearView Team
WearView Content & Research Team
WearView Team is a group of fashion technology specialists focused on AI fashion models, virtual try-on, and AI product photography for e-commerce brands. We publish in-depth guides, case studies, and practical insights to help fashion businesses improve conversion rates and scale faster using AI.