February 13, 2026•25 min read
How to Take Photos of Clothes to Sell Like a Pro
Learn how to take photos of clothes to sell with our guide. Get pro tips on lighting, styling, and editing to make your listings stand out and sell faster.
How to Take Photos of Clothes to Sell Like a Pro
Selling clothes online is all about one thing: taking photos that make your stuff look incredible. The real secret isn't just to document what you're selling, but to create images that tell a story and make someone need to own that item. This means having a clear, repeatable process for every shoot, from prep to the final edit, so every picture looks professional and actually makes you money.
Your Blueprint for Photos That Convert
When you're figuring out how to photograph clothes, you're not just taking pictures—you're creating the single most important marketing asset for your online store. Shoppers can't touch the fabric or try things on, so your photos have to do all the work. They need to show off the quality, the fit, and the style in a single glance.
That's why a solid plan is a game-changer. Instead of just winging it every time, a structured blueprint brings consistency and quality to every single listing. It's your roadmap for getting it right, every time.
This whole process really boils down to three simple, crucial stages.
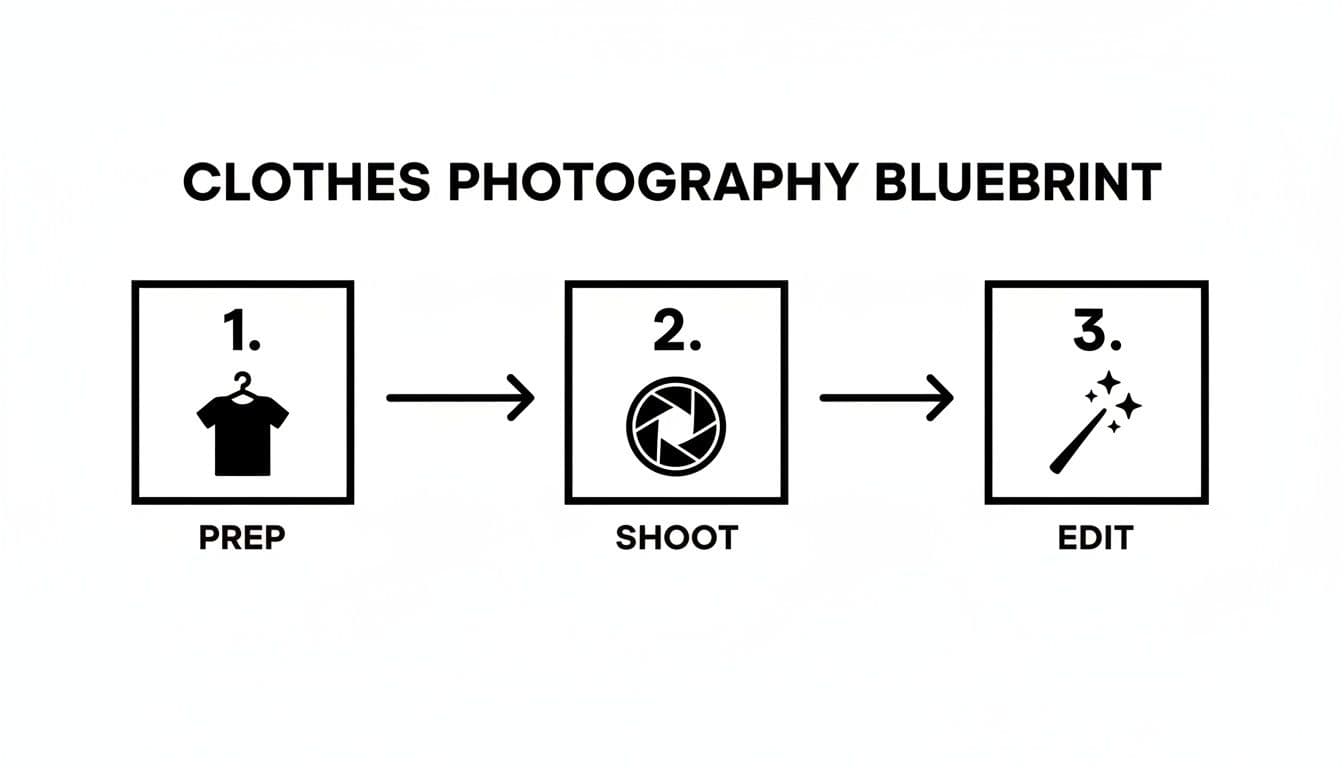
A visual blueprint illustrating three key steps for clothes photography: prep, shoot, and edit, with corresponding icons.
Nailing these three phases—Prep, Shoot, and Edit—is the foundation. Get these right, and you'll consistently turn casual browsers into paying customers. Each step just builds on the last to create a polished, professional final image.
Good Photos Aren't Optional, They're Essential
The numbers don't lie: visuals are everything in e-commerce. A massive 75% of online shoppers say that product photos are the most influential factor in their decision to buy. This makes your photography one of the most critical investments you can make.
It's not just about looking good, either. High-quality images have a direct, measurable impact on your sales. Stores that put effort into professional-looking photography see conversion rates that are a stunning 94% higher than shops with amateurish, low-quality shots.
Think of your photography as a core business function, not an afterthought. Every well-lit, beautifully styled photo is a chance to build trust and convince a customer to click "add to cart."
Before You Touch a Camera: Think Strategy
Before getting bogged down in the technical details, you need to understand the "why" behind what you're doing. A little strategic thinking upfront saves a ton of headaches later.
- Define Your Brand's Vibe: Are you going for a clean, minimalist look? Or is your brand more about a vibrant, in-the-moment lifestyle feel? Your photos need to match your brand's personality.
- Know Your Customer: What does your target audience actually want to see? Are they obsessed with texture and need close-up detail shots, or do they just want to know how a dress hangs and moves?
- Plan for Every Platform: Your photos are going to live on your website, on Instagram, on TikTok, and maybe on marketplaces like Etsy. Each one has different ideal image specs, so plan accordingly.
To give you a head start, here’s a quick checklist of what you'll need to pull together for a successful shoot.
Essential Clothing Photography Checklist
This table breaks down the core components you'll need for a solid clothing photoshoot, from the gear to the final styling touches.
| Category | Essential Items | Why It Matters |
|---|---|---|
| Gear | Camera or modern smartphone, tripod, lighting source | Stability from a tripod is non-negotiable for sharp images. Good lighting defines quality. |
| Prep | Steamer/iron, lint roller, pins, tape | Wrinkles and lint scream amateur. Pins and tape help shape garments for a perfect fit. |
| Styling | Background (wall, paper), props, mannequin/model | The background sets the mood. Props add context. A model or mannequin shows the item's shape. |
| Post | Editing software (e.g., Lightroom, Canva) | Color correction, cropping, and minor touch-ups are what make a good photo great. |
Having these items ready to go before you start shooting will make the entire process smoother and more professional.
And remember, still photos are just one piece of the puzzle. As you get comfortable, think about how other visuals can boost your brand. Learning how to create product videos that drive sales and engagement can add another powerful layer to your marketing, helping you build an even stronger connection with your customers.
Nail Your Photography Setup Before You Shoot
Great photos don't just happen by accident. They're the result of a solid setup. Honestly, the time you spend getting your environment right before you even pick up the camera is the most important part of this whole process. This is where you tame the light, pick a clean background, and dial in your camera settings—the holy trinity of product photography. Get these right, and you're halfway to a sale.
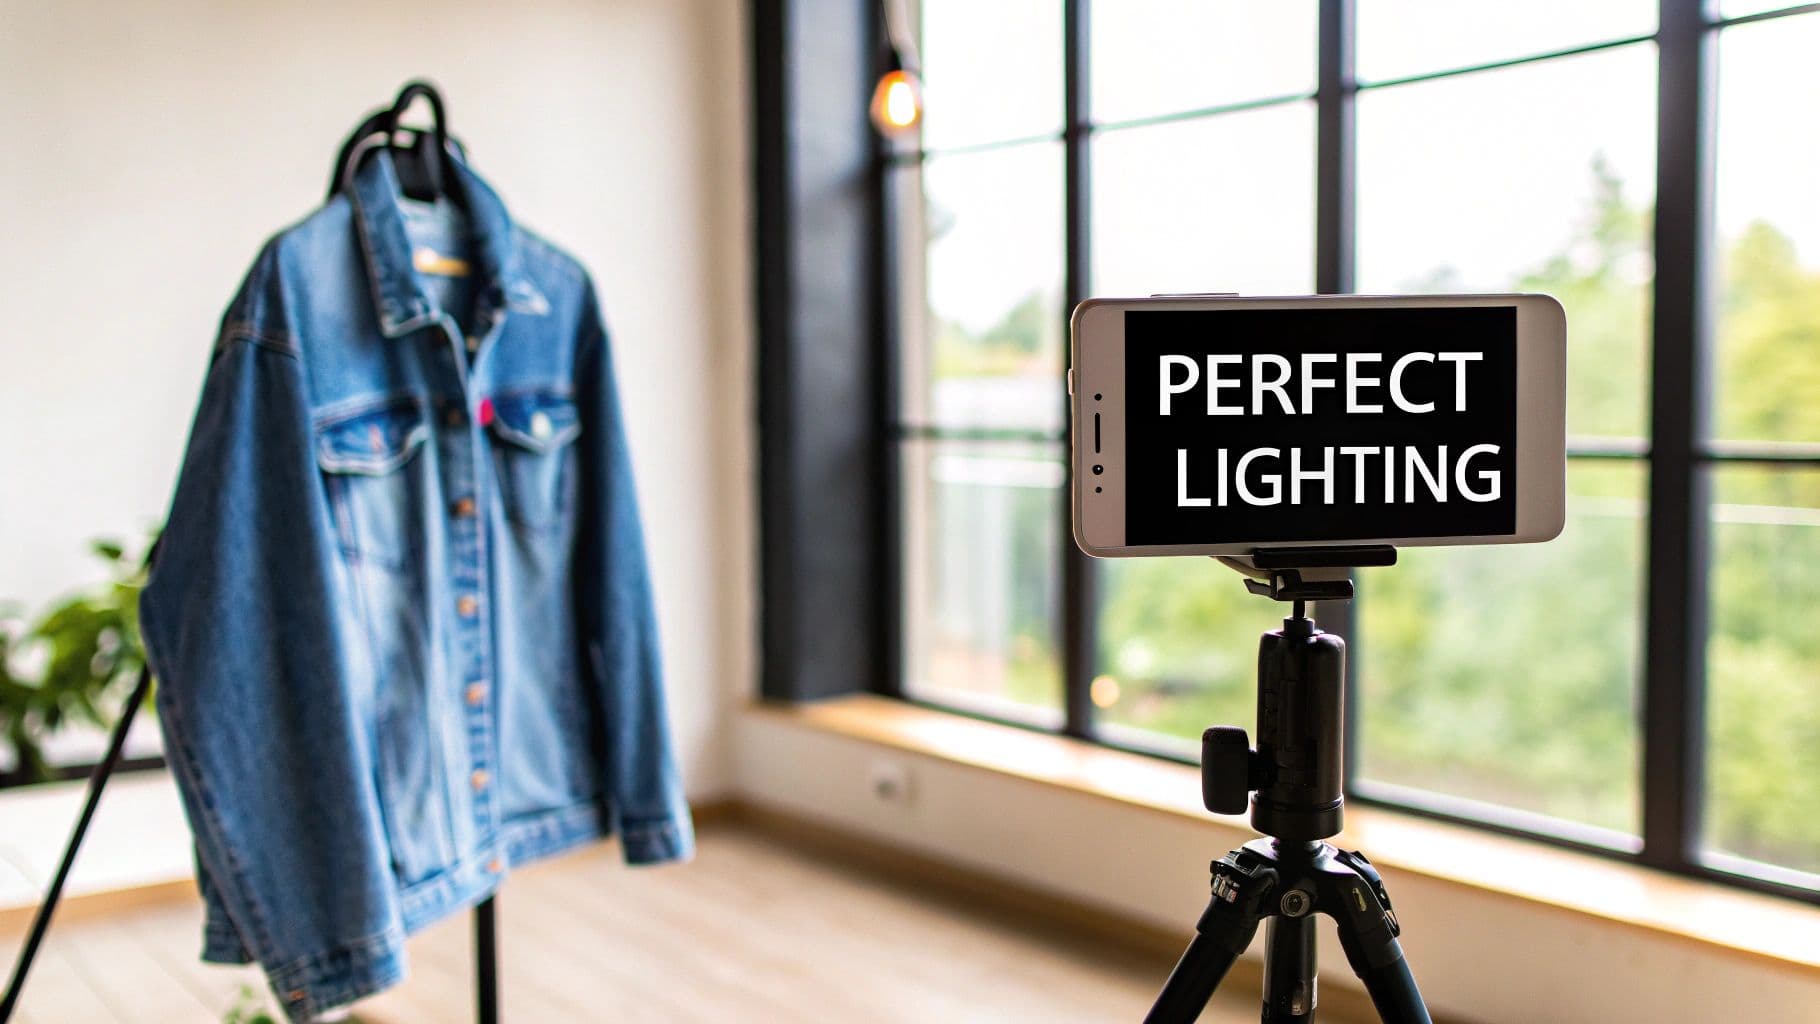
A smartphone on a tripod displays 'PERFECT LIGHTING' near a window, with a denim jacket on a hanger.
Think of this phase less as a technical chore and more as creating your own repeatable system. A good system means every single garment you shoot will look consistent, professional, and amazing.
Get the Lighting Right (It's Everything)
Lighting is the soul of your photo. It’s what shows off the texture of a chunky knit sweater, keeps the colors true-to-life, and sets the entire mood. You basically have two choices here: natural light or artificial light. Both work great, but you need to know how to handle them.
For anyone starting out, natural light is your best friend. It’s free, it’s everywhere, and it has this soft, flattering quality that’s tough to beat.
- Find a Big Window: Your best bet is to set up next to a large, north-facing window. This gives you bright, beautiful light without the harsh, direct sun that creates ugly shadows and blows out your colors.
- Shoot at the Right Time: The "golden hours"—that magical time shortly after sunrise and just before sunset—are perfect. The light is soft, warm, and forgiving. Avoid shooting in the middle of a sunny day; that direct overhead sun is your enemy.
- Soften It Up: If the sun is still a bit too intense, just diffuse it. You can hang a thin white sheet over the window, use a sheer curtain, or even just hold up a piece of white poster board. Anything to scatter that light and soften the shadows.
Your goal is simple: soft, even light that wraps around the entire garment. This lets customers see every little detail without any distracting, hard shadows getting in the way.
If natural light is too unpredictable (hello, cloudy winter days), an affordable lighting kit is a game-changer. You don't need a Hollywood budget; a simple ring light or a couple of softboxes will give you total control. If you're using a single light, place it at a 45-degree angle to your product. This creates just enough soft shadow to give the clothing some shape and dimension.
Choose a Background That Doesn't Distract
Your background is the stage, and your clothing is the star. The last thing you want is a busy, cluttered background that steals the spotlight. When in doubt, keep it simple.
A clean, solid, neutral background is the industry standard for a reason. A plain white wall, light gray, or even a soft beige works perfectly. For a few bucks, you can grab a roll of seamless paper from a camera store for that flawless, professional studio look.
If you’re going for more of a lifestyle vibe, you can use a background that adds a little context. Maybe a clean, minimalist corner of a room or a simple outdoor setting. The key is to make sure it complements the item, not competes with it.
Having a consistent background for all your listings makes your whole shop look more polished and trustworthy. If you find yourself shooting in different places, locking down a dedicated e-commerce shoot studio setup is a great way to guarantee that consistency every single time.
Dial In Your Camera (Yes, Your Phone Counts)
You absolutely do not need a multi-thousand-dollar DSLR. The camera in your pocket is an incredible tool, but you have to get out of "auto" mode to unlock its real power. These tips apply whether you're using a smartphone or a bigger camera.
- ISO: This is your camera's sensitivity to light. You want to keep your ISO as low as possible—ideally 100 or 200. Low ISO means clean, crisp images without that grainy "noise." This is only possible if you've nailed your lighting, which is why we covered that first!
- Aperture (or Portrait Mode): On a DSLR, the aperture (f-stop) controls how much of the background is blurry. A wider aperture (like f/1.8) creates that beautiful, soft background that makes the product pop. On a smartphone, "Portrait Mode" does a fantastic job of faking this effect. For flat lays where you want everything sharp, use a narrower aperture (like f/8).
- White Balance (WB): This is non-negotiable for getting your colors right. "Auto" white balance often gets confused and can make a white shirt look yellowish or bluish. Dig into your settings and set it manually. If you're shooting by a window, set it to "Daylight." Under artificial lights? Match it to the type of bulb you're using. This one step will save you hours of color-correcting headaches later.
By taking control of these three things—light, background, and camera settings—you're building the foundation for photos that do the selling for you. You're giving customers all the visual info they need to click "buy" with confidence.
Styling Garments for Maximum Appeal
Your lighting can be perfect and your camera settings dialed in, but if the clothes themselves look lifeless, you're leaving money on the table. Great styling is what closes the deal. It turns a piece of fabric into a desirable item, helping a customer see it hanging in their own closet.
This isn't just about making things look nice; it's visual storytelling. You're communicating the fit, the feel of the fabric, and the overall quality. I've seen countless sellers with great products fail because their presentation fell flat.
The three go-to methods are flat lays, hanger shots, and on-body displays. Each has its place, and the strongest product listings often use a mix of all three to give a complete picture. This is how you bridge the gap between a casual browser and a confident buyer.
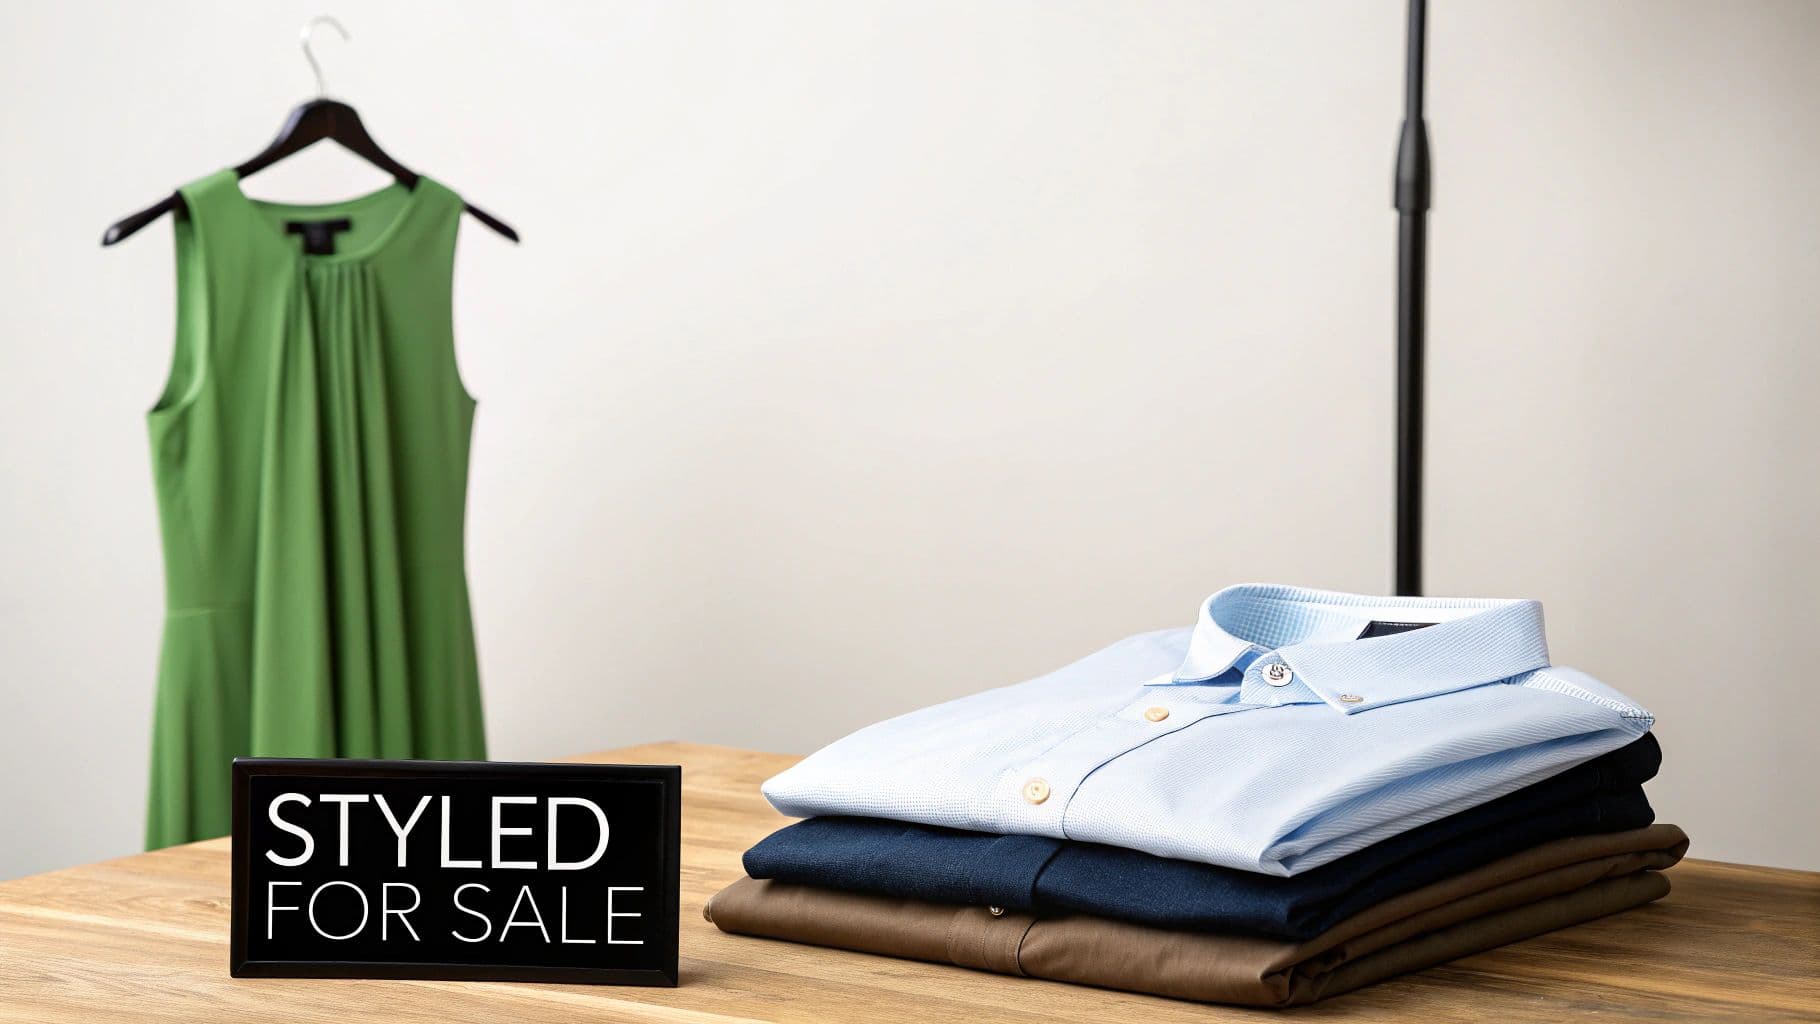
A green dress on a hanger and stacked men's shirts with a "Styled For Sale" sign on a wooden table.
Don't underestimate how visual we are. Studies show 65% of people are visual learners, and it's no surprise that content with relevant images gets a staggering 94% more views than content without. By focusing on your styling, you're playing directly to how your customers think and make decisions.
Creating Clean and Balanced Flat Lays
The flat lay is a classic for a reason. It's accessible, versatile, and can create a really clean, minimalist vibe for your store. This is the top-down shot where you lay a garment flat on a surface and shoot it from directly above. It’s perfect for showing full outfits or highlighting key accessories without any distractions.
But a good flat lay is all about composition.
- Prep the Garment: Cameras see everything. Every wrinkle, every piece of lint. Steam or iron the item until it's perfect, then hit it with a lint roller right before you place it.
- Embrace Negative Space: Don't feel the need to fill the entire frame. Leaving some "breathing room" around the clothing makes the shot feel balanced and less cluttered.
- Give it Some Life: Arrange the garment so it hints at how it would fall on a body. A subtle "S" curve in a t-shirt or a gentle fold in the sleeves adds a touch of dimension. Avoid making it look stiff and rigid; that just looks unnatural.
The Understated Elegance of Hanger Shots
Sometimes, a simple hanger shot is all you need to make a garment look more refined. It’s a step up from a flat lay, but the details here are everything. A cheap, flimsy plastic hanger will make a beautiful dress look cheap. A quality wooden or velvet hanger, on the other hand, suggests the product itself is high-quality.
Key Takeaway: Your hanger is part of the photo. Choose neutral, non-distracting hangers—think wood, velvet, or thin metal—to add a touch of class without stealing the show.
Just hang the item against a clean background, like a plain wall or door. This method is fantastic for showing the natural drape and length of pieces like dresses, coats, and flowy blouses. It's a simple, effective way to get a professional-looking shot.
Bringing Clothes to Life On-Body
This is where the magic happens. Showing clothing on an actual body, whether it's a live model or a mannequin, is the single most effective way to communicate fit and movement. Customers can instantly see how it might look on them, which is often the final push they need to buy.
If you’re using a mannequin, get one with a neutral finish like matte white or gray so it doesn't clash with the clothing. You'll want to pin the garment from the back to get that perfect, tailored fit for the photo.
When you're working with a live model, the aim is to capture natural poses that show off the clothing's best features.
- Capture Movement: Ask the model to walk, turn slightly, or interact with the garment. A hand casually slipped into a pocket or a slight twirl of a skirt adds energy and shows how the fabric moves.
- Zoom in on Details: Does the dress have a unique back? Get that shot. Is the jacket's collar a statement feature? Make sure you capture a three-quarter view that shows it off.
- Get All the Angles: Always provide a complete set: front, back, and side views. Being transparent about the fit builds trust and will dramatically cut down on returns.
Thankfully, technology now gives us incredible alternatives for getting consistent on-model shots without the hassle of a live shoot. For instance, advanced tools give you total creative freedom, letting you generate hyper-realistic model photos from a single flat lay with advanced pose control.
For a little extra inspiration, look at how the pros do it. Checking out some of the best retail clothing display ideas can spark some fresh ideas for your own presentation. By mixing and matching these styling techniques, you can build a compelling visual story for every single item you sell.
Editing and Optimizing Your Images
Snapping the photo is really just the first half of the job. The real magic—the stuff that turns a decent product shot into a great one—happens after you put the camera down. This is where you polish your images, making sure they’re not just pretty, but primed to perform for your online store.
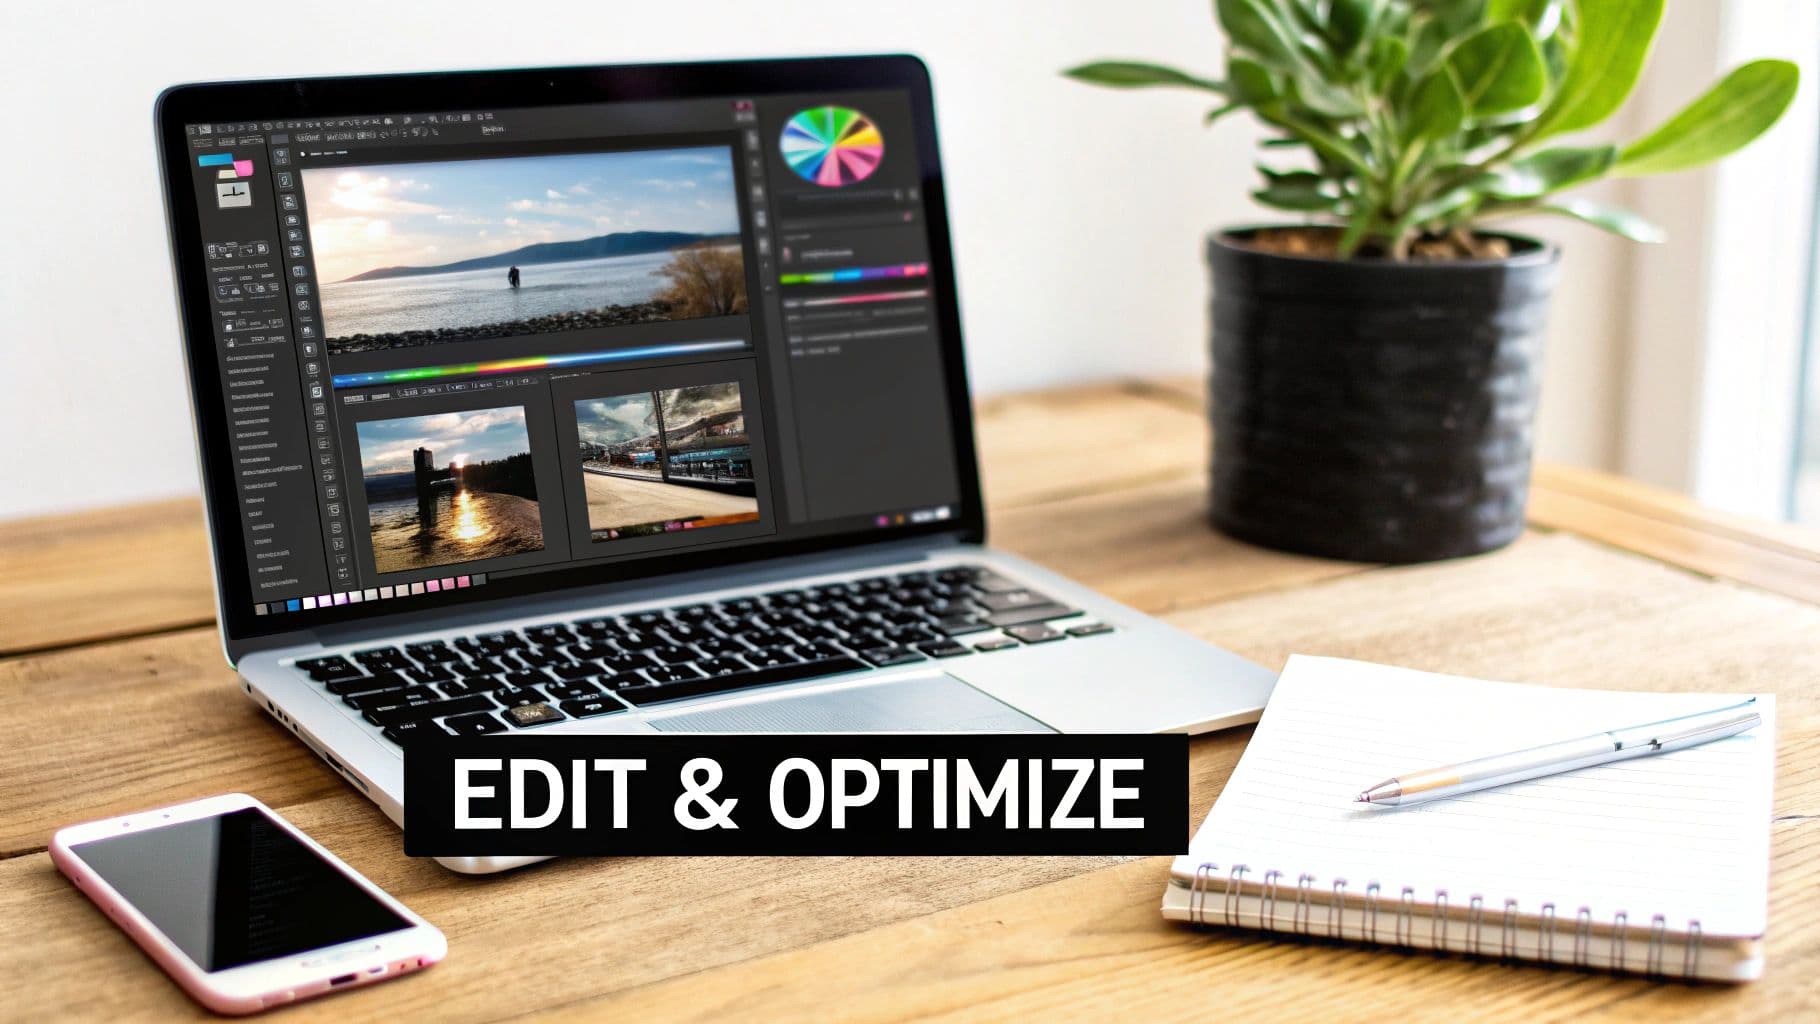
A laptop on a wooden desk showing photo editing software with images, next to a smartphone and a notepad.
This isn’t about faking it or dramatically changing the photo. It’s about small, essential tweaks that make your brand look professional and trustworthy. And you don’t need to drop a fortune on complicated software; plenty of free and easy-to-use tools can get you incredible results.
Your First-Step Editing Checklist
Before you start playing with filters, you need to nail the basics. These are the non-negotiables that form the foundation of a clean, professional photo. Most can be done right on your phone.
Your two main goals here are consistency and accuracy.
- Crop and Straighten: Is the hanger a little tilted? Too much empty space on the left? Jump in with the crop tool to tighten up the shot and use the straighten tool to fix any wonky lines. This one move instantly makes a photo feel more deliberate and balanced.
- Adjust Brightness and Contrast: Photos often come out a little darker than you’d like. Nudging up the brightness (or exposure) can make the item pop. A little touch of contrast helps define the details in the fabric, making textures more obvious.
- Enhance Sharpness: Use the sharpness or clarity tool sparingly to make the image crisper. This is a game-changer for bringing out the weave of denim or the texture of tweed. Just don't go overboard, or you'll end up with a crunchy, unnatural look.
Once you’ve checked these off, your photos will already look ten times better and are ready for the most important part: getting the color right.
Why True-to-Life Color Is Everything
In fashion e-commerce, color accuracy is king. If a customer buys what they believe is a bright cherry-red sweater but a dull burgundy one shows up, you’re looking at a guaranteed return and a bad review.
Your goal is for the on-screen color to be an identical match to the real-life garment. This is one of the most critical aspects of learning how to take photos of clothes to sell effectively.
Getting the color right builds trust and slashes your return rate. Most editing apps, like the free version of Adobe Lightroom Mobile, have simple tools for "temperature" and "tint." If the photo looks too yellow (warm), just slide the temperature slightly toward blue. Too blue (cool)? Nudge it back toward yellow. That’s usually all it takes.
Getting Your Images Ready for the Web (SEO & Speed)
Okay, your photos look fantastic. Now you need to prep them for your website. Image optimization is a crucial step that impacts how fast your site loads and how easily Google can find your products. A slow-loading page is a sales killer.
First things first: resize your images. A photo straight from your camera is massive—way too big for a website.
Recommended Image Sizes for E-commerce
| Platform | Recommended Width | File Size Goal |
|---|---|---|
| Shopify/BigCommerce | 2048 pixels | Under 200 KB |
| Etsy | 2000 pixels | Under 1 MB |
| Instagram Post | 1080 pixels | As small as possible |
After resizing, save your image as a JPEG, which gives you the best mix of quality and small file size. You can use a free online tool to compress it even further without a noticeable drop in quality.
Finally, name your files properly. This is free SEO! Instead of IMG_8457.jpg, give it a descriptive name that helps search engines understand what it is.
- Bad Filename:
DSC00123.jpg - Good Filename:
blue-denim-jacket-front-view.jpg
Just as important is the alt text. This is a short description you add in your website's backend. It’s what screen readers use for visually impaired shoppers, and it’s another signal to search engines.
- Good Alt Text: "Front view of a classic blue denim jacket with silver buttons on a white background."
By combining thoughtful editing with smart optimization, your images won't just convert shoppers—they'll help your entire store perform better.
Scaling Your Workflow with AI Photography
Let's be honest: creating consistent, high-quality images for every single product is a huge logistical headache. This is especially true when you're growing. The old way—booking models, scouts, stylists, and studios—isn't just expensive, it's a massive time sink that can seriously delay getting new products listed and making sales.
But what if you could sidestep that entire bottleneck? A new wave of AI-powered platforms is fundamentally changing how brands approach fashion photography, making it faster, far more affordable, and incredibly scalable.
Imagine taking a simple, well-lit photo of your garment—just a flat lay or a shot on a hanger—and instantly turning it into a professional on-model image. That's what this tech does. It cuts out the logistical nightmare of traditional shoots and delivers studio-quality results in seconds. This isn't about replacing creativity; it's about making professional-grade imagery accessible to everyone.
The Shift from Traditional to AI-Powered Workflows
The pressure to produce stunning product visuals is only getting more intense. The global photography services market hit a massive $55.6 billion in 2023 and is on track to reach $81.83 billion by 2032. Within that, product photography is one of the fastest-growing niches, projected to be worth $1.78 billion by 2033.
Those numbers tell a clear story: brands need to produce more visual content than ever before. AI tools like WearView give you a way to meet that demand without the crushing overhead. By transforming a basic photo into a dynamic on-model shot, you can generate a full catalog's worth of images in a fraction of the time and cost.
The real win here is efficiency. You get to skip the most expensive and time-consuming parts of content creation but still end up with the high-impact visuals you need to connect with customers and drive sales.
This frees you up to focus on other parts of your business, knowing your product imagery can be created on demand, whenever you need it.
Let's break down just how different these two approaches are.
Traditional Photoshoot vs AI-Powered Workflow
| Factor | Traditional Photoshoot | AI-Powered Workflow (WearView) |
|---|---|---|
| Cost | $1,000 - $10,000+ per shoot (models, studio, photographer, etc.) | Starts at $19/month for hundreds of images |
| Time | 2-4 weeks from planning to final images | Under 15 seconds per image generation |
| Scalability | Limited by budget and logistics; very difficult to scale | Infinitely scalable; generate thousands of images easily |
| Consistency | Difficult to maintain across different models, shoots, and locations | Guaranteed consistency with the same AI model and settings |
| Diversity | Limited by casting availability and budget | Effortlessly diverse; select from a wide range of virtual models |
| Revisions | Costly and time-consuming reshoots | Instant and free; regenerate images with new styles in seconds |
The table makes it pretty clear. While traditional shoots have their place for high-concept campaigns, AI offers a practical, powerful alternative for the day-to-day grind of e-commerce product listings.
Maintaining Brand Consistency on a Budget
One of the toughest parts of building a strong brand is keeping your look consistent. When you're constantly cycling through different models, locations, and photographers, creating a uniform aesthetic across all your product listings feels next to impossible.
AI-driven platforms solve this problem beautifully. You can choose a single AI-generated model to be the "face" of your brand across your entire collection. Suddenly, every photo has the same lighting, background, and model pose, creating a cohesive and professional storefront that customers instinctively trust.
Here’s how this sharpens your workflow:
- Guaranteed Consistency: Use the same digital model for every single item, from t-shirts to winter coats, reinforcing your brand identity with every click.
- Diverse Representation: Effortlessly feature a wide range of models that actually reflect your customer base, without the casting headaches.
- On-Demand Backgrounds: Drop your products into any scene you can imagine, from a clean studio look to a lifestyle setting, with just a few clicks.
How to Get Started with AI in Your Photography Process
Jumping in with a tool like WearView is refreshingly simple. You still need a good source image, so all those principles of solid lighting and preparation we covered earlier are still key. A great input leads to a great output.
The process itself is dead simple:
- Upload Your Garment: Snap a clear, well-lit photo of your clothing item, either as a flat lay or on a hanger.
- Choose Your Model and Style: Pick a virtual model that fits your brand’s vibe and select a pose that shows off the garment best.
- Generate and Download: The platform’s advanced product to model AI gets to work and spits out a photorealistic on-model image, ready for your website, social media, and ads.
This approach absolutely slashes your production time, letting you get new arrivals online way faster than your competitors. By knocking down the traditional barriers to professional photography, you can scale your operations, test more products, and ultimately boost your conversion rates—all without draining your bank account.
Your Top Clothing Photography Questions, Answered
As you start shooting your products, you're going to have questions. Everyone does. Whether you're trying to figure out what gear to use or how to make clothes look good without a model, getting solid answers can save you a world of frustration.
This is especially true now. Online fashion isn't just growing; it's exploding. We're talking about a market rocketing from $4.9 trillion in 2021 to an estimated $7.4 trillion by 2025. In a space that crowded, incredible product photos aren't just a nice-to-have—they're your ticket to getting noticed.
What’s the Best Camera for Taking Pictures of Clothes?
This might come as a surprise, but you probably already own the perfect camera. Modern smartphones are absolute powerhouses, and their cameras are more than capable of producing crisp, professional-looking photos for your store. Many even have a "Portrait Mode" that does a fantastic job of mimicking the soft, blurry backgrounds you see in high-end photography.
If you're dead set on an upgrade, a mirrorless or DSLR camera with a 50mm lens is a fantastic, versatile choice. It captures clothes with a natural perspective that's very true to life.
But here’s the real secret: the camera itself matters far less than your understanding of light, composition, and styling. Master those fundamentals with the gear you have now. You can always upgrade later.
How Can I Take Good Photos Without a Model or Mannequin?
This is a super common situation, and the good news is you have a couple of great options that look just as professional: flat lays and hanger shots.
Flat lays are all about creating a clean, artfully arranged composition.
- Start with a simple surface. A light-colored poster board, a clean wood floor, or even a simple, neutral rug works perfectly. The key is uncluttered.
- Give the garment some life. Don't just lay it flat and straight. A gentle "S" curve can make a t-shirt look dynamic and appealing, suggesting a natural shape.
- Shoot from directly above. This is non-negotiable for a professional look. A tripod is your best friend here—it ensures your shot is perfectly level, stable, and sharp.
For hanger shots, think simple and elegant. Grab an attractive hanger (wood or velvet looks infinitely better than cheap plastic) and hang the item against a clean, plain wall. When lit well, both of these methods can look incredibly polished.
How Do I Get Wrinkles Out of Clothes for Photos?
Wrinkles are the fastest way to make a beautiful garment look cheap and secondhand. The camera sees everything, so prepping your items before the shoot is absolutely critical.
You need to steam or iron every single piece right before you put it in front of the camera. A handheld steamer is a small investment that pays for itself almost immediately. Once it's prepped, handle the item carefully to avoid creating new creases. If you're shooting a flat lay, take a second to smooth the fabric out from the center before you click the shutter.
Sure, you can sometimes fix minor wrinkles with a "healing" or "clone" tool in editing, but trust me—getting it right in-camera will save you hours of tedious post-production work.
What Are the Biggest Mistakes to Avoid?
Most of the common mistakes I see sellers make come down to a few core issues. The good news is they're all pretty easy to fix once you know what to look for.
The biggest culprits are almost always bad lighting, busy backgrounds, and off-brand colors.
- Poor Lighting: Harsh, direct sunlight creates ugly, distracting shadows that hide details. Dim, murky light makes your products look dull and grainy. You're always aiming for soft, even, diffused light.
- Distracting Backgrounds: If there's clutter in the background, it's pulling focus away from your product. The clothing should always be the star. Keep your backgrounds simple and neutral.
- Inaccurate Colors: This is a return waiting to happen. If the color in the photo doesn't match the item in real life, you're guaranteed to have disappointed customers. Use your camera's white balance settings or color-correct your images in editing to make them true-to-life.
- Not Enough Photos: One photo is never enough. Shoppers want to see it all: the front, the back, the side, and close-ups of the fabric, texture, and any special details like buttons or embroidery. Give them the full picture.
Ready to skip the photoshoots entirely and generate stunning, on-model imagery in seconds? With WearView, you can transform simple flat lays into thousands of unique, AI-powered visuals that are proven to boost conversions. Create your first professional fashion photos with AI today and see how easy it is to scale your content production.
WearView Team
WearView Content & Research Team
WearView Team is a group of fashion technology specialists focused on AI fashion models, virtual try-on, and AI product photography for e-commerce brands. We publish in-depth guides, case studies, and practical insights to help fashion businesses improve conversion rates and scale faster using AI.