January 17, 2026•25 min read
A Creative Guide to Clothing Brand Photography
Elevate your brand with our guide to clothing brand photography. Learn how to plan shoots, master lighting, leverage AI tools, and track ROI for real results.
A Creative Guide to Clothing Brand Photography
Clothing brand photography is so much more than just taking pictures of your apparel. It’s the visual language you use to tell your brand’s story. It's that blend of crisp product shots and evocative lifestyle images that grabs a potential customer, sparks desire, and turns them into a loyal follower.
When it's done right, every photo strikes a perfect balance between clarity and creativity, giving shoppers all the info they need while making them feel like they have to have it.
Crafting Your Brand's Visual Blueprint
Before a single photo is taken, the real work begins. This is the planning stage, where you take the soul of your brand—all those ideas and feelings—and translate it into a concrete visual strategy.
Trust me, skipping this part is like trying to build a house without a blueprint. You might end up with four walls and a roof, but it won't be the cohesive, impactful home you dreamed of. A solid visual plan ensures every single image, from your e-commerce listings to your Instagram stories, feels intentional and on-brand. It’s the North Star for your entire creative team.
Defining Your Visual Aesthetic
Your visual aesthetic is your brand’s personality, captured in a frame. Is your vibe minimalist and modern? Rustic and adventurous? Or maybe loud and playful? Nailing this down dictates everything that comes next: your color palette, lighting choices, the expressions on your models' faces, and where you choose to shoot.
Think about it. A sustainable linen brand would probably lean into soft, natural light, earthy tones, and outdoor settings to really drive home that organic, back-to-nature feel. On the other side of the coin, a streetwear label might go for harsh, direct lighting against a gritty urban backdrop, with models striking dynamic, confident poses to project that edgy, high-energy vibe.
Key Takeaway: Your visual aesthetic isn’t just about making things look good. It's a silent conversation with your customer that instantly tells them who you are. Consistency here is what builds brand recognition and, most importantly, trust.
Understanding Your Target Audience
Who are you actually talking to? Your photography must connect with the people you want wearing your clothes. This goes way beyond basic demographics. What do they aspire to be? What does their life look like? What values do they hold, and what kind of content are they already double-tapping online?
To really sharpen your visual strategy and spot gaps in the market, it's worth digging into what your competitors are doing. Using a few Instagram competitor analysis tools can give you a massive leg up, revealing what’s already resonating with your shared audience. Seeing what works for them—and what doesn’t—helps you carve out your own unique space.
This research makes all the difference. If your target customer craves authenticity, super-polished, high-fashion studio shots might feel cold and unrelatable. You’d likely get much better results with candid, lifestyle images featuring models who look like people they’d actually hang out with.
To help you choose the right visual direction, let's break down the most common photography styles and what they're best used for.
Essential Photography Styles for E-commerce Fashion
| Photography Style | Primary Purpose | Best For |
|---|---|---|
| Flat Lay / Ghost Mannequin | Showcasing product details, fit, and construction without distraction. | E-commerce product pages, catalogs, brands focused on technical details. |
| On-Model Studio | Showing how a garment fits and drapes on a human body in a controlled environment. | Core product listings, lookbooks, size guides, brands with unique fits. |
| Lifestyle / In-Context | Telling a story and selling an aspirational experience or feeling. | Social media, ad campaigns, homepages, brands built on community/vibe. |
| Street Style | Capturing a raw, authentic, and trend-forward look in a real-world urban setting. | Streetwear brands, youth-focused labels, social media content, trend reports. |
| Editorial | Creating artistic, high-concept images that prioritize mood and brand narrative over product clarity. | Brand campaigns, magazine features, lookbooks for high-fashion or avant-garde labels. |
Choosing a primary style and complementing it with secondary ones gives your brand visual depth while keeping your core product front and center.
Building an Actionable Mood Board
This is where your ideas finally become a tangible plan. A mood board is way more than just a collage of pictures you like; it’s a strategic tool that visually defines the exact look and feel of your upcoming shoot. It’s a curated collection of images, textures, color swatches, and even text that serves as the blueprint.
A great mood board should clearly communicate:
- Color Palette: The specific primary and secondary colors that will anchor the shoot.
- Lighting Style: Is it bright and airy, or are we going for something dark and moody? Natural or studio?
- Posing and Expression: What attitude are we trying to capture? Confident? Relaxed? Joyful?
- Styling Direction: Exactly how will the clothes be worn and what accessories will complete the look?
- Location and Props: What environment best tells your brand's story? An open field, a minimalist apartment, a bustling city street?
This visual guide becomes the single source of truth for everyone involved, from the photographer to the stylist to the models. It’s the best way to guarantee that the final images are perfectly on-brand and set up to hit your sales goals.
Putting Your Photoshoot Plan into Action
You’ve got the blueprint. Now it’s time to make it happen. This is where all that planning pays off, turning your vision boards and creative briefs into tangible, compelling images that actually sell your clothing. Getting this right is about mastering a few core setups and making sure your entire team is on the same page.
This process flow shows how a clear brand identity, built from your vision and audience, directly informs the mood board that guides the entire shoot.
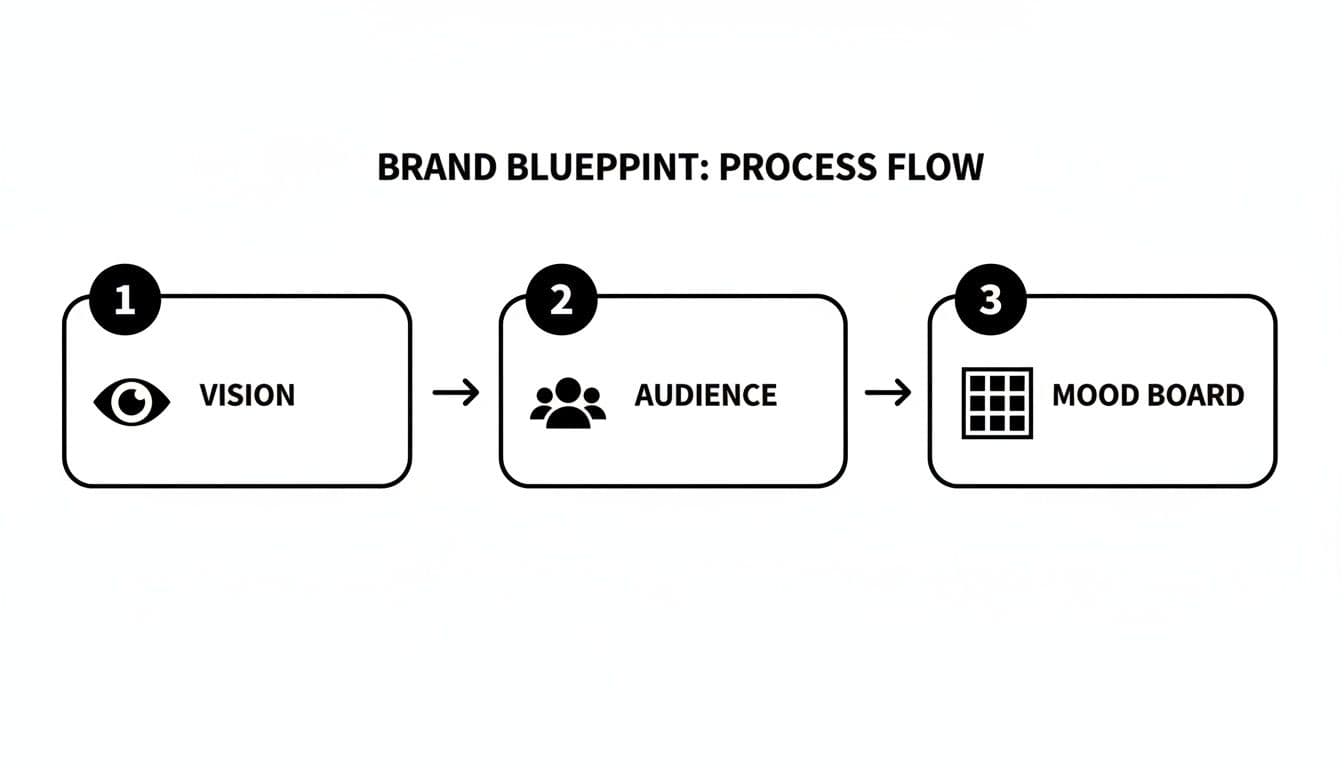
A brand blueprint process flow diagram showing three steps: Vision, Audience, and Mood Board.
Starting with this foundation ensures every decision on set—from the lighting to the model’s pose—is intentional and on-brand.
Mastering the Essential Photography Setups
Your customers need to see your products from multiple angles to feel confident enough to click "buy." That’s why you need to nail the three essential shots for any e-commerce brand: flat lay, hanger, and on-model. Each one tells a different part of the story.
- Flat Lay: This is your top-down, artfully arranged shot. It's fantastic for showing off specific details like embroidery or unique buttons and creates scroll-stopping content for social media feeds.
- Hanger: Simple, clean, and effective. A hanger shot shows the garment's natural shape and drape without any distractions. It’s a professional staple for product pages where clarity is key.
- On-Model: This is where the magic happens. On-model shots are the single most important factor for driving conversions because they help customers imagine themselves in the clothes. They see the fit, the scale, and how the fabric moves, which creates a vital emotional connection.
Mixing these styles is the standard for a reason. In fact, a whopping 75% of clothing brands use a combination of photography styles for every single product. If you're looking for more practical ways to get these shots right, there are some great expert tips on how to take good product shots.
Finding the Right Models and Stylists
The people you bring onto your set are a direct reflection of your brand. A model isn’t just wearing your clothes; they’re personifying the lifestyle and attitude of your ideal customer. When casting, look for people whose energy and look genuinely match the mood board you’ve worked so hard on.
A great stylist is just as critical. They go beyond just pairing a top with pants; they know how to make every piece fall perfectly, choose accessories that elevate the look, and ensure the entire story feels cohesive. A well-styled image is often what separates a decent photo from an unforgettable one.
Nailing Your Lighting and Camera Settings
You don't need a Hollywood budget to get incredible photos, but you absolutely need to understand the basics of light and camera settings. Your lighting choices are what will ultimately set the mood for every image, whether you're in a studio or shooting on location.
Interestingly, the industry is split on what works best. 47% of clothing brands prefer clean, white studio backgrounds to make products pop and drive sales. At the same time, another 47% say natural light is the most effective approach, tapping into a more authentic and relatable aesthetic.
Pro Tip: If you're shooting with natural light, schedule your shoot during the "golden hour"—the first hour after sunrise or the last hour before sunset. The light is soft, warm, and incredibly flattering. It wraps around your subject, minimizes harsh shadows, and gives everything a beautiful glow.
For your camera, don't get overwhelmed. Just focus on these three settings:
- Aperture (f-stop): Use a low f-stop (like f/1.8-f/4) to blur the background and make your model the hero of the shot. For flat lays where you want everything sharp, use a higher f-stop (like f/8-f/11).
- ISO: Keep this as low as you can—ideally 100-400—to avoid grainy, low-quality images. Only raise it if you’re in a low-light situation and don't have a tripod.
- Shutter Speed: To get crisp, clear shots of a model in motion, you need a fast shutter speed. Start at 1/250s or higher to freeze the action and avoid any blur.
Getting these technical details right on set is crucial. It doesn't matter if you're renting a space or building your own; these fundamentals are what give you high-quality raw images and make the editing process a hundred times easier. If you're trying to figure out the best location for your next shoot, our guide on choosing an e-commerce shoot studio can point you in the right direction.
Nail Your Visual Consistency in Post-Production
The photoshoot might feel like the main event, but the real brand magic happens on the editing table. This is where you take a folder full of great raw images and transform them into a polished, cohesive collection that screams your brand. A disciplined editing workflow is the secret to making sure every photo—from your product page to your Instagram ads—speaks the same visual language.
This consistency is what makes a brand instantly recognizable. When a customer is scrolling, they should know it's you before they even see your logo. It’s a quiet signal of professionalism that builds trust and makes for a much smoother shopping experience.
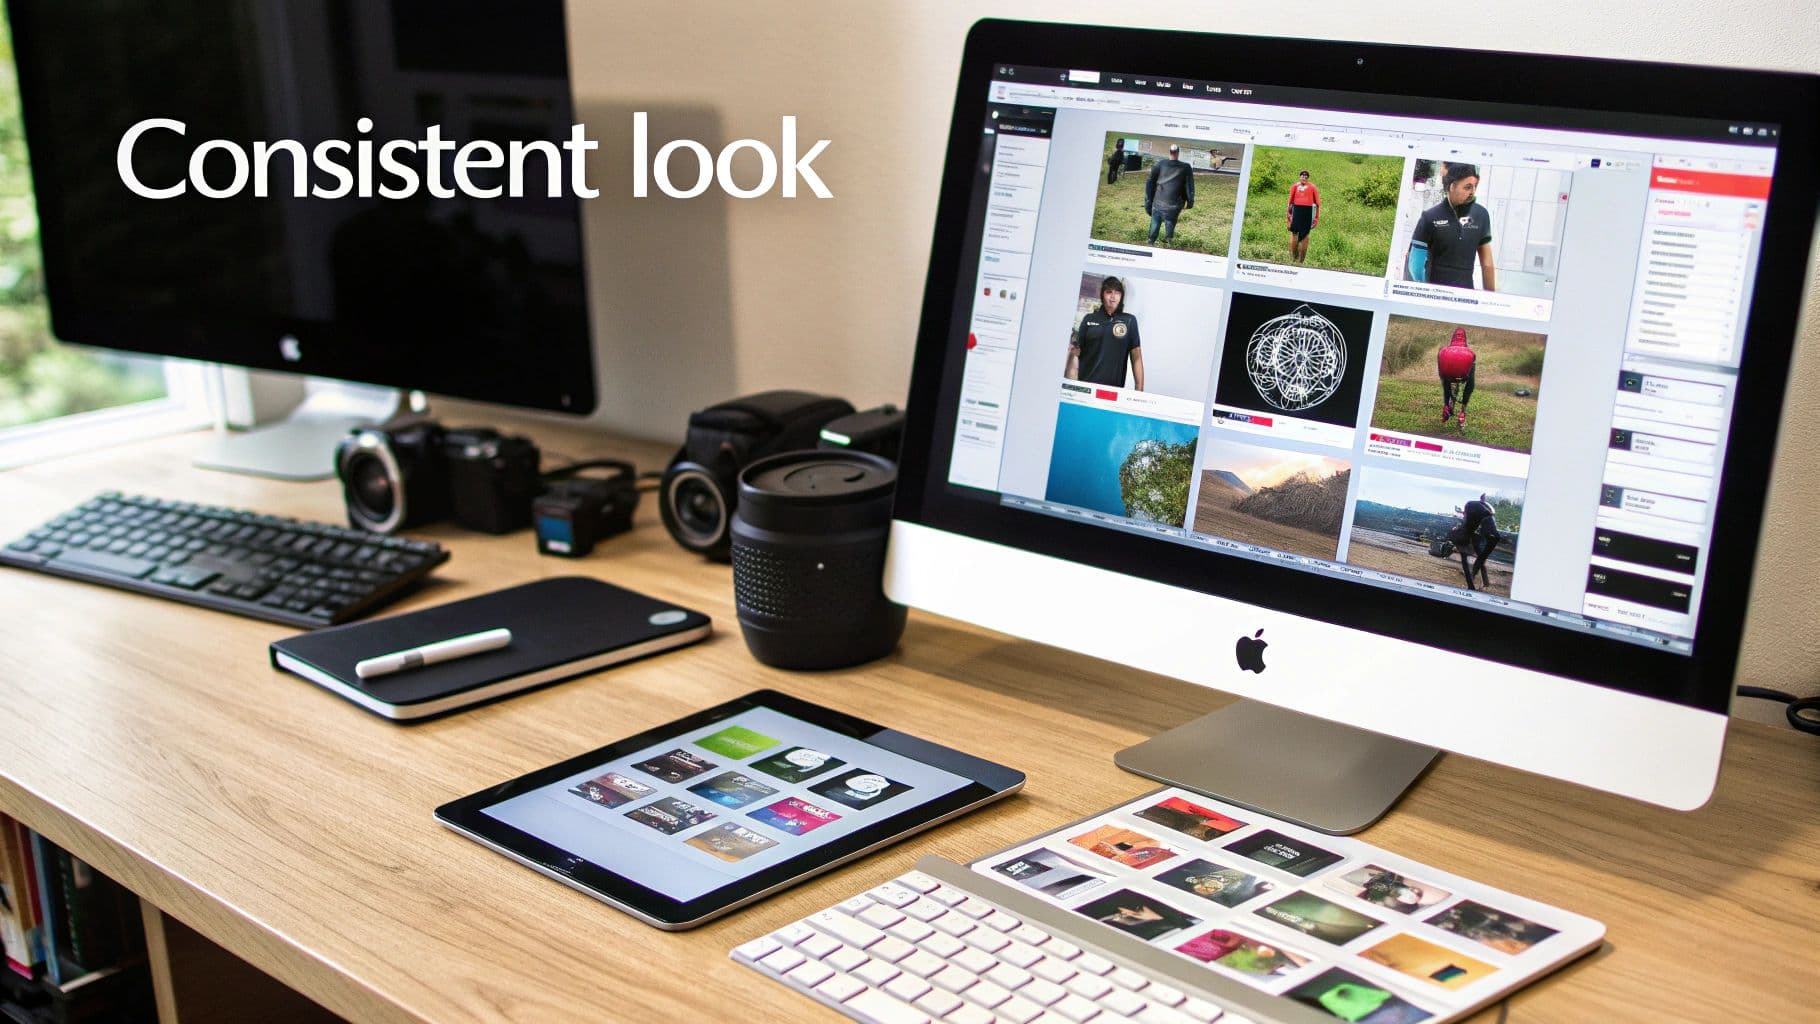
A modern desk with an Apple iMac, iPad, and camera for consistent photo editing workflow.
Developing a Professional Editing Workflow
A structured editing process isn't just about saving time; it's about preventing random, off-brand images from slipping through the cracks. It all starts with culling—the brutal but necessary process of picking the winners from the shoot. Be ruthless. Only the sharpest, best-composed shots that actually hit the marks from your brief should make it to the next round.
Once you’ve got your selects, it's time for the technical edits. This isn't the fun, artsy part yet. This is about building a clean, professional foundation.
- Color Correction: First things first, make sure the colors are true-to-life. Tweak the white balance so your whites are actually white and your blacks are deep black. This is non-negotiable for e-commerce, as it drastically cuts down on returns from customers claiming "the color looked different online."
- Exposure Adjustments: Go through and fix any shots that are too bright or too dark. You're aiming for a balanced, even exposure across every single photo to create a uniform look in your catalog.
- Basic Retouching: Now, clean it up. Zap any distracting dust spots from the lens, remove stray threads hanging off a garment, or gently soften a temporary blemish on a model's skin. The goal here is enhancement, not complete alteration. You want the product and model to look like the best version of their natural selves.
Getting this foundation right is everything. If you want to go deeper on these techniques, we’ve got a whole guide on ecommerce image editing that walks through the finer points.
Key Takeaway: Think of your editing workflow as your brand's quality control. By standardizing color, exposure, and basic retouching, you’re building a reliable and professional visual identity that customers learn to trust.
Creating and Applying Editing Presets
With the foundational edits locked in, you can start applying your brand’s signature aesthetic. The smartest and most efficient way to do this is by creating custom presets in software like Adobe Lightroom or Capture One. A preset is basically a saved recipe of settings—your specific adjustments to contrast, saturation, tones, and grain—that you can apply to any photo with a single click.
A preset is your brand’s visual filter. It should directly reflect the mood you mapped out in your creative brief. If your look is bright and airy, your preset will probably boost the exposure and soften the contrast. If you're going for moody and cinematic, you’ll likely deepen the shadows and mute certain colors.
Developing a primary preset for your clothing brand photography is what ensures a photo you shot in January feels like it belongs right next to one you shoot in June. This is how you build a powerful, memorable brand.
Building Asset Templates for Every Platform
Your beautifully polished images are going to live on a dozen different platforms, and each one has its own quirky size and format requirements. A product photo for your website is a different shape than an Instagram Story, which is different from a Facebook carousel ad. Manually resizing and cropping every single image for every single platform is a soul-crushing waste of time.
This is where asset templates save the day. By setting up pre-sized canvases in a program like Photoshop, Canva, or Figma, you can turn the export process into a simple drag-and-drop.
Essential Templates to Create:
- E-commerce Product Pages: High-resolution squares or vertical rectangles.
- Instagram Feed Posts: 1:1 square and 4:5 vertical formats.
- Instagram Stories & Reels: The classic 9:16 vertical format.
- Paid Ad Creatives: Specific dimensions for platforms like Facebook and Google.
- Email Marketing Banners: Wide, horizontal formats for headers.
Once these templates are ready, you can just drop your edited photos in, make a few minor tweaks, and export perfectly optimized assets in seconds. This little system doesn't just save you hours of grunt work; it guarantees a consistent, professional look everywhere your brand shows up online. It's the final piece of the puzzle, turning your photoshoot into a visual marketing machine.
Scaling Your Photography with AI-Powered Tools
Let’s be honest: traditional photoshoots are a massive bottleneck. The logistics, the costs, the time—it all adds up, especially when you're trying to grow. This is where AI steps in. It's not here to replace creativity, but to give you the power to scale it in ways that were impossible just a few years ago.
We're seeing a fundamental shift in the economics and speed of creating clothing brand photography. New platforms can take a single, basic product photo and spin it into an endless library of on-model shots. You can sidestep the entire process of booking models, renting studios, and coordinating huge production teams, getting your products to market faster than ever.
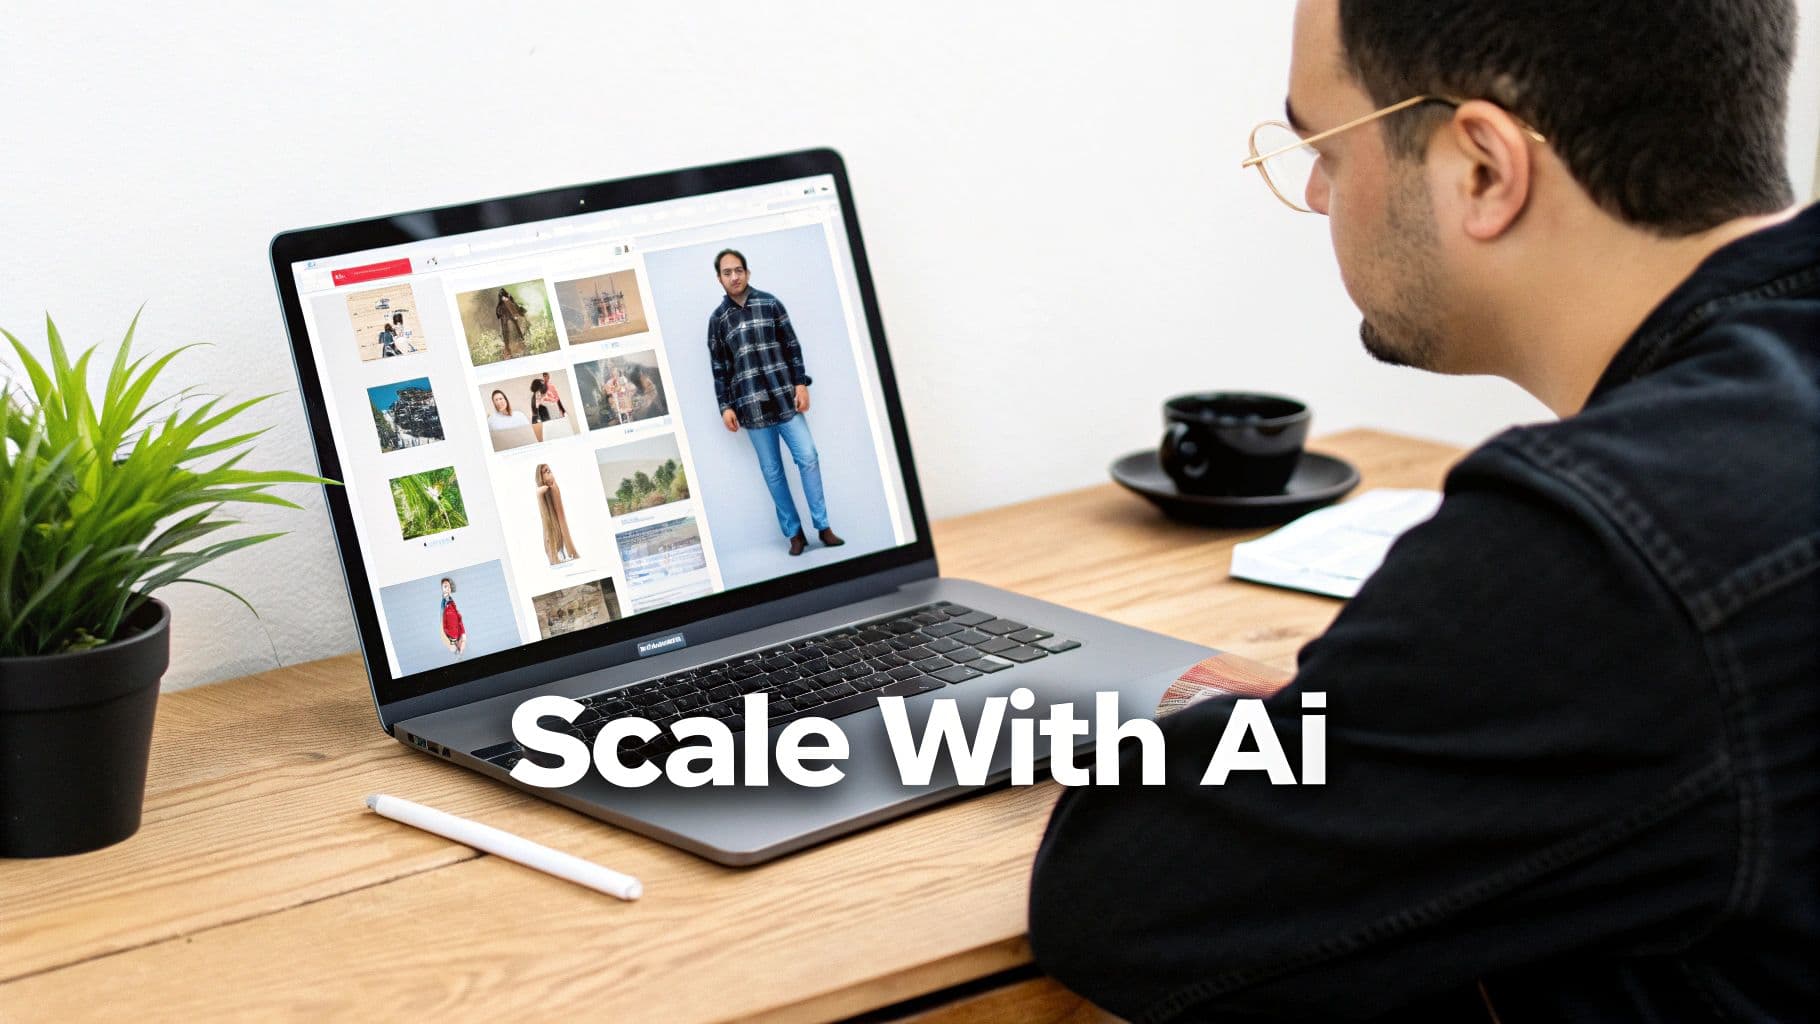
A man views clothing brand photography on a laptop screen, with 'Scale With Ai' overlaid.
The New Math of Fashion Photography
The impact AI has on your budget is staggering. We're not talking about small savings. AI fashion photography can slash production costs by up to 90% while boosting your creative output by as much as 500%.
We saw this firsthand with a mid-size retailer, StyleCo, who cut their annual photography spend from $480,000 down to just $48,000. That’s not an outlier. It’s why 30% of fashion industry professionals are already using AI for visual content. With generative AI expected to add up to $275 billion to the industry's bottom line in the next five years, ignoring it is no longer an option.
This isn't just about saving money. It’s about reallocating those funds to things that move the needle—marketing, product development, R&D—all while creating more diverse and targeted visuals than you ever could before.
How AI Turns a Simple Product Photo into a Model Shot
The magic behind this is a process we call Product-to-Model transformation. It sounds complex, but from your end, it's incredibly simple. You upload a flat lay or hanger photo of your garment, and the AI does the heavy lifting.
Here’s a quick look at what happens behind the scenes:
- Garment Analysis: First, the AI scans your photo, learning the garment's shape, texture, drape, and all the little details like buttons or prints.
- Model Selection: Next, you pick a model from a library of diverse, AI-generated or real-life options. This is your chance to choose faces and body types that genuinely connect with your customers.
- Virtual Fitting: The AI then digitally "dresses" your chosen model. It simulates how the fabric would realistically hang and fold on a human body, creating natural shadows and highlights.
- Scene Generation: Finally, you can place your model anywhere you want—a clean studio backdrop, a bustling city street, a sun-drenched beach. Whatever matches your brand’s vibe.
This workflow hands you an unprecedented level of control and speed. You can generate hundreds of unique on-model shots for a new collection in a few hours, not a few weeks. If you want to get into the nitty-gritty, our guide to AI product photography breaks it down even further.
Advanced AI Features That Unleash Your Creativity
The best AI platforms go way beyond just putting a shirt on a model. They offer advanced tools that give your creative team real power—unlocking possibilities that used to be out of reach for anyone without a massive budget.
Key Insight: AI model generation lets you create truly unique and inclusive campaigns. Forget being limited by a casting agency's roster. You can now generate models that perfectly embody your brand's vision and resonate with any niche audience you want to reach.
Here are some of the advanced features you should look for:
- Virtual Try-On: Lets customers see a garment on a model that reflects their own body type. This is a game-changer for boosting conversions and slashing return rates.
- Custom AI Model Creation: Some tools let you create entirely new models from a text prompt. You could type, "a woman with freckles and curly red hair, smiling in a sunlit park," and the AI brings her to life.
- Consistent Model Feature: Need the same model for an entire campaign? No problem. You can use the same AI-generated face across hundreds of product shots for perfect brand consistency—a logistical nightmare with human models.
- Pose and Expression Control: Tweak the model's pose, their facial expression, even where they're looking. This gives you fine-tuned control to match the exact mood of your campaign.
By adopting these tools, you can produce a higher volume of diverse, on-brand, and conversion-focused imagery at a fraction of the cost and time. It’s a fundamental change in how visual content gets made, making professional-grade, scalable photography accessible to everyone.
Measuring the ROI of Your Visuals
You've invested time, money, and creative energy into producing stunning photography. But how do you prove it's actually working? Gorgeous visuals are great, but if they aren't moving the needle on sales, they're just an expensive hobby.
This is where you need to shift from subjective feedback—"the photos look great!"—to objective data. We need to connect those beautiful images directly to business results. By tracking the right numbers, you can stop guessing what your audience wants and start making decisions that directly boost your bottom line.
Pinpointing Your Key Performance Indicators
To figure out if your photography is successful, you have to define what "success" actually looks like in numbers. These numbers are your Key Performance Indicators (KPIs). Instead of a vague goal, you're tracking concrete metrics that tell a clear story.
Here are the essential KPIs every clothing brand should be watching like a hawk:
Conversion Rate: This is the big one. It’s the percentage of people visiting your site who actually buy something. If you swap out your old product photos and your conversion rate jumps from 2% to 3%, that’s cold, hard proof the new images are doing their job.
Add-to-Cart Rate: This tells you how many visitors liked a product enough to put it in their cart. It’s a crucial sign of initial desire, and that desire is almost always sparked by a compelling photo.
Click-Through Rate (CTR) on Ads: When you're running paid campaigns, your CTR shows how many people saw your ad and were motivated enough to click. On visual platforms like Instagram and Facebook, your imagery is the single biggest factor driving a strong CTR.
Social Media Engagement Rate: Don't dismiss likes, comments, shares, and saves. These actions are signals that your content is hitting the mark. Keep an eye on these metrics to see which photo styles—lifestyle, studio, or AI-generated—get your audience talking.
The Power of A/B Testing Your Visuals
Tracking KPIs is like looking at the scoreboard—it tells you if you're winning or losing. A/B testing is like reviewing the game tape—it tells you why.
A/B testing (or split testing) is just a simple way to compare two versions of something to see which one performs better. In our case, you’re pitting different image styles against each other to let your customers vote with their clicks and wallets. It completely removes the guesswork. No more conference room debates about whether on-model or ghost mannequin shots are better; you let the data give you the definitive answer.
Pro Tip: The golden rule of A/B testing is to change only one thing at a time. If you test a new photo and a new product description at the same time, you'll have no idea which change drove the results. Keep your tests clean to get clear, actionable insights.
Setting Up Simple and Effective Image Tests
You don't need a team of data scientists to start A/B testing. Most e-commerce platforms and ad managers have these tools built right in. Even if they don’t, running manual tests is straightforward.
Here are a few high-impact tests you can run right now:
On-Model vs. Ghost Mannequin: Pick a key product. Show 50% of your website visitors an on-model hero image and the other 50% a ghost mannequin shot. Let it run for a week or two, then dive into your analytics. Which version got more add-to-carts and sales? There's your winner.
Traditional Photoshoot vs. AI-Generated Images: Set up two identical ad campaigns. Same budget, same audience, same copy. The only difference is the creative. One campaign uses images from your traditional photoshoot, and the other uses AI-generated model shots. Compare the CTR and, more importantly, the cost-per-acquisition for each.
Studio vs. Lifestyle Backgrounds: Test a clean, white studio shot against the same product in a more dynamic, real-world setting. Check which one generates more engagement on social media or leads to a higher add-to-cart rate on your product page.
By making these kinds of tests a regular part of your process, you create a powerful feedback loop. The data you gather from your KPIs and A/B tests should directly inform the creative brief for your next photoshoot or your next batch of AI images. This is how your clothing brand photography evolves from a cost center into a reliable, profit-driving engine.
Common Questions About Clothing Photography
Once you start digging into clothing photography, the questions pop up fast. From wrestling with budgets to figuring out which tech is actually useful, most brands run into the same roadblocks. Let's tackle the most common ones head-on with some practical advice.
How Many Photos Should I Have Per Product?
The short answer? More than you probably think. It’s tempting to believe a couple of great shots will do the trick, but the data from top e-commerce brands tells a very different story. On average, they’re using 8 images per product.
Why so many? Because they're trying to build a complete picture for the customer, leaving no room for doubt. A solid product page doesn't just show the front and back. It includes:
- Studio Shots: Crisp, on-model photos from the front, back, and side against a clean background. These are your foundational images.
- Detail Close-ups: Get in close on the fabric's texture, the quality of the stitching, unique buttons, or custom hardware. This is where you show off craftsmanship.
- Fit and Movement: A shot that captures how the garment actually drapes and moves on a body. This adds life and helps customers visualize the feel.
- Styled or Lifestyle Image: Put the product in context. Show it as part of a complete outfit to sell a vibe, not just a piece of clothing.
This approach proactively answers questions, builds a ton of trust, and drastically cuts down on returns.
What Is the Most Cost-Effective Way to Get Professional Photos?
For brands watching their bottom line, AI-powered photography has completely changed the game. A traditional photoshoot is a financial black hole: you’re paying for the photographer, the model, the studio, the stylist, makeup artists, and then the retoucher. It adds up incredibly fast, making it nearly impossible to create a diverse library of content without a massive budget.
AI platforms flip this model on its head. You can take a single flat lay or hanger photo and generate an endless variety of on-model images from it. This completely removes the biggest cost centers—models, studios, and photographers—from the equation. Suddenly, even a brand new startup can produce a huge volume of high-quality, diverse, and on-brand imagery for a tiny fraction of the traditional cost.
Key Insight: The real magic of AI isn't just about saving money; it's about speed and agility. You can generate an entire campaign's worth of assets for a new drop in a few hours, not weeks. This lets you jump on trends and get products live while your competitors are still trying to book a studio.
Should I Use a Model or a Mannequin?
This isn't an either/or question. The smartest brands use both, because they serve two totally different—but equally critical—purposes.
The numbers don't lie: an overwhelming 95.6% of brands use model photography as a core part of their strategy. Why? Because people connect with people. On-model shots help shoppers see the fit, understand how a garment moves, and, most importantly, imagine themselves wearing it. That emotional connection is what turns a casual browser into a buyer.
But at the same time, "ghost" mannequin shots or simple flat lays give a clean, unobstructed view of the product itself. They let customers scrutinize the garment's shape, construction, and details without any distractions. This is for the shopper who wants to get into the weeds before they buy.
The industry standard is a hybrid approach. A full 76.1% of leading fashion brands use more than one photography style on their product pages. It's not just a trend; it's a competitive necessity. You can see more data on what the top brands are doing in these fashion e-commerce photography statistics.
How Do I Budget for Clothing Photography?
Budgeting for photography can feel like throwing darts in the dark, but it gets a lot clearer when you break it down into two paths: the traditional route and the AI-powered route.
A traditional photoshoot budget has a long list of line items you need to account for:
- Photographer: Day rates can swing from a few hundred bucks to several thousand.
- Model(s): Expect to pay agency rates by the hour or day.
- Studio/Location: Fees for renting a professional space.
- Stylist & MUA: Non-negotiable for getting that polished, on-brand look.
- Retouching: Post-production is often billed per image, which can add up.
An AI photography budget, on the other hand, is refreshingly simple. It’s almost always a subscription or a pay-per-image plan. This gives you predictable, fixed costs, making it way easier to plan your content spend without any nasty surprises. The trick is to figure out how many images you need each month and pick a plan that matches your volume. This simple shift turns photography from a volatile, high-cost headache into a scalable, predictable part of your operations.
Ready to create stunning, on-brand model imagery without the cost and complexity of traditional photoshoots? With WearView, you can generate unlimited studio-quality visuals in seconds. Simply upload your garment photos, choose your model, and download assets that are ready to drive sales across your website, social media, and ads. Discover how WearView can scale your brand's visual content today.
WearView Team
WearView Content & Research Team
WearView Team is a group of fashion technology specialists focused on AI fashion models, virtual try-on, and AI product photography for e-commerce brands. We publish in-depth guides, case studies, and practical insights to help fashion businesses improve conversion rates and scale faster using AI.